
1. Introduction
This manual provides detailed instructions for the proper installation of the Tema4x4 30mm Complete Lift Kit designed for Chrysler PT Cruiser models manufactured between 2000 and 2010. This kit is intended to increase your vehicle's ground clearance by 30 millimeters through the use of polyurethane strut and coil spacers. Adherence to these instructions is crucial for safe and effective installation.
2. Safety Information
- Professional Installation Recommended: While installation can be performed by individuals with basic automotive maintenance skills, professional installation is highly recommended to ensure proper fitment and safety.
- Vehicle Support: Always use appropriate jack stands to support the vehicle securely after lifting. Never work under a vehicle supported only by a jack.
- Personal Protective Equipment: Wear safety glasses, gloves, and other appropriate personal protective equipment during installation.
- Brake Lines and Wiring: Be cautious not to stretch, pinch, or damage brake lines, ABS sensor wires, or other electrical components during suspension disassembly and reassembly.
- Torque Specifications: Always tighten all fasteners to the vehicle manufacturer's specified torque values. Over-tightening or under-tightening can lead to component failure.
- Wheel Alignment: A professional wheel alignment is mandatory after installing any suspension lift kit to ensure proper handling, tire wear, and vehicle safety.
3. Package Contents
Please verify that all components listed below are present in your kit before beginning installation. If any parts are missing or damaged, contact Tema4x4 customer support immediately.
- 2x Front Strut Spacers (Polyurethane)
- 2x Rear Coil Spacers (Polyurethane)
- 1x Fitting Kit (Includes necessary bolts/hardware)
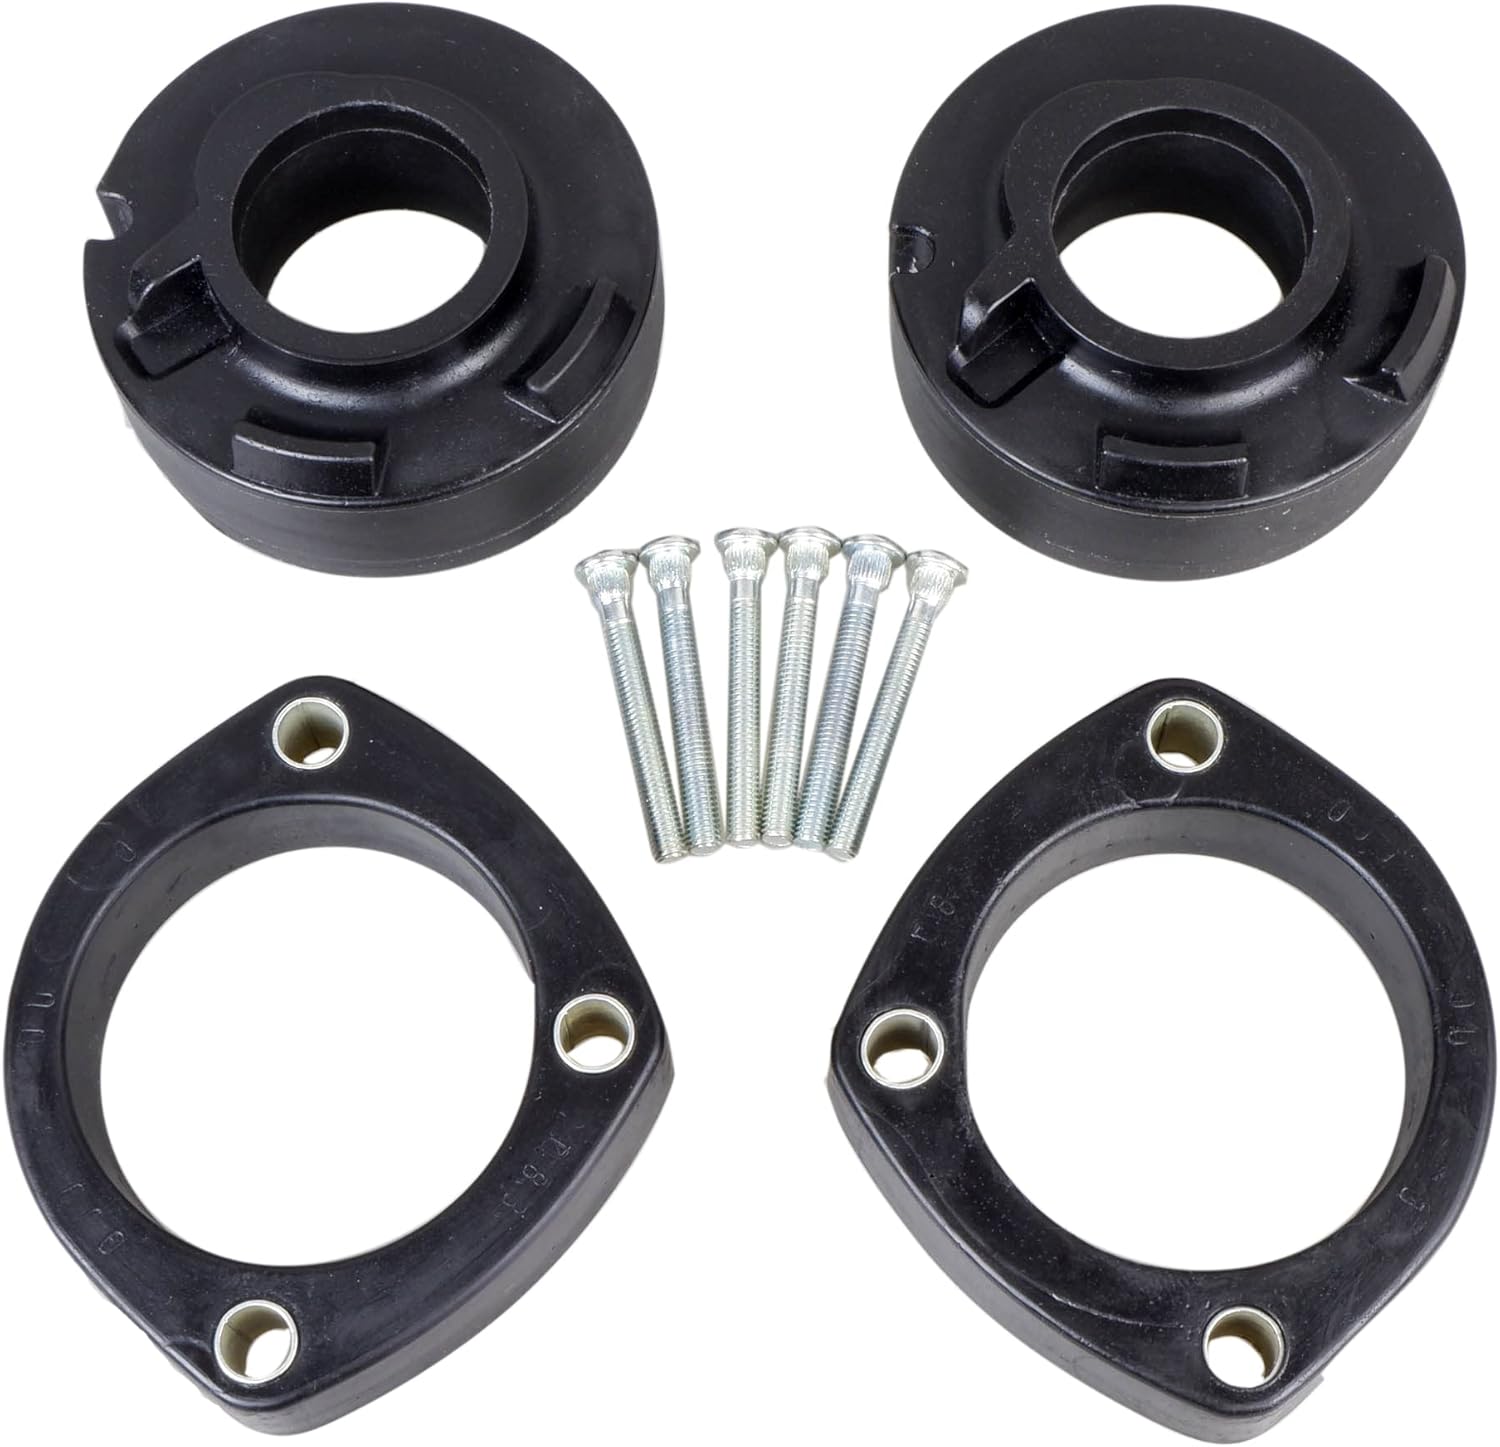
Image 3.1: Overview of the Tema4x4 30mm Complete Lift Kit components.
4. Tools Required
The following tools are generally required for the installation of this lift kit:
- Vehicle Jack and Jack Stands
- Wheel Chocks
- Metric Socket and Wrench Set
- Torque Wrench
- Spring Compressor (for front strut disassembly, if required by vehicle design)
- Pry Bar / Lever
- Penetrating Oil
- Thread Locker (optional, for critical fasteners)
5. Installation Instructions
These instructions are a general guide. Always refer to your vehicle's specific service manual for detailed procedures regarding suspension component removal and installation.
5.1. Preparation
- Park the vehicle on a flat, level, and stable surface.
- Engage the parking brake and place wheel chocks behind the rear wheels (when working on the front) or in front of the front wheels (when working on the rear).
- Loosen the lug nuts on the wheels you will be removing.
- Jack up the vehicle and support it securely with jack stands on the frame rails. Ensure the vehicle is stable before proceeding.
- Remove the wheels.
5.2. Front Strut Spacer Installation
The front strut spacers are designed to be installed above the factory strut assembly.

Image 5.2.1: Front strut spacers.
- Locate the top mounting bolts of the front strut assembly under the hood.
- Carefully disconnect any brake lines, ABS wires, or sway bar links attached to the strut assembly.
- Support the lower control arm with a jack.
- Remove the lower strut mounting bolts from the steering knuckle or control arm.
- Remove the upper strut mounting nuts.
- Carefully remove the entire strut assembly from the vehicle.
- Install the Tema4x4 front strut spacer onto the top of the strut assembly, aligning the bolt holes. The new longer bolts from the fitting kit will pass through the spacer and into the vehicle's strut tower.
- Reinstall the strut assembly with the spacer into the vehicle, securing the upper mounting nuts first (using the new longer bolts provided).
- Reattach the lower strut mounting bolts, sway bar links, brake lines, and ABS wires.
- Tighten all fasteners to the manufacturer's recommended torque specifications.
5.3. Rear Coil Spacer Installation
The rear coil spacers are designed to be installed either above or below the factory coil springs, depending on the vehicle's suspension design. For the Chrysler PT Cruiser, they typically sit above the coil spring.

Image 5.3.1: Rear coil spacers and bolts.
- Support the rear axle or control arm with a jack.
- Disconnect the lower shock absorber mounting bolts.
- Carefully lower the axle or control arm to allow the coil spring to be removed. Be mindful of brake lines and other components.
- Remove the factory coil spring.
- Place the Tema4x4 rear coil spacer on top of the coil spring perch (or as per specific vehicle design). Ensure it is seated correctly.
- Reinstall the coil spring, ensuring it seats properly within the spacer and the lower perch.
- Raise the axle or control arm with the jack to align the lower shock absorber mounting holes. Reinstall the shock bolts.
- Tighten all fasteners to the manufacturer's recommended torque specifications.
6. Post-Installation Checks
- Recheck All Fasteners: Before lowering the vehicle, double-check that all bolts and nuts loosened or removed during installation are securely tightened to their specified torque values.
- Clearance Check: Ensure there is adequate clearance around all suspension components, brake lines, and wiring. Turn the steering wheel lock-to-lock to check for any rubbing or interference.
- Wheel Installation: Reinstall the wheels, hand-tighten lug nuts, then lower the vehicle. Torque the lug nuts to the manufacturer's specifications in a star pattern.
- Test Drive: Perform a short, cautious test drive on a safe road. Listen for any unusual noises, and check for proper braking and steering response.
- Wheel Alignment: Within 50-100 miles of installation, have a professional wheel alignment performed. This is critical for vehicle safety, handling, and tire longevity.
7. Maintenance
After initial installation and the first 500 miles, it is recommended to:
- Re-torque all suspension fasteners to ensure they remain tight.
- Periodically inspect the polyurethane spacers for any signs of wear or damage.
- Regularly check the condition of your vehicle's suspension components as part of routine maintenance.
8. Troubleshooting
- Uneven Lift: Ensure all spacers are correctly installed and seated. Verify that the correct kit was purchased for your specific vehicle model and year.
- Unusual Noises (Clunking, Squeaking): Recheck all fasteners for proper torque. Inspect for any components rubbing or interfering with each other. Ensure no tools or debris were left in the suspension area.
- Steering or Handling Issues: A professional wheel alignment is essential after installation. If issues persist after alignment, re-inspect all components for proper installation and ensure no damage occurred during the process.
- Incorrect Bolt Size: The kit includes a fitting kit with necessary bolts. If you encounter issues with bolt sizing, double-check that the correct bolts from the kit are being used for their intended location. If discrepancies persist, contact Tema4x4 support.
9. Specifications
| Specification | Detail |
|---|---|
| Brand | Tema4x4 |
| Model Number | CHR-15-009 + CHR-15-010/30 |
| Material | Polyurethane (PU) |
| Maximum Lifting Height | 30 Millimeters |
| Included Components | 2x Strut Spacers, 2x Coil Spacers, Fitting Kit |
| Compatible Vehicles | Chrysler PT CRUISER (PT_) 2000 - 2010 |
10. Warranty and Support
For specific warranty information or technical support regarding your Tema4x4 30mm Complete Lift Kit, please contact Tema4x4 directly through their official website or the retailer from whom the product was purchased. When contacting support, please have your product model number (CHR-15-009 + CHR-15-010/30) and purchase details readily available.