
1. Introduction
Thank you for choosing the byecold Smart LED Bathroom Mirror. This manual provides essential information for the safe installation, operation, and maintenance of your new mirror. Please read it thoroughly before use and retain it for future reference.

Figure 1: byecold Smart LED Bathroom Mirror in a modern bathroom setting.
2. Safety Instructions
To ensure safe operation and prevent damage, please observe the following safety precautions:
- Always disconnect power before installation, cleaning, or maintenance.
- Installation must be performed by a qualified electrician in accordance with local electrical codes.
- Do not expose the mirror to excessive moisture or direct water spray.
- Handle the mirror with care to avoid breakage. The mirror features an explosion-proof film to prevent fragments from scattering if broken.
- Ensure the mounting surface is structurally sound and can support the weight of the mirror.
- Do not attempt to repair or modify the mirror yourself. Contact customer support for assistance.

Figure 2: Illustration of the explosion-proof film feature, showing how the byecold mirror retains fragments upon impact compared to a standard mirror.
3. Package Contents
Verify that all components are present before installation:
- byecold Smart LED Bathroom Mirror (1 unit)
- Mounting hardware (screws, wall anchors)
- User Manual (this document)
4. Product Features
Your byecold Smart LED Bathroom Mirror includes the following key features:
- Smart Touch Switch: A single touch button controls multiple functions.
- Adjustable LED Lighting: Choose between 3000K warm light and 6000K white light.
- Anti-Fog Function: Prevents mirror surface from fogging in humid conditions.
- Integrated Display: Shows date, time, humidity, and temperature.
- Wi-Fi Connectivity: Connects to the WiFiClock app for real-time weather forecasts and advanced settings.
- Explosion-Proof Film: Enhances safety by preventing glass fragments from scattering upon breakage.
5. Setup and Installation
Follow these steps for proper installation:
- Preparation: Ensure the power supply to the installation area is turned off at the main circuit breaker.
- Marking: Use the provided template (if applicable) or measure the mounting points on the back of the mirror. Mark the drilling locations on the wall.
- Drilling: Drill holes at the marked locations using an appropriate drill bit for your wall type. Insert wall anchors if necessary.
- Mounting: Secure the mounting hardware (e.g., screws) into the wall, leaving enough protrusion to hang the mirror securely.
- Wiring: Connect the mirror's electrical wiring to your household electrical system. This step must be performed by a qualified electrician. Ensure all connections are secure and insulated. The mirror typically comes with an EU standard power plug, which may need to be removed for direct wiring.
- Hanging the Mirror: Carefully lift the mirror and align the mounting brackets on the back with the installed hardware on the wall. Ensure the mirror is level and securely seated.
- Power On: Once the mirror is securely mounted and wired, restore power at the main circuit breaker.

Figure 3: Back view diagram illustrating key dimensions and the location of the light switch for color temperature adjustment.

Figure 4: Detailed diagram of the mirror's rear components, including the high-definition display module, LED light strip, brightness switch, and power connection point.
6. Operating Instructions
The mirror's functions are controlled via the smart touch switch located on the mirror surface and a physical switch on the back.
6.1 Smart Touch Switch Functions

Figure 5: Touch switch functionality guide.
- Click: Turns the LED light ON/OFF.
- Double Click: Opens the smart interface, displaying weather, date, time, humidity, and temperature.
- Long Press: Activates the anti-fog (defogging) function.
6.2 Adjustable LED Lighting
To change the LED light color temperature:
- Locate the physical switch on the black box at the back of the mirror.
- Toggle this switch to select between 3000K warm light and 6000K white light.

Figure 6: Demonstrates the two available LED light color temperatures (6000K white and 3000K warm) and the location of the physical switch on the mirror's back to select between them.
6.3 Anti-Fog Function
Activate the anti-fog function by long-pressing the smart touch switch. This will clear condensation from the mirror surface, providing a clear reflection.
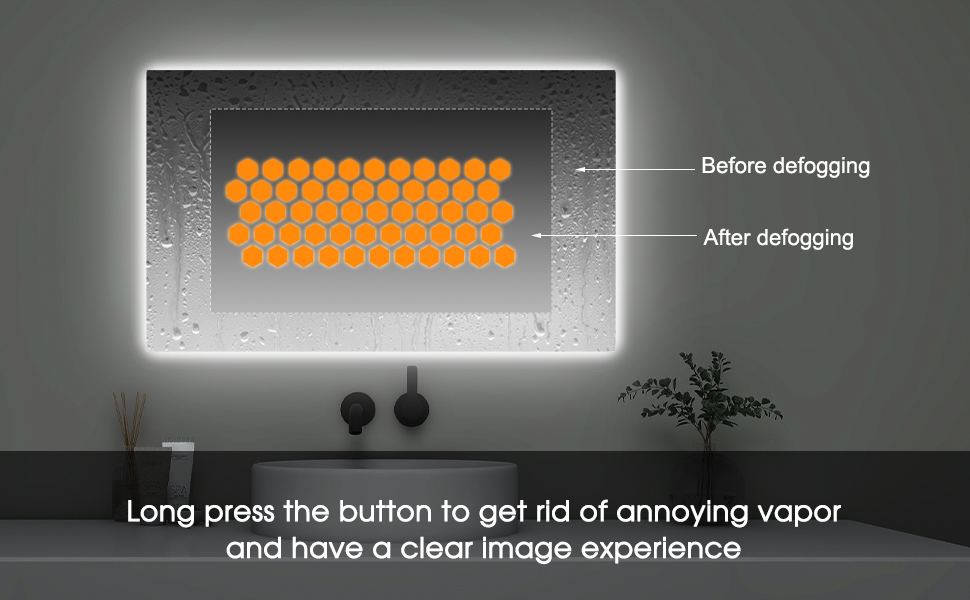
Figure 7: Visual representation of the anti-fog function, showing the mirror surface clearing from condensation.
7. Wi-Fi Connection and App
To access weather forecasts and advanced settings, connect your mirror to the WiFiClock app.
- Download the App: Search for "WiFiClock" in your device's app store (available for Android and iOS).
- Network Requirement: The mirror only supports 2.4GHz Wi-Fi networks. Ensure your router is configured for 2.4GHz or that your device is connected to a 2.4GHz network during setup.
- Pairing: Follow the in-app instructions to pair your mirror with the WiFiClock app. This typically involves putting the mirror into pairing mode and entering your Wi-Fi credentials.
- Settings: Once connected, you can configure various settings through the app, including:
- 24-hour / 12-hour time display
- Date and month mode
- Temperature unit (Celsius/Fahrenheit)
- Humidity display
- Alarm settings
- Weather Forecast: The mirror will display real-time weather forecasts from the network, including 11 different weather icons.

Figure 8: The mirror's integrated display showing various smart functions like weather, time, and environmental data, indicating connectivity with the dedicated app.
8. Maintenance
Regular cleaning and maintenance will ensure the longevity and optimal performance of your mirror.
- Cleaning the Mirror Surface: Use a soft, lint-free cloth and a non-abrasive glass cleaner. Spray the cleaner onto the cloth, not directly onto the mirror, to avoid liquid seeping into electrical components.
- Cleaning the Frame/Edges: Wipe with a damp cloth and mild detergent if necessary. Dry thoroughly.
- Do Not Use: Abrasive cleaners, ammonia-based cleaners, or harsh chemicals, as these can damage the mirror surface or electronic components.
- Power Disconnection: Always disconnect power before performing any cleaning or maintenance.
9. Troubleshooting
If you encounter issues with your byecold Smart LED Bathroom Mirror, refer to the following table:
| Problem | Possible Cause | Solution |
|---|---|---|
| Mirror does not turn on. | No power supply; loose wiring. | Check circuit breaker. Ensure all electrical connections are secure (consult a qualified electrician). |
| LED light not working. | Light function not activated; internal wiring issue. | Click the smart touch switch. If issue persists, contact customer support. |
| Anti-fog function not working. | Function not activated. | Long-press the smart touch switch to activate. |
| Wi-Fi connection fails. | Incorrect Wi-Fi password; 5GHz network used; mirror too far from router. | Ensure correct password. Connect to a 2.4GHz network. Move mirror closer to router or use a Wi-Fi extender. |
| Display shows incorrect time/date/weather. | Not connected to Wi-Fi; app settings incorrect. | Verify Wi-Fi connection. Check and adjust settings within the WiFiClock app. |
If the problem persists after attempting these solutions, please contact byecold customer support.
10. Specifications
| Feature | Detail |
|---|---|
| Brand | byecold |
| Model Number | B0856W9J45 |
| Product Dimensions (L x W x D) | 80 x 60 x 2.3 cm |
| Weight | 10.88 kg |
| Mounting Type | Wall Mount |
| Shape | Rectangular (Vertical) |
| Frame Material | Frameless |
| Finish Type | Polished |
| Special Features | Touch Sensor, Fog-Free, Illuminated, Wi-Fi Connectivity, Weather Display |
| LED Color Temperature | 3000K (Warm Light), 6000K (White Light) |
| Wi-Fi Support | 2.4GHz only |
| Assembly Required | Yes |
| Batteries Required | No |

Figure 9: Energy efficiency class F.
11. Warranty and Support
For warranty information and customer support, please refer to the documentation included with your purchase or visit the official byecold website. Keep your purchase receipt as proof of purchase.
For direct inquiries, you may contact the seller "Byecold" via their Amazon store page: byecold Store on Amazon.

