1. Introduction and Overview
Thank you for choosing the Canarm Calibre III 48-Inch Ceiling Fan. This manual provides essential information for the safe installation, operation, and maintenance of your new ceiling fan. Please read all instructions carefully before beginning installation and retain this manual for future reference.
The Calibre III ceiling fan features a sleek matte black finish with matching black blades, designed to complement various interior decors. It includes integrated lighting with flat opal glass and two 60W Type A bulbs, offering both efficient air circulation and ambient illumination. The fan supports dual mounting options (downrod and flush mount) and is operated by classic pull chains for fan speed and light control.

Image 1.1: Overview of the Canarm Calibre III 48-inch Ceiling Fan highlighting its key features including pull chain operation, integrated light kit, quiet motor, and three-speed settings.
2. Safety Information
WARNING: To reduce the risk of fire, electric shock, or personal injury, always turn off power at the main circuit breaker or fuse box before installation or servicing.
- All wiring must be in accordance with national and local electrical codes. If you are unfamiliar with wiring, consult a qualified electrician.
- The fan must be mounted to a ceiling joist or support structure capable of supporting a minimum of 35 lbs (15.9 kg).
- Ensure the installation site does not allow the rotating fan blades to come into contact with any objects or walls.
- Do not operate the fan with damaged blades or housing.
- Avoid placing objects in the path of the fan blades.
- This product contains chemicals known to the State of California to cause cancer and birth defects or other reproductive harm. Wash hands after handling.
3. Package Contents
Carefully unpack your ceiling fan and inspect the contents to ensure all parts are present and undamaged. If any parts are missing or damaged, contact Canarm customer service immediately.
- Motor Housing Assembly
- Fan Blades (3)
- Blade Brackets
- Downrod and Canopy Assembly (for downrod mount)
- Mounting Bracket
- Light Kit Assembly with Flat Opal Glass
- 60W Type A Bulbs (2)
- Pull Chains
- Hardware Pack (screws, washers, wire nuts)
- Instruction Manual
4. Setup and Installation
Installation should be performed by a qualified electrician or a person with experience in electrical wiring and ceiling fan installation. Always ensure power is disconnected at the circuit breaker before starting.
4.1 Mounting Options
The Calibre III fan offers dual mounting options: a standard downrod mount for higher ceilings and a flush mount for lower ceilings. Choose the appropriate method for your space.
4.2 Installation Steps (General)
- Turn Off Power: Locate the circuit breaker for the fan location and turn off the power.
- Install Mounting Bracket: Secure the mounting bracket to the ceiling joist or approved outlet box.
- Assemble Fan: Depending on your chosen mounting method (downrod or flush), assemble the fan motor to the downrod or directly to the mounting bracket.
- Wire Connections: Connect the fan's electrical wires to the household wiring according to the wiring diagram provided in the separate detailed installation guide. Ensure all connections are secure with wire nuts.
- Attach Blades: Securely attach the fan blades to the motor housing using the provided screws.
- Install Light Kit: Connect the light kit wiring and attach the light kit assembly to the bottom of the fan motor housing. Install the two 60W Type A bulbs and the flat opal glass shade.
- Final Checks: Ensure all connections are tight and the fan is securely mounted.
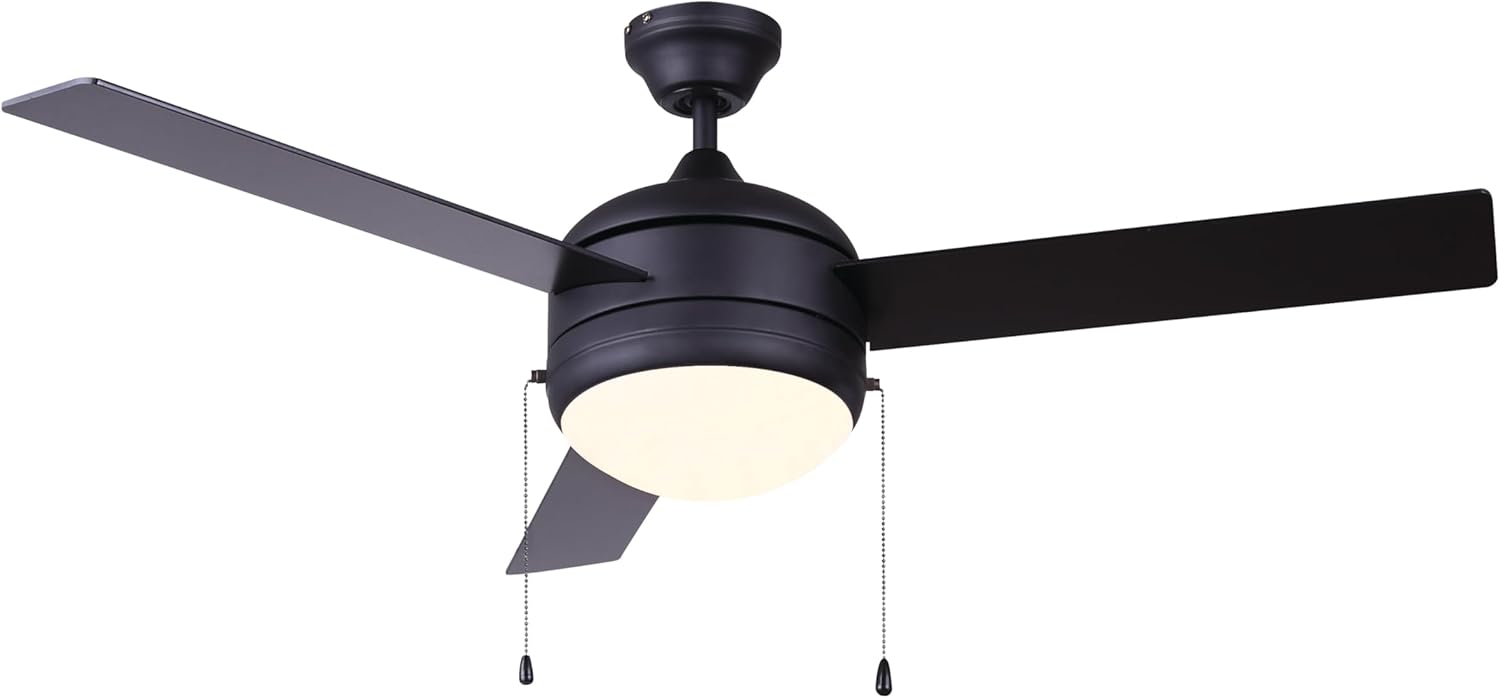
Image 4.1: The Canarm Calibre III 48-inch Ceiling Fan, showcasing its matte black finish, three blades, and integrated light kit with pull chains.
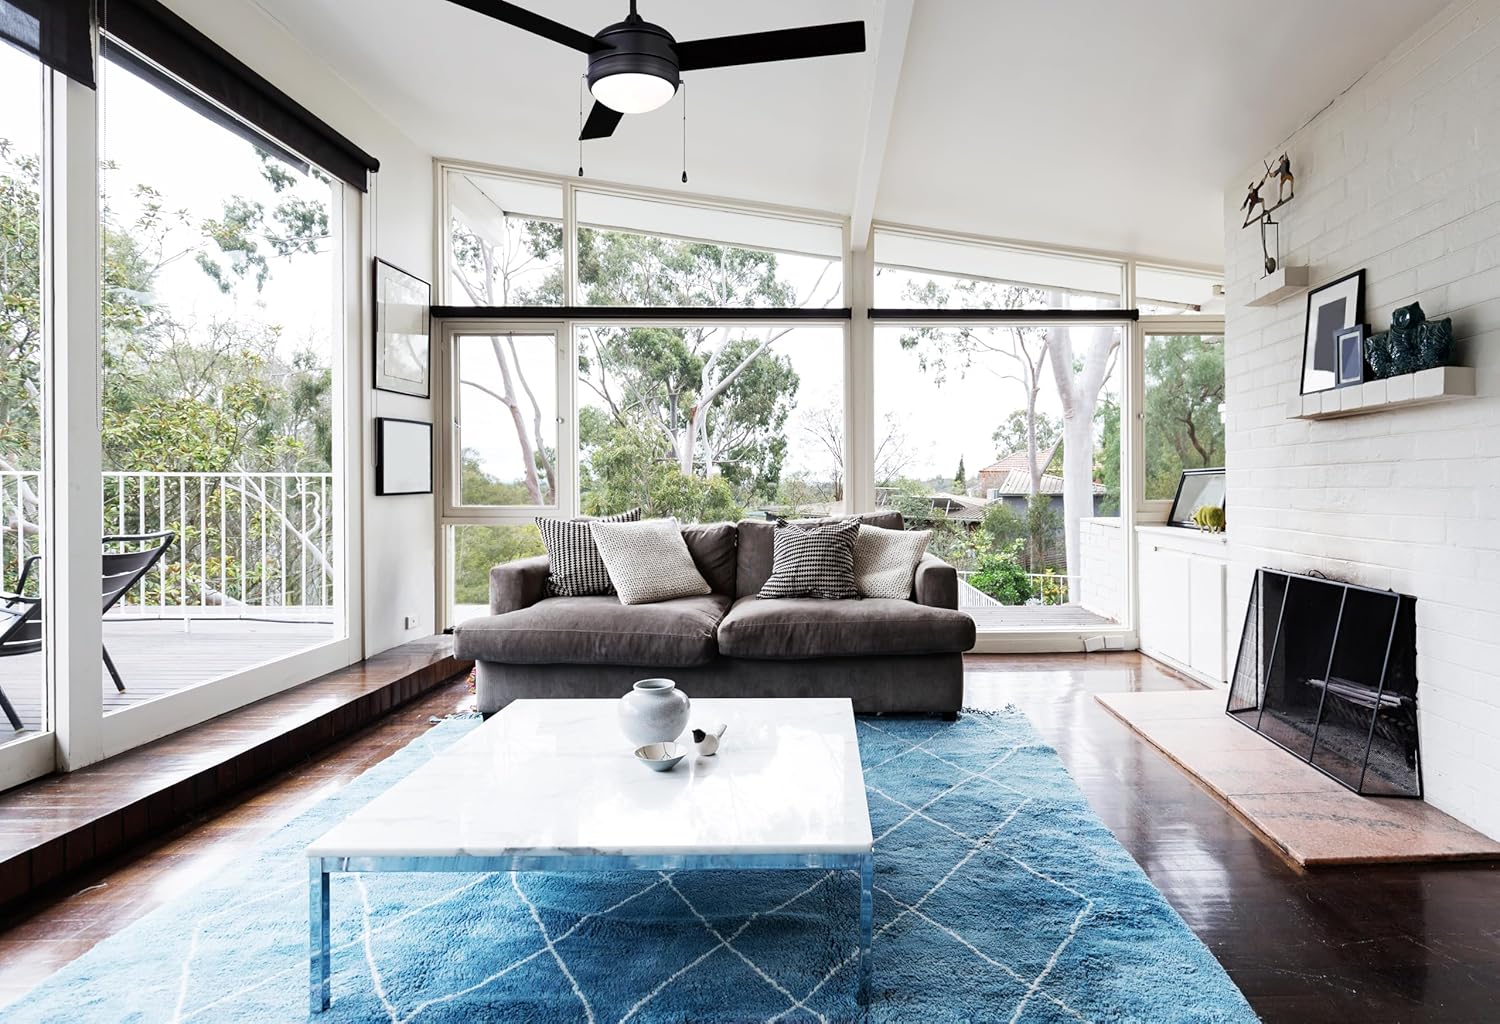
Image 4.2: The Calibre III ceiling fan seamlessly integrated into a living room setting, demonstrating its aesthetic appeal and functional placement.
5. Operating Instructions
The Canarm Calibre III ceiling fan is operated using two pull chains located on the fan's motor housing.
5.1 Fan Speed Control
One pull chain controls the fan speed. Each pull will cycle through the available speeds:
- 1st Pull: High Speed
- 2nd Pull: Medium Speed
- 3rd Pull: Low Speed
- 4th Pull: Off
5.2 Light Control
The other pull chain controls the integrated light kit. Each pull will toggle the light on or off.

Image 5.1: A close-up view from below the fan, illustrating the flat opal glass light fixture and the two distinct pull chains for controlling fan speed and light.
6. Maintenance
Regular maintenance will ensure the longevity and optimal performance of your ceiling fan.
- Cleaning: To clean the fan, wipe with a soft, damp cloth. Do not use abrasive cleaners or solvents as they may damage the finish or blades.
- Blade Cleaning: Dust the blades regularly to prevent dust buildup, which can affect balance and performance.
- Tighten Screws: Periodically check all screws on the motor housing, blade attachments, and mounting hardware. Tighten any loose screws to prevent wobbling and ensure safe operation.
- Light Bulbs: Replace light bulbs only with the specified type (60W Type A) to avoid overheating or damage to the light kit. Ensure power is off before replacing bulbs.
7. Troubleshooting
If you experience issues with your ceiling fan, refer to the following common problems and solutions:
| Problem | Possible Cause | Solution |
|---|---|---|
| Fan does not start | No power to the fan; Loose wire connections; Incorrect wiring | Check circuit breaker/fuses; Ensure all wire connections are secure; Verify wiring against diagram. |
| Light does not work | Bulb is loose or burned out; Loose wire connection in light kit | Tighten or replace bulb; Check light kit wiring. |
| Fan wobbles | Loose blade screws; Unbalanced blades; Loose mounting bracket | Tighten all blade screws; Use a balancing kit (not included) to balance blades; Ensure mounting bracket is securely fastened. |
| Noisy operation | Loose screws; Motor hum; Blades hitting an obstruction | Check and tighten all screws; Allow for a break-in period for new motors; Ensure no obstructions are in the blade path. |
8. Specifications
Detailed technical specifications for the Canarm Calibre III 48-Inch Ceiling Fan:
- Brand: Canarm
- Model Name: CalibreIII 48 inch Ceiling Fan
- Part Number: CF48CA33BK
- Size: 48-Inch Blade Span
- Finish: Matte Black
- Material: Metal (Housing), Glass (Shade)
- Number of Blades: 3
- Mounting Type: Dual Mount (Downrod/Flush Mount)
- Control Method: Pull Chain
- Light Source Type: Incandescent (LED Bulbs Included)
- Number of Light Sources: 2
- Wattage: 75 watts (Fan), 60W Type A (Bulbs)
- Voltage: 120 Volts
- Item Weight: 16.5 Pounds
- Product Dimensions: 48 x 48 x 15.5 inches
- Special Feature: Lightweight
- Certification: CSA Certified
- Assembly Required: Yes
9. Warranty and Support
Your Canarm Calibre III 48-Inch Ceiling Fan comes with a 5-Year Warranty from the date of purchase. This warranty covers defects in materials and workmanship under normal use.
For warranty claims, technical support, or to inquire about replacement parts, please contact Canarm customer service. Keep your proof of purchase for warranty validation.
Contact Information: Please refer to the official Canarm website or your purchase documentation for the most current customer support contact details.


