
1. Introduction
This manual provides detailed instructions for the installation, setup, operation, and maintenance of your Alpine DVR-C310R WiFi Enabled Dash Camera. Please read this manual thoroughly before using the product to ensure proper functionality and to prevent damage.
The Alpine DVR-C310R is a high-definition dash camera system designed to record vehicle activity. It features full HD video recording, high dynamic range (HDR) for clear imaging, and Wi-Fi connectivity for easy file management via a smartphone or PC application. A secondary rear camera is included for comprehensive vehicle monitoring.
2. Safety Information
Observe the following safety precautions to prevent injury or damage to the device:
- Do not install the dash camera in a location that obstructs the driver's view or interferes with vehicle operation.
- Ensure all cables are securely routed and do not interfere with airbags or other safety features.
- Avoid exposing the device to extreme temperatures, direct sunlight for prolonged periods, or excessive moisture.
- Do not attempt to disassemble or modify the device. Refer all servicing to qualified personnel.
- Use only the specified power adapter and accessories provided with the product.
- Periodically check the mounting of the cameras to ensure they remain securely attached.
3. Package Contents
Verify that all items are present in the package:
- Alpine DVR-C310R Front Dash Camera
- Rear Camera
- Mounting Bracket (for front camera)
- Power Cable
- Rear Camera Connection Cable
- GPS Module (if included with your specific package)
- User Manual (this document)
4. Product Overview
Familiarize yourself with the main components of the Alpine DVR-C310R system.
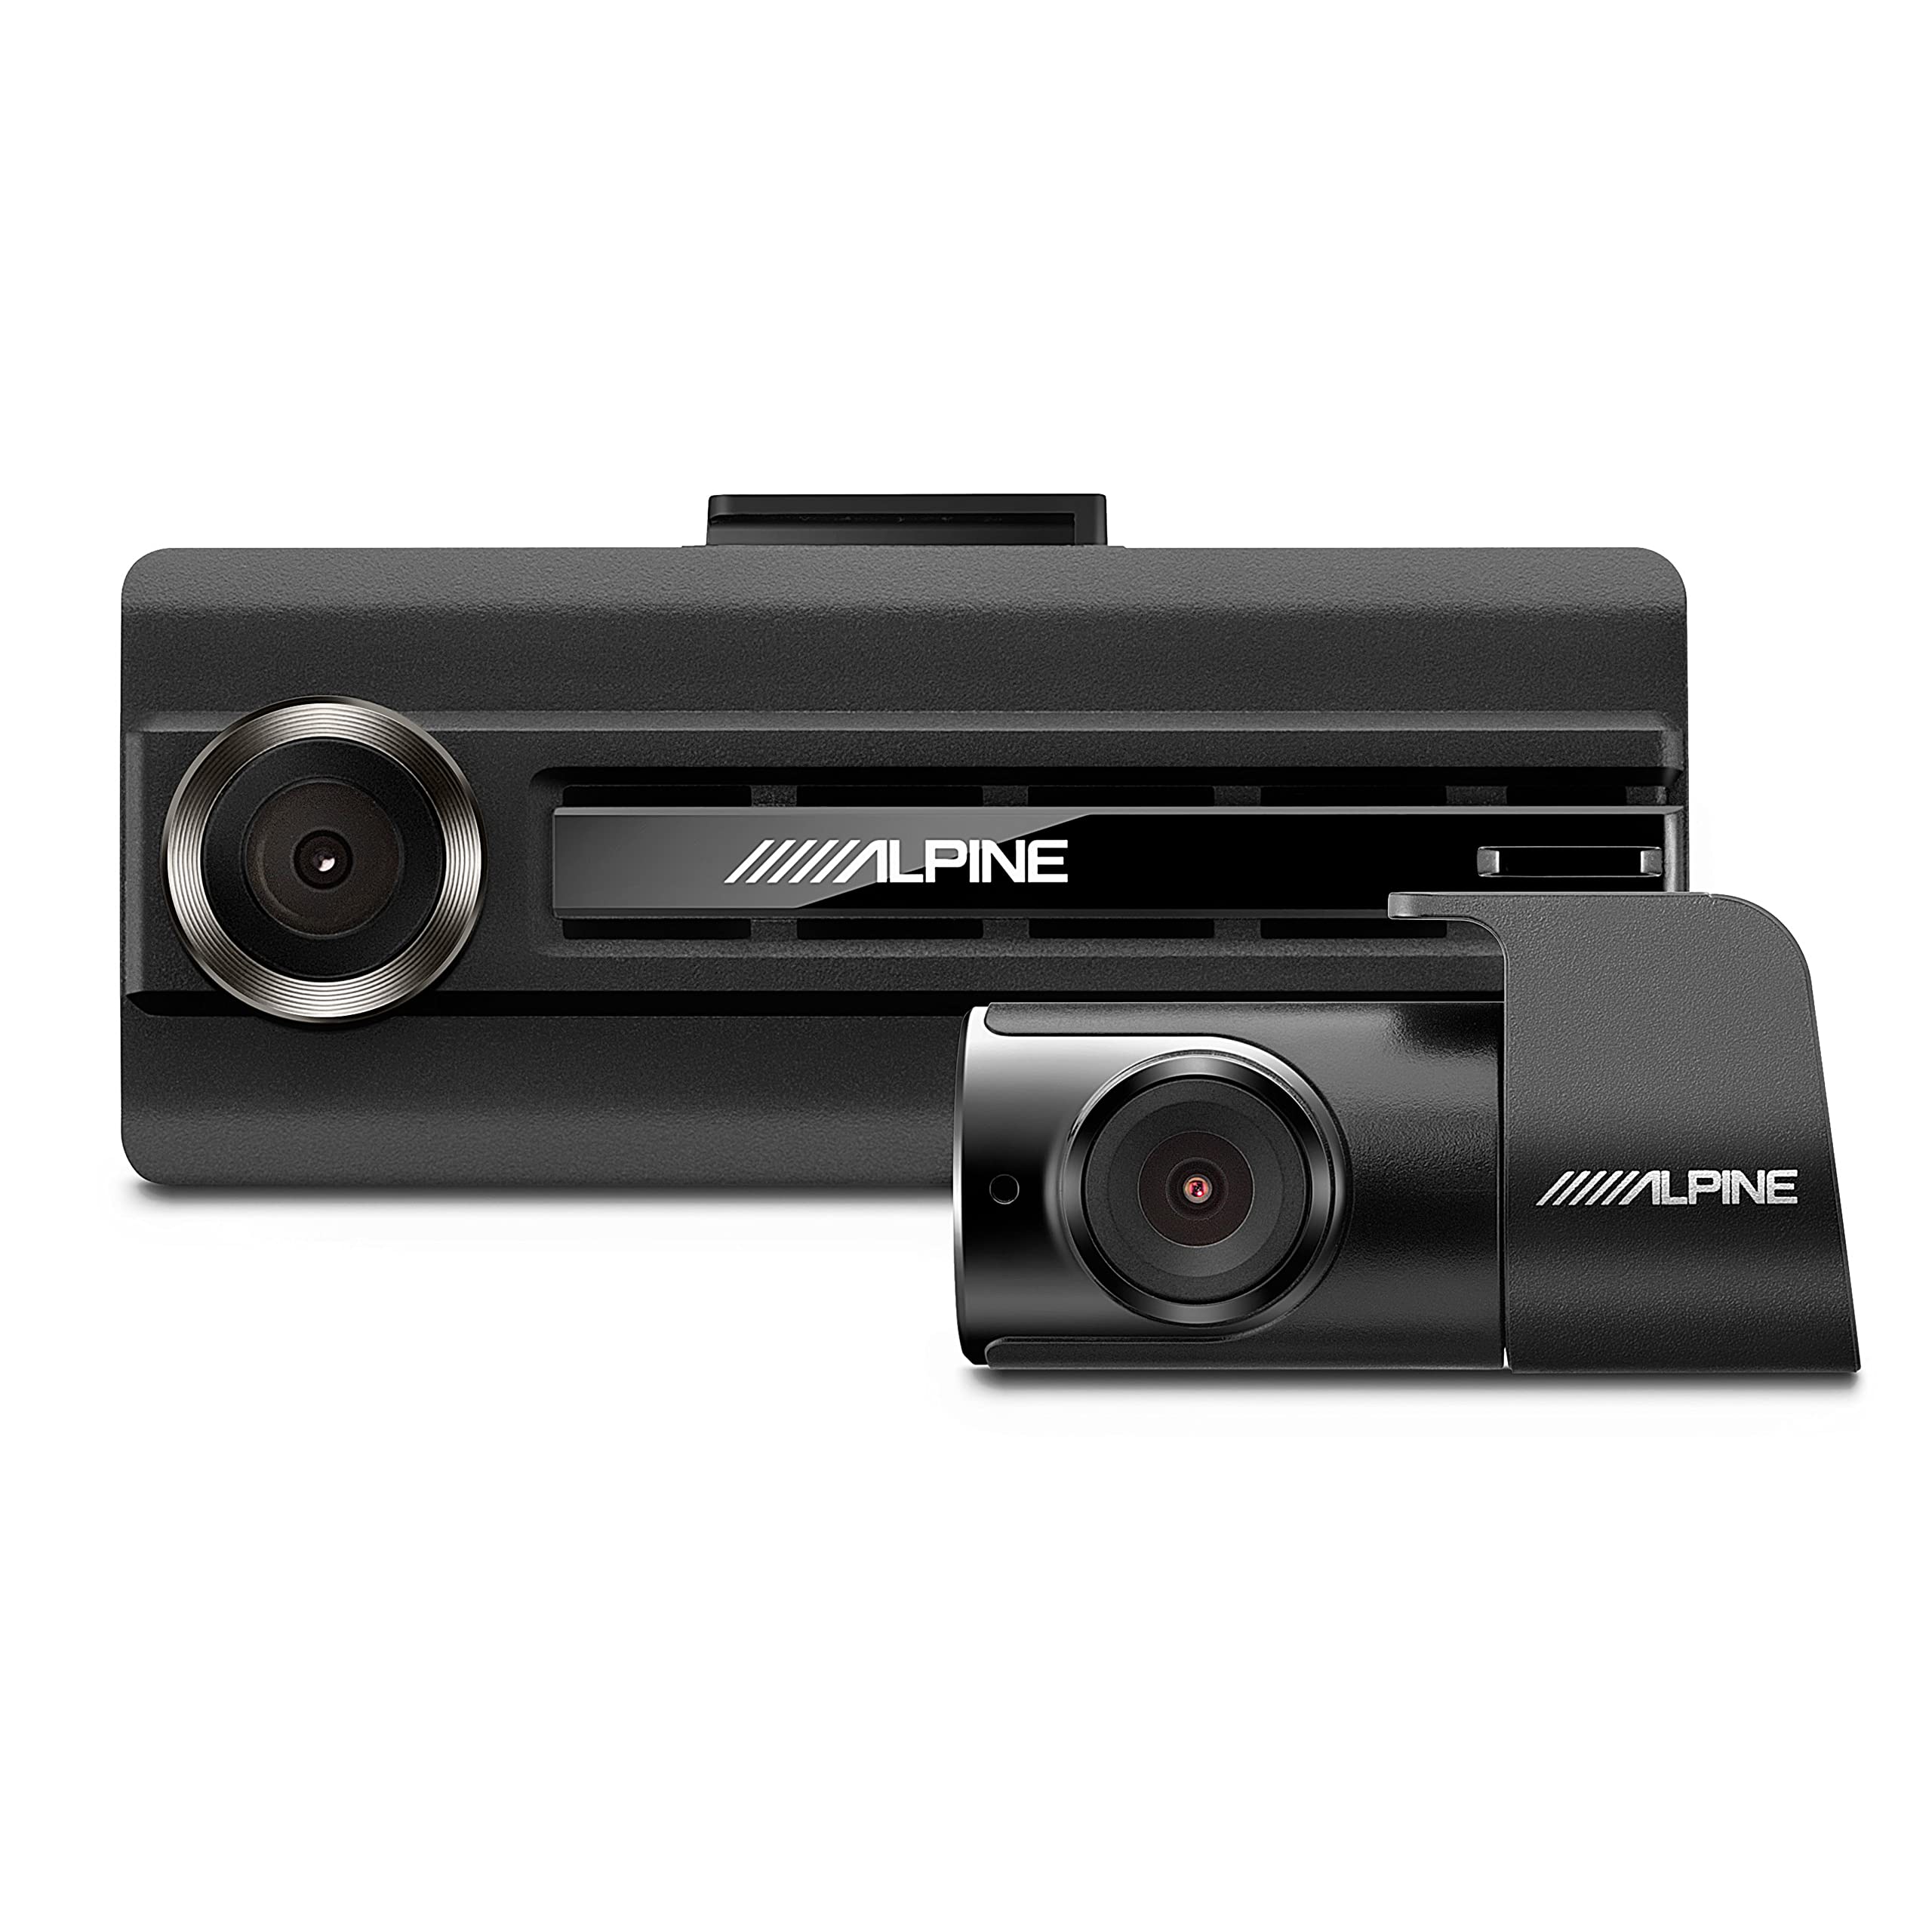
Figure 4.1: Alpine DVR-C310R Front and Rear Dash Cameras. This image displays both the main front dash camera and the smaller rear camera unit.
4.1 Front Dash Camera
The main unit records the forward view of your vehicle.

Figure 4.2: Front view of the Alpine DVR-C310R dash camera, highlighting the lens and Alpine branding.

Figure 4.3: Rear view of the Alpine DVR-C310R dash camera, showing the Wi-Fi and REC buttons, status indicators, DC-IN port, and microphone.
- Lens: Records full HD video.
- REC Button: Manually initiate or save an event recording.
- Wi-Fi Button: Activates/deactivates Wi-Fi for smartphone connection.
- Status LED: Indicates recording status and Wi-Fi connection.
- DC-IN Port: Power input for the camera.
- V-OUT Port: Connects to the rear camera.
- Microphone: Records in-cabin audio.
- Reset Button: Resets the device (requires a thin object like a paperclip).
- MicroSD Card Slot: For video storage.
4.2 Rear Camera
The secondary camera records the rear view or internal cabin view, depending on installation.

Figure 4.4: Close-up view of the Alpine DVR-C310R rear camera, showing its compact design and lens.
- Lens: Records video, typically in HD.
- V-OUT Port: Connects to the front camera.
4.3 GPS Module
The optional GPS module provides location and speed data for recorded footage.

Figure 4.5: Alpine GPS module, a small black rectangular unit with a connecting cable, used to add location data to recordings.
5. Installation
Proper installation is crucial for optimal performance and safety. Professional installation is recommended.
5.1 Choosing Mounting Locations
- Front Camera: Mount on the windshield, typically behind the rearview mirror, ensuring it does not obstruct the driver's view or airbag deployment.
- Rear Camera: Mount on the rear windshield for external recording, or on the dashboard/headliner for internal cabin recording (e.g., for rideshare drivers). Ensure a clear line of sight.

Figure 5.1: Top view of the front camera showing the integrated mounting bracket, which slides into a slot on the camera body.
5.2 Mounting the Cameras
- Clean the chosen windshield area thoroughly.
- Attach the mounting bracket to the front camera.
- Remove the protective film from the adhesive pad on the bracket and firmly press the camera onto the windshield. Hold for at least 30 seconds.
- Repeat for the rear camera, ensuring its orientation is correct for the desired recording angle.
5.3 Wiring Connections
- Insert a compatible MicroSD card into the front camera's card slot.
- Connect the rear camera cable to the V-OUT port on the front camera and the corresponding port on the rear camera. Route the cable neatly along the vehicle's interior trim.
- Connect the power cable to the DC-IN port on the front camera. Route the power cable to a 12V power outlet (cigarette lighter socket) or a hardwire kit (sold separately for continuous recording).
- If using the GPS module, connect it to the designated GPS port on the front camera (if available) or integrate it as per its specific instructions.
- Ensure all cables are tucked away and secured to prevent interference with driving or vehicle components.
6. Initial Setup and Wi-Fi Connection
After installation, perform the initial setup and connect to the camera via Wi-Fi.
6.1 Powering On and Initial Recording
- Start your vehicle's engine. The dash camera should power on automatically and begin recording.
- Observe the status LED on the front camera. It should indicate active recording (e.g., blinking red).
6.2 Connecting via Wi-Fi (Smartphone App)
- Download the official Alpine Dash Cam app from your smartphone's app store (iOS or Android).
- Press the Wi-Fi button on the front camera to activate its Wi-Fi hotspot. The Wi-Fi LED should illuminate.
- On your smartphone, go to Wi-Fi settings and connect to the network named "Alpine_DVR-C310R" (or similar). The default password is typically "1234567890" or found in the app/manual.
- Open the Alpine Dash Cam app. The app should automatically detect and connect to the camera.
- Through the app, you can adjust settings, view live footage, playback recorded videos, and transfer files to your phone.
Note: Ensure your vehicle's Wi-Fi or other strong Wi-Fi signals do not interfere with the camera's Wi-Fi connection.
7. Operating Instructions
Understand the various recording modes and functions of your dash camera.
7.1 Continuous Recording
The camera automatically begins continuous loop recording when the vehicle's ignition is turned on. Older files are overwritten by new ones once the MicroSD card is full, ensuring continuous recording without manual intervention.
7.2 Event Recording (Impact Detection)
The built-in G-sensor detects sudden impacts or rapid acceleration/deceleration. When an event is detected, the camera automatically saves the current footage (before, during, and after the event) to a protected folder on the MicroSD card, preventing it from being overwritten.
- Manual Event Recording: Press the REC button on the camera to manually save a segment of footage as an event file. This is useful for recording specific incidents you witness.
7.3 Parking Surveillance Mode
If hardwired (requires optional hardwire kit), the camera can monitor your vehicle while parked. It typically uses motion detection or impact detection to record events when the vehicle is off, conserving battery and storage space.
7.4 Video Playback and File Management
- Via Smartphone App: Connect to the camera via Wi-Fi using the Alpine Dash Cam app. You can view live footage, browse recorded files (continuous, event, parking), and download desired videos to your phone.
- Via PC Viewer: Remove the MicroSD card from the camera and insert it into a computer's card reader. Install the Alpine PC Viewer software (available for download from the Alpine website) to view recordings, GPS data, and manage files.
8. Maintenance
Regular maintenance ensures the longevity and optimal performance of your dash camera.
- Cleaning the Lenses: Gently wipe the camera lenses with a soft, lint-free cloth. Do not use abrasive cleaners or solvents.
- MicroSD Card Management: Periodically format the MicroSD card (at least once a month) using the camera's app or PC viewer. This helps maintain card health and prevents data corruption. Back up important files before formatting.
- Firmware Updates: Check the Alpine website periodically for firmware updates. Updates can improve performance, add features, or fix bugs. Follow the instructions provided with the update carefully.
- Cable Inspection: Regularly inspect all cables for signs of wear or damage. Replace damaged cables immediately.
9. Troubleshooting
Refer to this section for solutions to common issues.
| Problem | Possible Cause | Solution |
|---|---|---|
| Camera does not power on. | No power supply; loose connection; faulty power cable. | Check power cable connection to camera and power source. Ensure vehicle ignition is on. Test with another power source if possible. |
| Recording stops or freezes. | MicroSD card error; full MicroSD card; faulty card; firmware issue. | Format the MicroSD card. Try a new, high-quality MicroSD card. Check for firmware updates. |
| Wi-Fi connection issues. | Incorrect password; interference; camera Wi-Fi not activated. | Ensure camera Wi-Fi is enabled. Verify password. Move away from other strong Wi-Fi signals. Restart camera and phone. |
| Video quality is poor or blurry. | Dirty lens; protective film still on lens; improper mounting; extreme glare. | Clean the lens. Remove any protective film. Ensure camera is securely mounted and not vibrating. Consider a CPL filter for glare reduction (if compatible). |
| Rear camera image is upside down. | Rear camera installed upside down. | Re-orient the rear camera during installation. Some apps may offer image rotation settings. |
10. Specifications
Key technical specifications for the Alpine DVR-C310R Dash Camera:
| Feature | Detail |
|---|---|
| Model Name | DVR-C310R |
| Video Capture Resolution | 1080p (Full HD) |
| Connectivity Technology | Wi-Fi |
| Special Feature | Built-In WiFi, Impact Recording |
| Mounting Type | Windshield Mount / Dashboard Mount |
| Control Method | App |
| Included Components | DVR-C310R (Front Camera), Rear Camera |
| Item Weight | 1.59 pounds (approx.) |
| Color | Black |
| Manufacturer | Alpine Electronics |
11. Warranty and Support
For warranty information and technical support, please refer to the official Alpine Electronics website or contact their customer service directly. Keep your purchase receipt as proof of purchase for warranty claims.
Official Alpine Website: www.alpine-usa.com


