
SMARTRO SC31
SMARTRO Digital Projection Alarm Clock User Manual
Model: SC31
Product Overview
The SMARTRO Digital Projection Alarm Clock (Model SC31) is a versatile bedside device designed to provide accurate time, temperature, and humidity readings, along with convenient alarm and charging features. Its unique projection function allows for easy time viewing on your ceiling or wall, making it an ideal addition to any bedroom.

Figure 1: SMARTRO Digital Projection Alarm Clock connected to power and charging a smartphone.
Key Features:
- Dual Alarm Clocks: Set two independent alarms for different schedules.
- Time Projection: Projects time onto the ceiling or wall with 90-degree rotation.
- Indoor Thermometer & Hygrometer: Monitors room temperature and humidity.
- USB Charging Ports: Two convenient USB ports for charging electronic devices.
- Adjustable Backlight: Three brightness levels (light, medium, off) for the LCD screen.
- Snooze Function: Provides an extra five minutes of sleep.
- Compact Design: Space-saving and ideal for bedside tables or travel.
- Power Options: Operates via AC adapter for continuous display or AAA batteries for temporary display and backup.

Figure 2: Overview of the clock's compact design and multiple functions including date & time, projection, USB charging, dual alarms, snooze, and indoor temperature & humidity.
Package Contents
- SMARTRO Digital Projection Alarm Clock (Model SC31)
- Power Adapter
- User Manual (this document)
Note: AAA batteries (3 required) are not included and are necessary for backup power and temporary display when not connected to AC power.
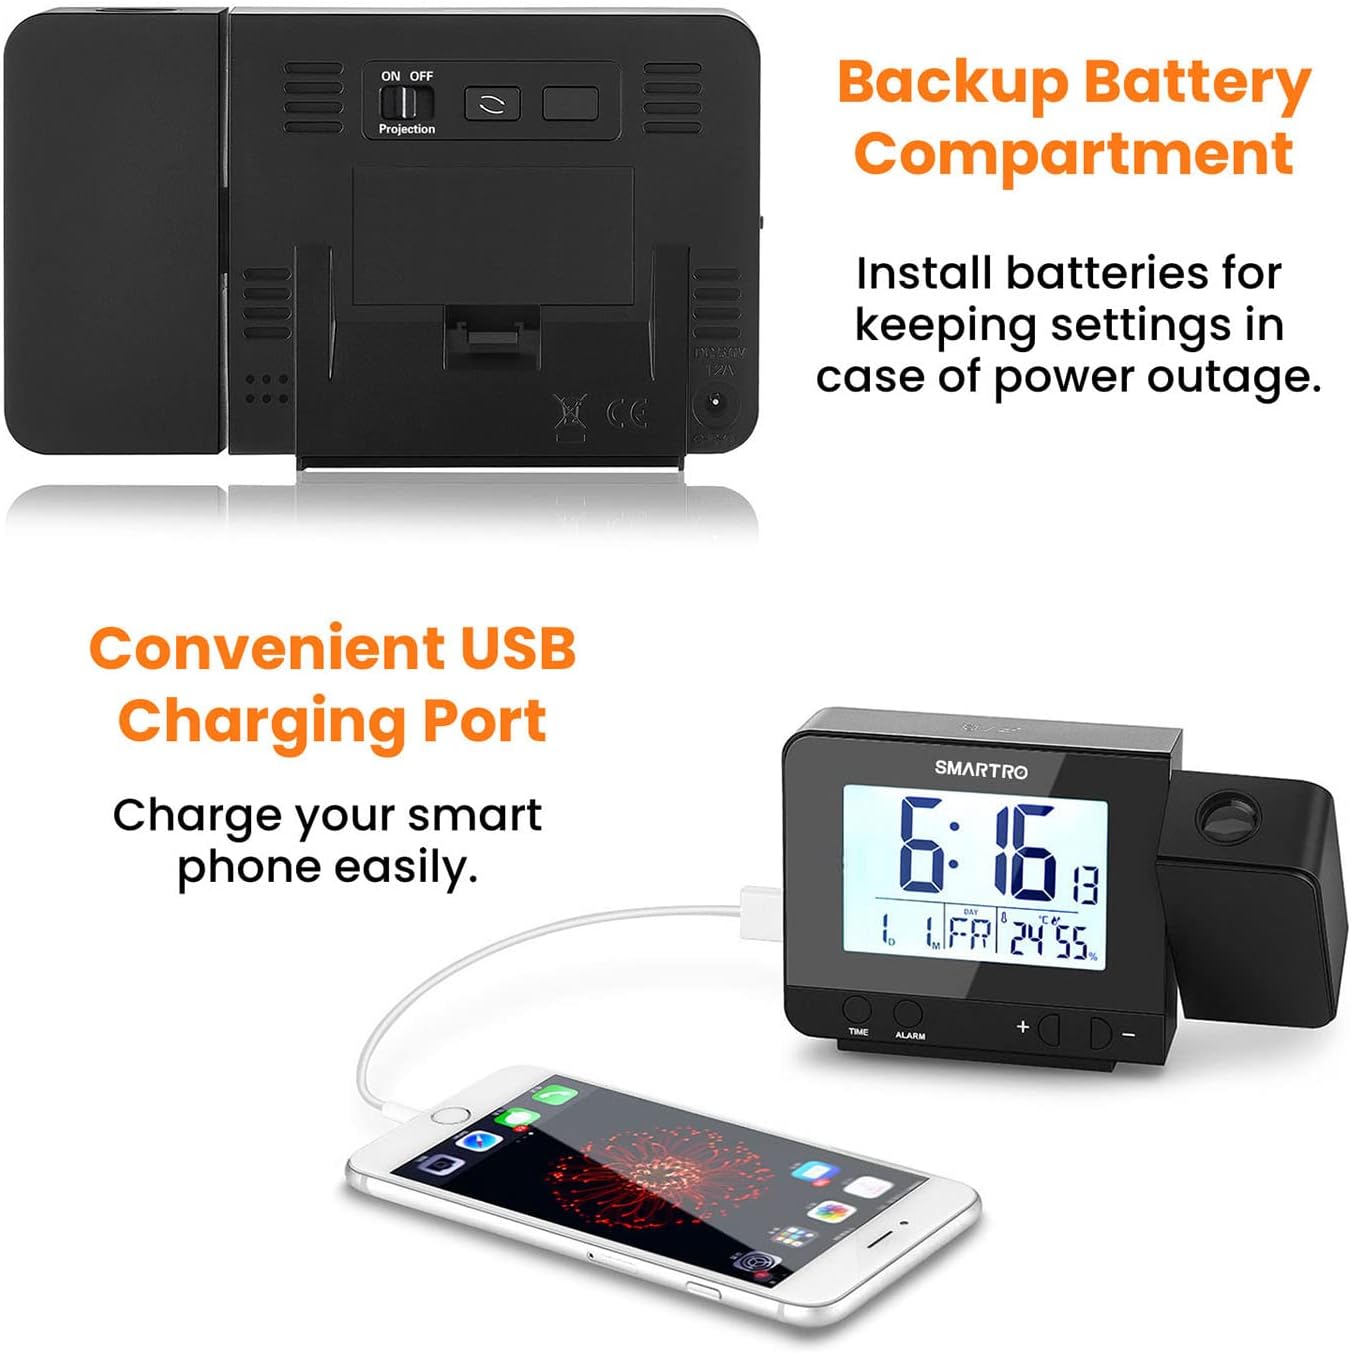
Figure 3: Rear view of the clock showing the backup battery compartment and USB charging ports.
Setup
- Power Connection:
- Connect the provided power adapter to the DC 5V input port on the back of the alarm clock.
- Plug the adapter into a standard electrical outlet. The display will light up.
- For backup power during outages or temporary display without AC power, insert 3 AAA batteries (not included) into the battery compartment on the back of the unit.
- Initial Time Setting:
- Press and hold the "TIME" button to enter time setting mode.
- Use the "+" or "-" buttons to adjust the hour, then press "TIME" to confirm.
- Repeat for minutes, 12/24 hour format, year, month, and day.
- Alarm Setting:
- Press and hold the "ALARM" button to set Alarm 1.
- Use the "+" or "-" buttons to adjust the hour, then press "ALARM" to confirm.
- Repeat for minutes.
- To activate/deactivate Alarm 1, slide the "ON/OFF 1" switch on the side of the clock.
- Repeat the process for Alarm 2 using the "ON/OFF 2" switch.

Figure 4: The clock supports dual alarms, allowing users to set two separate wake-up times or reminders.
Operating Instructions
Display Brightness Adjustment:
Tap the large button on the top of the clock to cycle through three backlight brightness levels: Light, Medium, and Off. This allows you to adjust the display to your preference, especially for nighttime viewing.
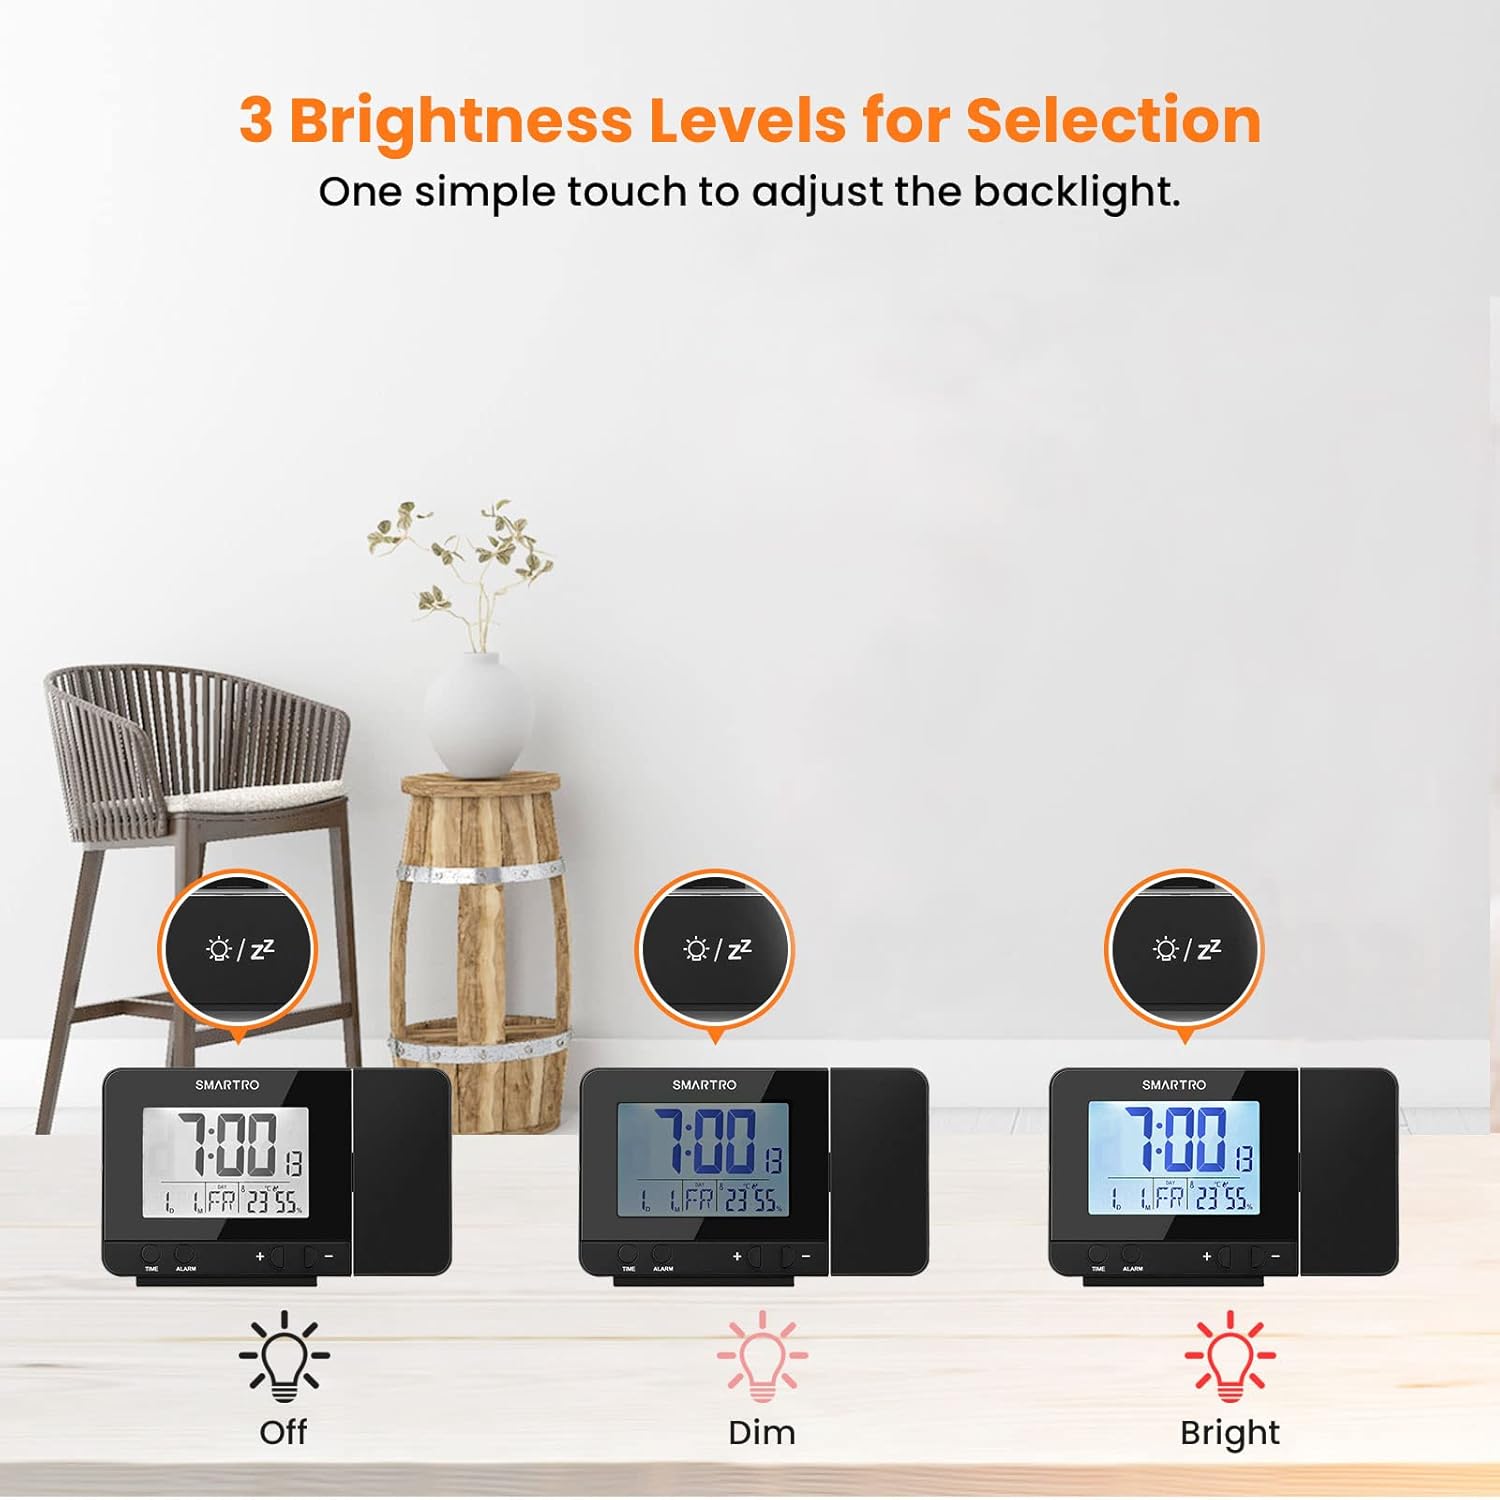
Figure 5: The clock offers three adjustable brightness levels for its LCD display.
Time Projection:
- The projection feature displays the time in a soft red color on your ceiling or wall.
- The suggested projection distance is 5 to 13 feet (1.5 to 4 meters).
- To adjust the projection angle, rotate the projector arm up to 90 degrees.
- To rotate the projected image itself (e.g., for different wall/ceiling orientations), press the "Projection" button on the back of the unit to cycle through 4 orientations.
- When powered by the AC adapter, the projection can remain continuously on. When using only batteries, the projection will activate for a few seconds when the top button is pressed.

Figure 6: The clock's projection feature displays the time clearly on a surface.

Figure 7: The projection arm can be rotated 90 degrees, and the projected image can be rotated 180 degrees for optimal viewing.
Snooze Function:
When an alarm sounds, press the large button on the top of the clock to activate the snooze function. This will silence the alarm for five minutes, after which it will sound again. The alarm will ring for 2 minutes if not snoozed or turned off.
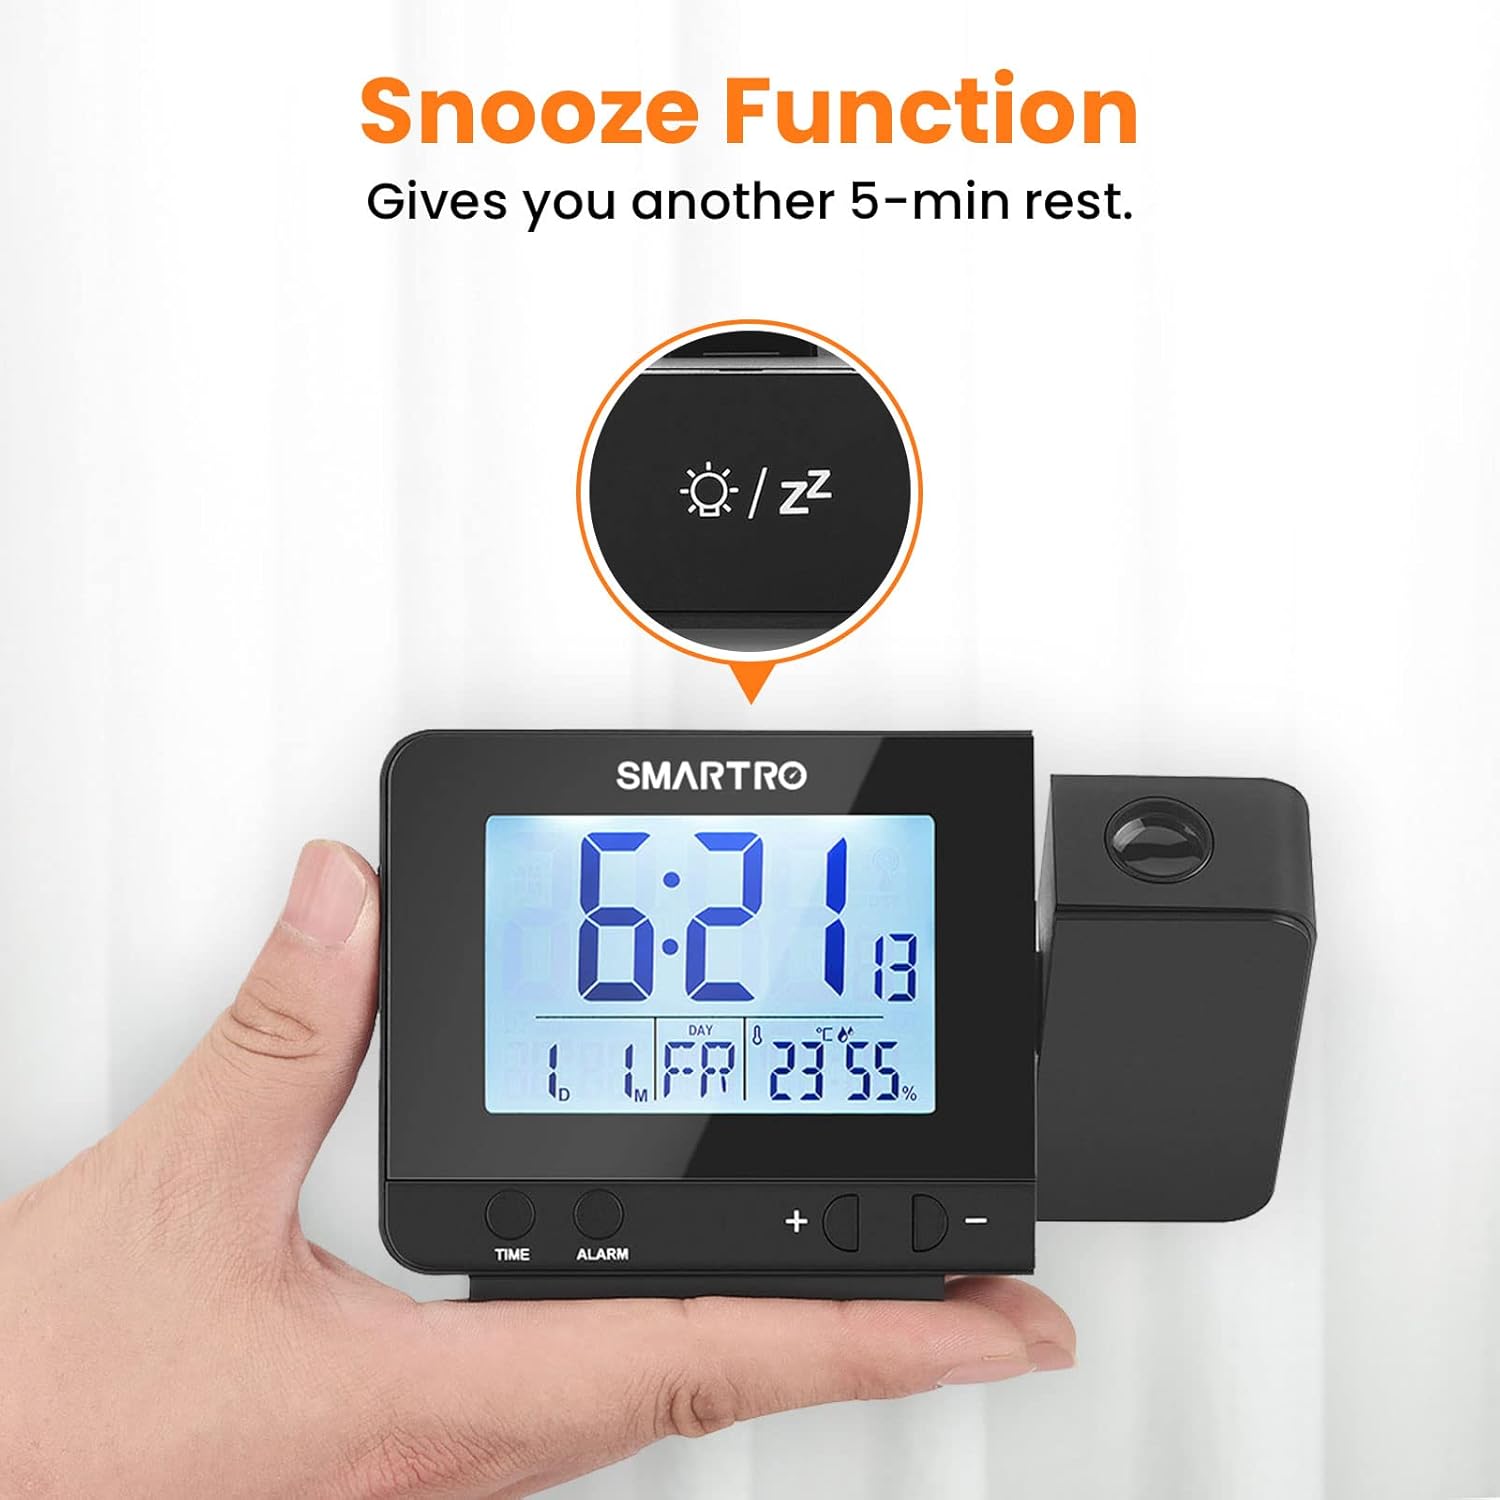
Figure 8: The snooze button provides an additional 5 minutes of rest.
USB Charging Ports:
The clock features two USB charging ports (5V/1A) on its side. Use these ports to conveniently charge your smartphones or other USB-powered electronic devices directly from the alarm clock.
Indoor Thermometer & Hygrometer:
The built-in sensors provide real-time indoor temperature (in Celsius or Fahrenheit) and humidity readings. This helps you monitor your room's conditions for optimal comfort.

Figure 9: The integrated thermometer and hygrometer help monitor indoor environmental conditions.
Maintenance
- Cleaning: Wipe the clock with a soft, dry cloth. Do not use abrasive cleaners or solvents.
- Battery Replacement: If using backup batteries, replace them annually or when the display dims unexpectedly during power outages. Ensure correct polarity (+/-) when inserting new batteries.
- Placement: Place the clock on a stable, flat surface away from direct sunlight, extreme temperatures, and high humidity.
Troubleshooting
| Problem | Possible Cause | Solution |
|---|---|---|
| Display is blank or dim. | No power, power adapter loose, or batteries drained. | Ensure power adapter is securely plugged in. If using batteries, replace them. Tap the top button to adjust backlight brightness. |
| Projection is not visible or dim. | Projection is off, too far from surface, or batteries low (if not AC powered). | Ensure the "Projection" switch on the back is ON. Adjust the clock's distance from the projection surface (5-13 ft recommended). Ensure AC power is connected for continuous projection. |
| Alarm does not sound. | Alarm is not activated or volume is too low. | Check if the "ON/OFF 1" or "ON/OFF 2" switch is in the ON position. Ensure alarm time is set correctly. |
| Time/Date is incorrect. | Not set correctly or power interruption. | Reset the time and date following the "Initial Time Setting" instructions. Ensure backup batteries are installed if power interruptions are common. |
| USB charging not working. | Device not compatible or cable faulty. | Ensure the device is compatible with 5V/1A charging. Try a different USB cable. |
Specifications
| Feature | Detail |
|---|---|
| Model | SC31 |
| Dimensions (W x H) | 5.28" x 3.14" |
| Weight | 7 ounces (199 grams) |
| Power Source | Corded Electric (AC Adapter included), 3x AAA Batteries (not included) for backup |
| Display Type | Digital LCD with adjustable backlight |
| Projection Color | Soft Red |
| Projection Distance | 5 - 13 ft (1.5 - 4 m) |
| USB Output | 2 x 5V/1A |
| Temperature Range | Indoor (specific range not provided, but implied by "66°F OK 75°F" in image) |
| Humidity Range | Indoor (specific range not provided, but implied by "40% OK 60%" in image) |
Warranty and Support
This SMARTRO Digital Projection Alarm Clock (Model SC31) comes with a 13-month warranty from the date of purchase, covering defects in materials and workmanship under normal use.
What is Covered:
- Manufacturing defects.
- Malfunctions occurring under normal operating conditions.
What is Not Covered:
- Damage caused by misuse, abuse, accident, or neglect.
- Unauthorized repairs or modifications.
- Normal wear and tear.
- Damage from improper installation or operation.
Claiming Warranty:
For warranty service or technical support, please contact SMARTRO customer service. You may be required to provide proof of purchase and a description of the issue.
For further assistance, please visit the official SMARTRO store or contact their support channels. (Specific contact information is not provided in the input data.)
Related documentsSC31


Ask a question about this manual
Ask about setup, troubleshooting, compatibility, parts, safety, or missing instructions. Manuals+ will review the question and use this page’s manual context to help answer it.