1. Introduction
This manual provides comprehensive instructions for the setup, operation, maintenance, and troubleshooting of your MSI G271 27-inch FHD IPS 1ms 144Hz FreeSync Gaming Monitor. Please read this manual thoroughly before using the product to ensure proper functionality and safety.

Figure 1.1: Front view of the MSI G271 Gaming Monitor.
2. Safety Information
Observe the following safety precautions to prevent damage to the monitor and ensure your personal safety.
- Always disconnect the power cord from the electrical outlet before cleaning the monitor.
- Do not expose the monitor to rain or moisture to avoid fire or shock hazards.
- Do not open the monitor casing. There are no user-serviceable parts inside. Refer all servicing to qualified service personnel.
- Place the monitor on a stable, flat surface to prevent it from falling.
- Ensure proper ventilation around the monitor. Do not block ventilation openings.
- Use only the power adapter and cables provided or recommended by MSI.
3. Package Contents
Verify that all items are present and in good condition. If any item is missing or damaged, contact your retailer.
- MSI G271 Gaming Monitor
- Power Adapter
- Power Cord
- HDMI Cable
- DisplayPort Cable
- Monitor Stand (Base and Neck)
- User Manual (this document)
- Quick Start Guide
4. Setup
4.1 Assembling the Monitor Stand
- Carefully remove the monitor and stand components from the packaging.
- Attach the stand neck to the monitor panel. Ensure it clicks securely into place or is fastened with screws if applicable.
- Attach the stand base to the stand neck. Tighten the thumb screw or screws at the bottom of the base.
- Place the assembled monitor on a stable, flat surface.

Figure 4.1: Rear view of the monitor showing the stand attachment point.
4.2 Connecting the Monitor
Connect the monitor to your computer or other devices using the appropriate cables.
- Power Connection: Connect the power adapter to the monitor's power input, then plug the power cord into the adapter and a wall outlet.
- Video Connection:
- For optimal performance (144Hz), use the provided DisplayPort cable to connect the monitor to your graphics card.
- Alternatively, use an HDMI cable to connect the monitor to your device. Note that HDMI may support lower refresh rates depending on the version.
- Audio Connection: If desired, connect headphones or external speakers to the audio output jack on the monitor.

Figure 4.2: Bottom view of the monitor displaying HDMI, DisplayPort, Audio, and Power input ports.
5. Operating Instructions
5.1 Powering On/Off
Press the power button, typically located on the bottom right side of the monitor, to turn it on or off. The power LED indicator will illuminate when the monitor is on.
5.2 On-Screen Display (OSD) Menu
The OSD menu allows you to adjust various display settings. Access the OSD menu using the joystick or buttons located on the back or bottom of the monitor.
- Navigation: Use the joystick (if present) or directional buttons to navigate through the menu options.
- Selection: Press the joystick or a dedicated button to select an option.
- Exit: Move the joystick left or press the 'Exit' button to go back or exit the OSD menu.
5.3 Key OSD Settings
- Gaming Mode: Select from various preset gaming modes (e.g., FPS, RTS, RPG) to optimize display settings for different game genres.
- Brightness/Contrast: Adjust the overall brightness and contrast levels of the display.
- Color Temperature: Modify the color warmth or coolness (e.g., Warm, Cool, User).
- Input Source: Manually select the input source (HDMI 1, HDMI 2, DisplayPort).
- FreeSync: Enable or disable AMD FreeSync technology for tear-free gaming (requires compatible AMD graphics card).
- Response Time: Adjust the pixel response time for reduced motion blur.
6. Maintenance
6.1 Cleaning the Monitor
To clean the monitor, ensure it is turned off and unplugged.
- Screen: Gently wipe the screen with a soft, lint-free cloth. For stubborn marks, lightly dampen the cloth with water or a screen-cleaning solution. Do not spray liquid directly onto the screen.
- Casing: Wipe the monitor casing with a soft, dry cloth. Avoid using abrasive cleaners or solvents.
6.2 Storage
When storing the monitor for an extended period, keep it in a cool, dry place, away from direct sunlight and extreme temperatures. Use the original packaging if available to protect it from dust and physical damage.
7. Troubleshooting
If you encounter issues with your monitor, refer to the following common problems and solutions.
| Problem | Possible Cause | Solution |
|---|---|---|
| No Power | Power cable not connected; Power outlet faulty. | Ensure power cable is securely connected. Test the outlet with another device. |
| No Signal | Video cable not connected; Incorrect input source selected. | Check video cable connections. Select the correct input source via the OSD menu. |
| Flickering Screen | Loose video cable; Graphics card driver issue; Refresh rate mismatch. | Secure video cable. Update graphics drivers. Adjust refresh rate in display settings. |
| Poor Image Quality | Incorrect resolution; OSD settings not optimized. | Set display resolution to 1920x1080. Adjust brightness, contrast, and color settings in OSD. |
8. Specifications
| Feature | Detail |
|---|---|
| Model Name | MSI Optix G271 |
| Screen Size | 27 inches |
| Panel Type | IPS |
| Resolution | 1920 x 1080 (FHD) |
| Refresh Rate | 144Hz |
| Response Time | 1ms |
| Adaptive Sync | AMD FreeSync |
| Viewing Angle | 178° (H) / 178° (V) |
| Brightness | 250 nits (Typ.) |
| Contrast Ratio | 1000:1 |
| Video Ports | 2x HDMI, 1x DisplayPort |
| Audio Ports | 1x Headphone Out |
| Dimensions (LxWxH) | 21.4 x 7.1 x 15.8 inches |
| Weight | 9.02 pounds |
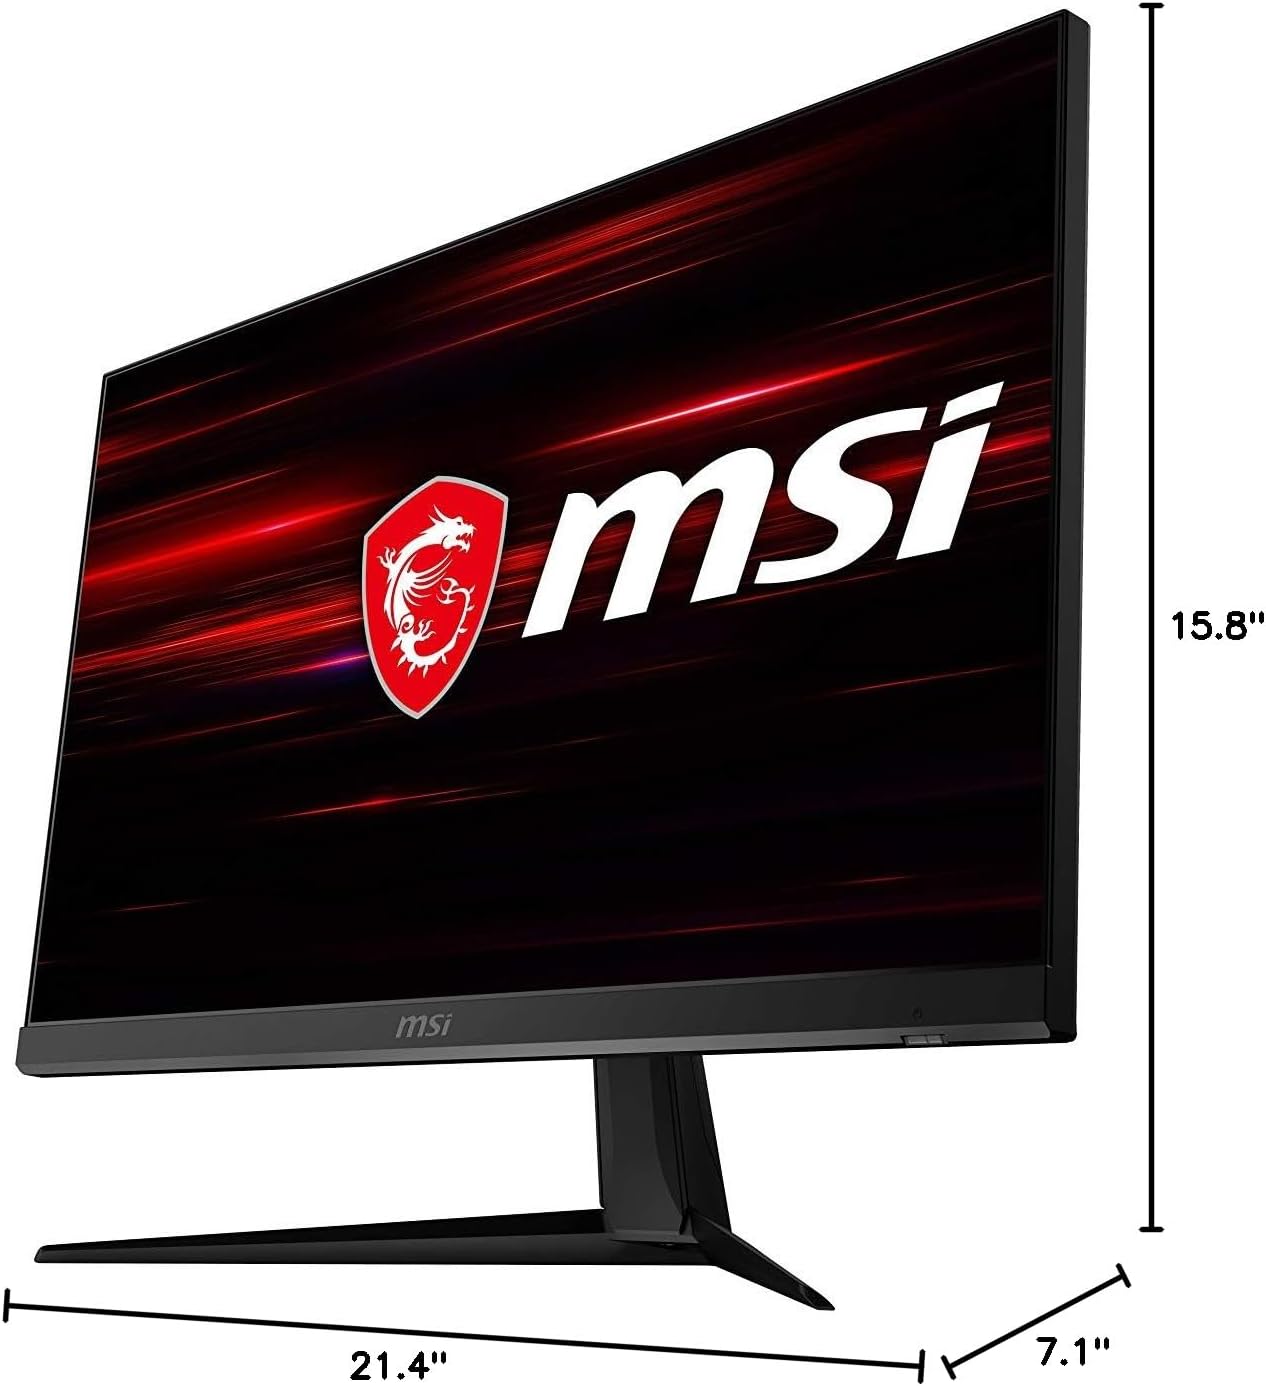
Figure 8.1: Physical dimensions of the MSI G271 monitor.
9. Warranty and Support
For detailed warranty information, please refer to the warranty card included with your product or visit the official MSI website.
For technical support, driver downloads, and frequently asked questions, please visit the MSI support page: www.msi.com/support.
You can also contact MSI customer service directly for assistance.


