
1. Introduction
Thank you for choosing the GreenForest L-Shaped Gaming Desk. This manual provides essential information for the safe assembly, operation, maintenance, and troubleshooting of your new desk. Please read these instructions carefully before assembly and retain them for future reference.

Figure 1.1: The GreenForest L-Shaped Gaming Desk, showcasing its spacious design for multiple monitors and accessories.
2. Safety Information
- Always assemble the desk on a soft, clean surface to prevent scratches.
- Ensure all screws and fasteners are securely tightened before use. Periodically check and re-tighten as necessary.
- Do not overload the desk. Refer to the specifications section for weight capacity.
- Keep small parts away from children during assembly.
- It is recommended that at least one person assemble this product.
3. Package Contents
Verify that all components are present before beginning assembly. If any parts are missing or damaged, please contact customer support.
- Desk Panels (Long and Short sections, and Corner piece)
- Metal Frame Components (Legs, support bars)
- Assembly Hardware (Screws, bolts, Allen wrench)
- Adjustable Leveling Studs
- CPU Stand
- Instruction Manual
4. Setup and Assembly
Follow these steps for proper assembly of your L-shaped desk. A Phillips head screwdriver (not included) may be required in addition to the provided Allen wrench.
- Unpack and Identify: Carefully remove all components from the packaging. Lay them out on a protected surface and compare them against the package contents list.
- Assemble Frame: Attach the metal frame components together using the provided hardware. Ensure all connections are finger-tightened initially.
- Attach Desk Panels: Place the desk panels onto the assembled frame. The desk features a reversible design, allowing the longer board (58.1 inches) to be placed on either the left or right side, depending on your space requirements. The shorter board measures 44.3 inches.
- Secure Connections: Once the desired orientation is achieved, fully tighten all screws and bolts using the provided Allen wrench. Do not overtighten.
- Install Leveling Studs: Screw the adjustable leveling studs into the bottom of the desk legs. Adjust them to ensure the desk is stable and level on your floor.
- Place CPU Stand: Position the included CPU stand as desired under the desk.

Figure 4.1: Illustration of the two-way setup, demonstrating how the desk panels can be arranged for left or right-hand configurations. Note that the legs remain in their fixed positions.
Advanced Configuration: Combining Multiple Desks
For an expanded workspace, two GreenForest L-shaped desks can be combined to form a 'U' shaped workstation. This configuration provides an even larger surface area for extensive setups.

Figure 4.2: An example of two L-shaped desks joined to create a larger U-shaped workspace, ideal for multi-user or extensive setups.
5. Operating and Usage
The GreenForest L-Shaped Gaming Desk is designed for versatility and comfort in various environments.
- Spacious Surface: The 58.1-inch long side and 44.3-inch short side provide ample space for multiple monitors, laptops, keyboards, and other peripherals.
- Ergonomic Design: The 29.1-inch height offers sufficient legroom for comfortable seating during extended periods of gaming, working, or studying.
- Versatile Application: Suitable for use in bedrooms, home offices, living rooms, and dedicated gaming setups.
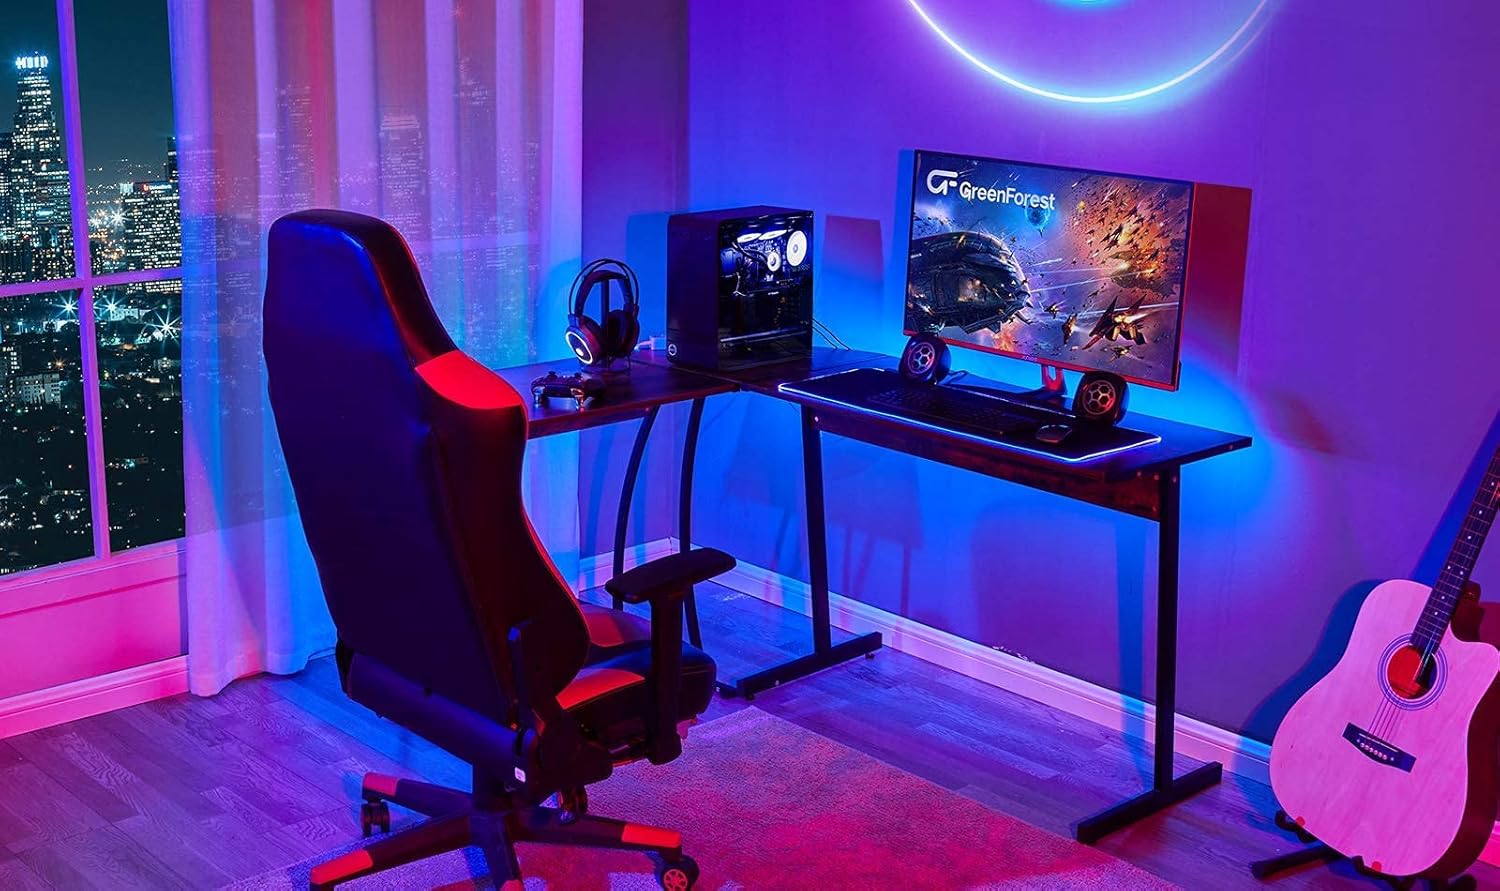
Figure 5.1: The desk configured for a gaming environment, demonstrating its capacity for a monitor, PC, and accessories.

Figure 5.2: The desk used in a home office setting, highlighting its suitability for productivity with a laptop and monitor.
6. Maintenance
Proper care will extend the life and appearance of your GreenForest L-Shaped Gaming Desk.
- Cleaning: The desk surface is moisture-proof and scratch-resistant. Wipe clean with a soft, damp cloth. Avoid harsh chemicals or abrasive cleaners.
- Dusting: Regularly dust the surface with a dry, soft cloth to prevent buildup.
- Hardware Check: Periodically inspect all screws and bolts to ensure they remain tight. Re-tighten if necessary to maintain stability.
- Avoid Extreme Conditions: Do not expose the desk to direct sunlight for prolonged periods or to extreme temperature changes, as this may affect the material.
7. Troubleshooting
If you encounter any issues with your desk, refer to the following common problems and solutions.
- Desk Wobbles/Unstable:
- Ensure all assembly hardware is fully tightened.
- Adjust the leveling studs on the bottom of the legs to compensate for uneven floor surfaces.
- Parts Do Not Align During Assembly:
- Loosen all screws slightly, adjust the components into alignment, then re-tighten.
- Verify that you are using the correct parts for each step as indicated in the assembly instructions.
- Surface Scratches Easily:
- While the surface is scratch-resistant, it is not scratch-proof. Avoid dragging sharp or heavy objects across the surface. Use coasters for drinks.
8. Specifications
| Feature | Detail |
|---|---|
| Product Dimensions (D x W x H) | 58.1" x 44.3" x 29" |
| Long Board Size | 39" x 18.9" |
| Short Panel Size | 25.2" x 18.9" |
| Item Weight | 35.27 Pounds |
| Color | Rustic Brown |
| Top Material Type | Engineered Wood (P2 Particle Board) |
| Base Material | Metal |
| Finish Type | Laminated |
| Special Feature | Reversible L-Shape, CPU Stand Included |
| Recommended Number of People for Assembly | 1 |

Figure 8.1: Detailed dimensions of the GreenForest L-Shaped Gaming Desk.
9. Warranty and Support
GreenForest is committed to providing quality products and customer satisfaction.
- Warranty: This product comes with a worry-free warranty. Specific terms and duration may vary. Please refer to your purchase documentation for details.
- After-Sales Service: For any questions, missing parts, or issues not covered in this manual, please contact GreenForest customer service.
- Contact Information: Please visit the official GreenForest website or refer to your purchase platform for the most current customer support contact details.
10. Product Videos
No official product videos were provided for embedding in this manual.


