
REOLINK B10
Reolink B10 Junction Box User Manual
Model: B10
1. Product Overview
The Reolink B10 Junction Box is designed to provide a secure and weatherproof enclosure for the Ethernet cables and RJ45 connectors of compatible Reolink bullet IP cameras. Constructed from durable aluminum alloy, it protects connections from water, vandalism, and environmental elements, ensuring a clean and professional installation.

Figure 1.1: Top view of the Reolink B10 Junction Box, showing various mounting points (A1, B1, C1, D1, A2, B2, C2, D2, A3, B3, C3, D3, D4) for different camera models.

Figure 1.2: Various angles of the Reolink B10 Junction Box, highlighting its compact design and cable entry point.
2. Key Features
- Durable Construction: Made from high-quality aluminum alloy for long-lasting performance.
- Weatherproof Design: Provides waterproof protection for Ethernet cables and RJ45 connectors, safeguarding against water and environmental damage.
- Vandalism Protection: Helps protect sensitive connections from tampering and vandalism.
- Clean Installation: Enables a neat and organized cabling solution, improving the aesthetic of the camera setup.
3. Compatibility
The B10 Junction Box is specifically designed for use with the following Reolink bullet IP cameras:
3.1. Compatible PoE Cameras:
- RLC-510A
- RLC-810A
- RLC-811A
- RLC-812A
- RLC-1212A
- RLC-81MA
- RLC-81PA
- CX410
- CX810
- Duo 2 PoE
- Duo 3 PoE
3.2. Compatible WiFi Cameras:
- RLC-410W
- RLC-510WA
- RLC-511WA
- RLC-810WA
- RLC-811WA
- CX410W
- Duo 2 WiFi
3.3. Compatible Surveillance Camera Kits:
- RLK8-410B4-4MP
- RLK8-410B4-5MP
- RLK8-800B4
- RLK8-800B6
- RLK8-811B4
- RLK8-1200B4-A
- RLK16-800B8
- RLK16-1200B8-A
- RLK12-800WB4
- RLK12-500WB4
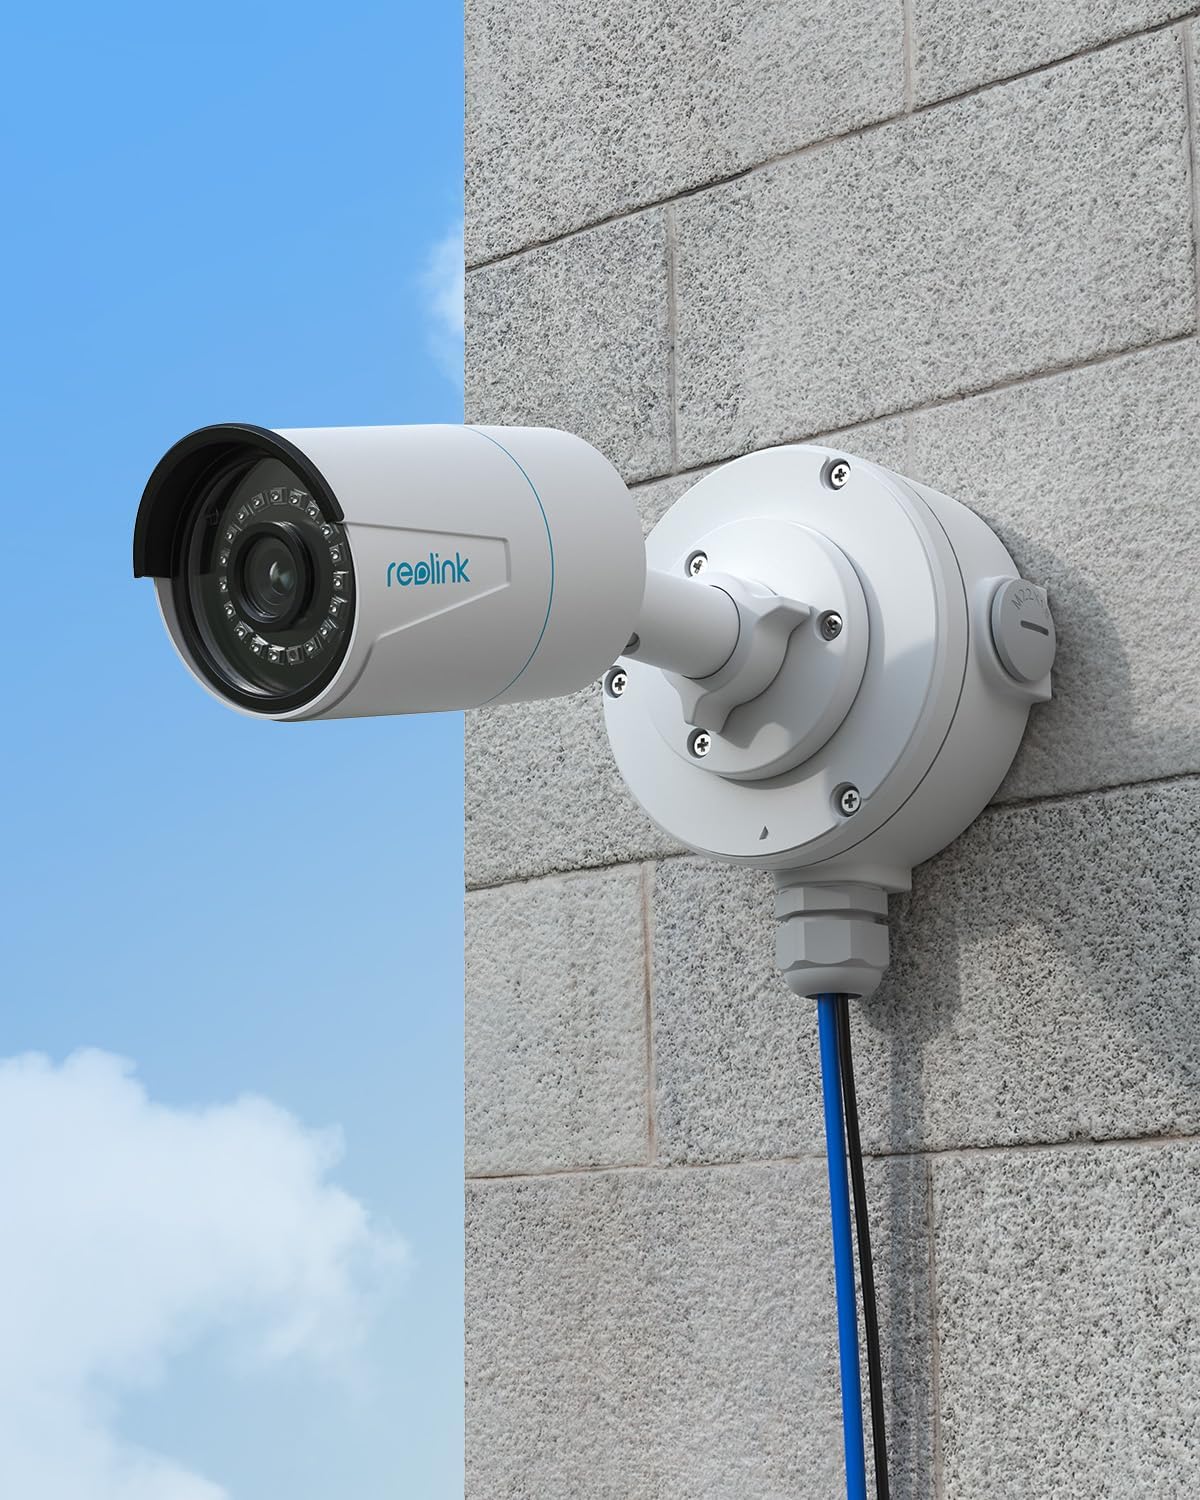
Figure 3.1: Visual representation of cameras compatible with the B10 Junction Box.
4. Installation Guide
Follow these steps to properly install the Reolink B10 Junction Box with your compatible camera:
- Step 1: Prepare the Junction Box. Open the junction box and route the camera's Ethernet cable through the waterproof gland at the bottom. Ensure the cable is securely passed through.
- Step 2: Connect the Cables. Inside the junction box, connect the camera's Ethernet cable to the appropriate network connection. Ensure all connections are secure and properly insulated if necessary.
- Step 3: Mount the Camera Base. Align the camera's mounting base with the screw holes on the junction box. The B10 is designed with multiple hole patterns (A1-D4) to accommodate various Reolink bullet cameras. Secure the camera base to the junction box using the provided screws.
- Step 4: Secure the Camera. Once the camera base is attached to the junction box, secure the camera body to its base. Ensure all components are tightly fastened to prevent movement and maintain weather resistance.

Figure 4.1: Step-by-step visual guide for installing the B10 Junction Box with a Reolink camera.

Figure 4.2: An example of a Reolink camera securely mounted with the B10 Junction Box on an exterior wall, demonstrating a clean and protected installation.
5. Maintenance
The Reolink B10 Junction Box requires minimal maintenance. Periodically inspect the following:
- Seals and Gaskets: Ensure all seals and gaskets are intact and free from cracks or damage to maintain waterproof integrity.
- Mounting Screws: Check that all mounting screws are tight and secure. Over time, vibrations or environmental factors may cause them to loosen.
- Cable Gland: Verify the cable gland at the bottom of the box is tightly sealed around the cable to prevent water ingress.
- Exterior Cleanliness: Keep the exterior of the junction box clean from dirt, dust, or debris that might accumulate, especially around seals.
6. Troubleshooting
| Problem | Possible Cause | Solution |
|---|---|---|
| Difficulty aligning screw holes. | Slight manufacturing tolerance or incorrect alignment. | Carefully adjust the camera's position. Some users have reported needing to slightly widen holes, but this should be a last resort and done with caution to avoid damaging the product. |
| Water ingress into the box. | Improperly sealed cable gland or damaged gasket/seal. | Ensure the cable gland is tightened securely around the cable. Inspect all seals and gaskets for damage and replace if necessary. Ensure the lid is properly closed and sealed. |
| Junction box feels loose after installation. | Mounting screws are not tight enough or wall anchors are insufficient. | Retighten all mounting screws. If mounting to a soft material, consider using more robust wall anchors. |
7. Specifications
- Model: B10
- Material: Aluminum Alloy
- Color: White
- Dimensions (L x W x H): 13.5 x 14 x 6 cm (5.3 x 5.5 x 2.4 inches)
- Weight: 380 grams (0.84 lbs)
- Installation Method: Screw-in / Wall Mount
- Finish: Powder Coating
- Compatibility: Designed for specific Reolink Bullet PoE/WiFi Cameras and Kits (refer to Section 3)

Figure 7.1: Detailed dimensions of the Reolink B10 Junction Box.
8. Warranty and Support
For warranty information and technical support, please refer to the official Reolink website or contact Reolink customer service directly. Keep your purchase receipt for warranty claims.
Reolink Official Website: www.reolink.com
Related documentsB10


Ask a question about this manual
Ask about setup, troubleshooting, compatibility, parts, safety, or missing instructions. Manuals+ will review the question and use this page’s manual context to help answer it.