
1. Introduction
This manual provides detailed instructions for the installation, operation, and maintenance of your Nilight 4-in-1 Outlet Socket Panel. This versatile panel integrates a dual USB charger, an LED voltmeter, a 12V cigarette lighter outlet, and an ON/OFF toggle switch into a single unit, designed for various 12-24V DC automotive and marine applications.

Figure 1: Nilight 4-in-1 Outlet Socket Panel
2. Package Contents
Verify that all items listed below are included in your package:
- 1 x 4-in-1 Toggle Switch Panel
- 3 x Connecting Wires (pre-wired)
- 9 x Insulated Terminals
- 4 x Mounting Screws
- 1 x Wiring Diagram

Figure 2: Included Components
3. Specifications
| Feature | Specification |
|---|---|
| Model Number | 90100D |
| Product Dimensions | 6 x 2 x 1 inches |
| Operating Voltage | 12-24 Volts DC |
| USB Output | Dual 5V/2.1A (Total 4.2A) |
| 12V Outlet Max Power | 150W (12V) / 300W (24V) |
| Current Rating | 1 Amps (for switch) |
| Operation Mode | OFF-NONE-ON |
| Contact Type | Normally Open |
| Connector Type | Plug In |
| Terminal Type | Spade |
| Actuator Type | Toggle |

Figure 3: Product Dimensions
4. Safety Information
- Ensure the power source is disconnected before installation to prevent electrical shock.
- Always use appropriate wiring and fuses for your application to prevent overload and damage. The panel includes a built-in 10A fuse for over-load protection.
- Verify correct polarity (+/-) when connecting the panel to the power source.
- Do not exceed the maximum voltage and current ratings of the panel or individual components.
- Keep the panel and connections dry to avoid short circuits.
- If you are unsure about any installation steps, consult a qualified professional.
5. Setup and Installation
5.1. Wiring Methods
The panel offers two primary wiring configurations:
- Power Cut-off Switch: The main switch controls the power supply to the entire panel. This is suitable for applications where you want to completely disconnect power to all components on the panel.
- Control Loads Only: Use the switch independently to control specific loads, allowing other components on the panel to remain powered.

Figure 4: Two Wiring Methods
5.2. Jumper Wire Disconnection
The pre-wired jumper wires can be easily disconnected if you need to reconfigure the panel or replace individual components. To disconnect:
- Locate the clips on the insulated terminals.
- Press down on the clips firmly.
- Gently pull the jumper wire from the blade terminal.
Note: Do not pull the jumper wires directly without pressing the clips to avoid damaging the terminals.

Figure 5: Easy Disconnection of Jumper Wires
5.3. Component Removal and Replacement
The individual components (switch, voltmeter, USB charger, 12V outlet) are designed to be removable from the panel. This allows for customization or replacement if needed. To remove a component, unscrew the retaining nut from the back and gently push the component out from the front.

Figure 6: Replaceable Components
5.4. General Installation Steps
After selecting your desired wiring method and ensuring all connections are secure, mount the panel in your chosen location using the provided screws. Ensure adequate space behind the panel for wiring and component depth.

Figure 7: Installation Process
6. Operating Instructions
6.1. ON/OFF Toggle Switch
The integrated toggle switch controls the power to the panel or specific loads, depending on your wiring configuration. Press the switch to the 'ON' position to activate, and to the 'OFF' position to deactivate. The switch features an LED indicator.
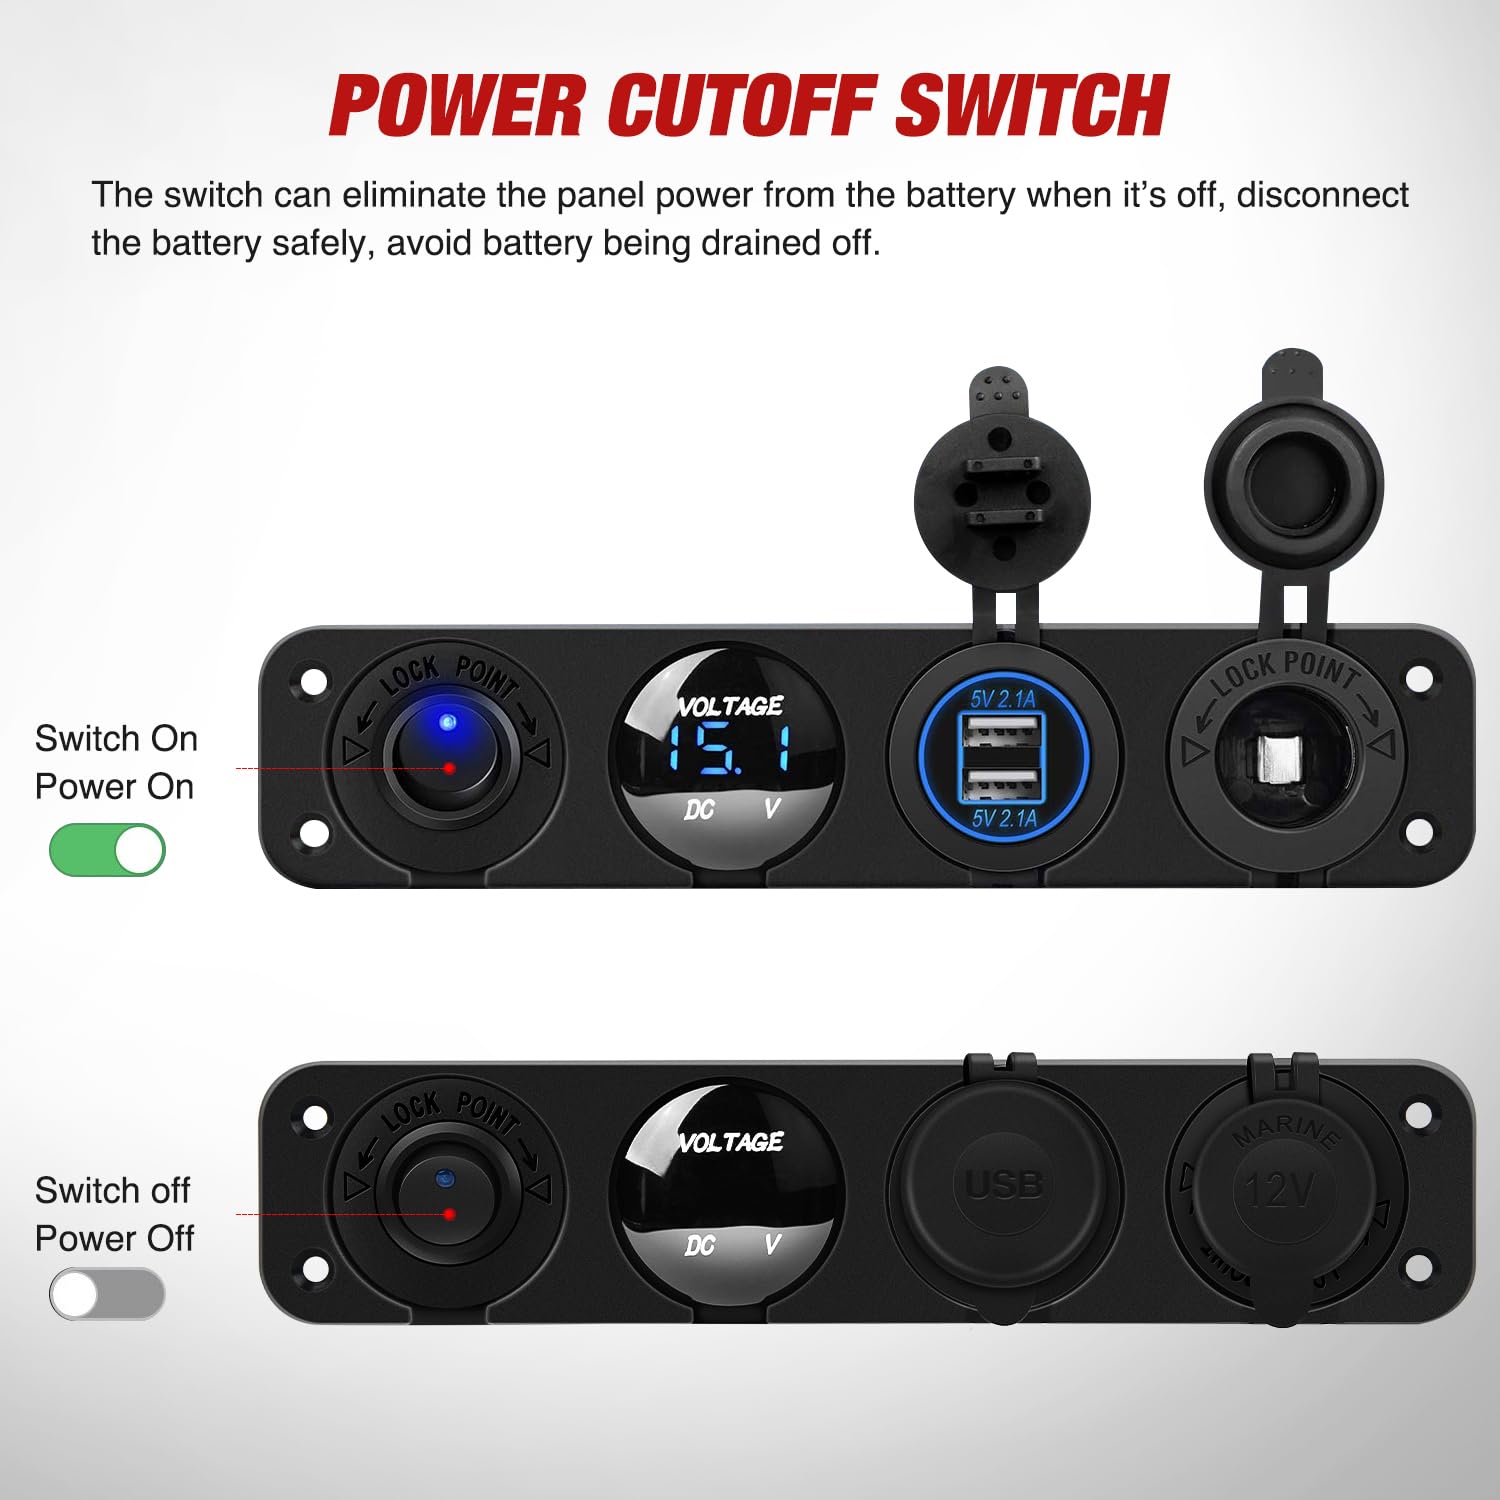
Figure 8: Power Cutoff Switch Operation
6.2. LED Voltmeter
The LED voltmeter provides real-time voltage readings of your vehicle's electrical system. This helps monitor battery health and ensures the voltage is within a normal operating range.
- <12V: Indicates low voltage. Charge or replace the battery as soon as possible.
- 12V-12.8V: Normal voltage range before starting the engine.
- 12V-14.8V: Normal voltage range after starting the engine.

Figure 9: Real-Time Voltmeter Display
6.3. Dual USB Charger
The dual USB charging ports provide 5V/2.1A output each, allowing you to charge two devices simultaneously. This is suitable for smartphones, tablets, GPS devices, and other USB-powered electronics.

Figure 10: Dual USB Charger
6.4. 12V Cigarette Lighter Outlet
The 12V cigarette lighter outlet provides power for various accessories, with a total power output of up to 150W (at 12V) or 300W (at 24V). This can power devices such as car DVRs, air purifiers, GPS units, vacuum cleaners, and air compressors.

Figure 11: 12V Cigarette Lighter Outlet
6.5. Product Video Overview
Video 1: An official Nilight video demonstrating the features and functionality of the 4-in-1 Charger Socket Panel, including the ON/OFF switch, voltmeter, USB ports, and 12V outlet.
7. Maintenance
- Regularly inspect all wiring connections for tightness and corrosion.
- Keep the panel clean and free from dust and debris. Use a soft, dry cloth for cleaning.
- Ensure the protective caps for the USB ports and 12V outlet are securely closed when not in use to prevent moisture and dust ingress.
- Check the fuse periodically. If a component stops working, inspect the fuse for the panel. Replace with a fuse of the same rating (10A).
8. Troubleshooting
- No Power to Panel: Check the main power connection to the panel. Verify the vehicle's battery is charged. Inspect the inline fuse for the panel and replace if blown.
- USB Ports Not Charging: Ensure the panel's main switch is ON. Check the USB cable and the device being charged. Verify the vehicle's voltage is within the normal operating range using the voltmeter.
- 12V Outlet Not Working: Ensure the panel's main switch is ON. Check the connected device. Verify the vehicle's voltage is sufficient.
- Voltmeter Not Displaying: Check power connections to the voltmeter. Ensure the panel is receiving power.
9. Warranty and Support
Nilight products are designed for durability and performance. For specific warranty details, please refer to the product packaging or contact Nilight customer support directly. Nilight is committed to providing quality products and support.
For technical assistance or inquiries, please visit the official Nilight store or contact their support channels.
- Nilight Store: Visit Nilight Store on Amazon