1. Safety Information
Read all instructions carefully before beginning installation. Failure to follow these instructions may result in electrical shock, fire, or personal injury.
- Always disconnect power at the circuit breaker or fuse box before installation or servicing.
- All wiring must be in accordance with national and local electrical codes. If you are unfamiliar with wiring, consult a qualified electrician.
- Ensure the installation site can support the weight of the fan (approximately 3.53 kg).
- Do not operate the fan with damaged blades or housing.
- Maintain a minimum clearance of 7 feet (2.1 meters) from the floor to the bottom edge of the fan blades.
- Do not insert objects into the path of the fan blades.
2. Package Contents
Verify that all components listed below are present before beginning installation. If any parts are missing or damaged, do not proceed with installation and contact customer support.
- Motor Housing Assembly
- Fan Blades (4) - Reversible white/bleached oak
- Blade Brackets (4)
- Downrod
- Canopy
- Mounting Bracket
- Light Kit Assembly
- Mushroom Globe Glass
- Pull Chains (2)
- Hardware Pack (screws, washers, wire nuts)
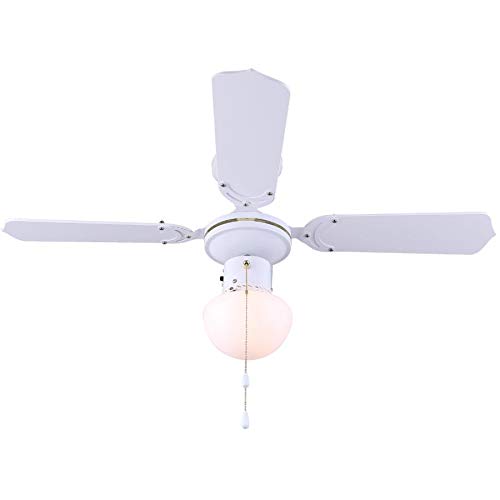
Figure 2.1: Overview of the Canarm Unity Ceiling Fan with Light, displaying the motor housing, four blades, and the central mushroom globe light.
3. Setup and Installation
Professional installation is recommended. Ensure power is disconnected at the circuit breaker before proceeding.
3.1 Mounting the Fan
- Secure the mounting bracket to the ceiling junction box. Ensure the junction box is securely fastened to the building structure and can support the fan's weight.
- Feed the electrical wires from the junction box through the center hole of the mounting bracket.
- Attach the downrod to the motor housing, ensuring all screws are tightened.
- Carefully lift the fan assembly and hang it from the mounting bracket using the hook provided on the downrod.
3.2 Electrical Connections
Connect the fan's electrical wires to the household wiring according to the following:
- Connect the green/bare copper wire (ground) from the fan to the ground wire from the junction box.
- Connect the white wire (neutral) from the fan to the white wire from the junction box.
- Connect the black wire (hot for fan) from the fan to the black wire from the junction box.
- Connect the blue wire (hot for light) from the fan to the black or blue wire from the junction box (if separate light switch).
- Secure all connections with wire nuts and ensure no loose strands of wire are exposed.
3.3 Attaching Fan Blades
- Attach each blade to a blade bracket using the provided screws. Ensure the desired blade finish (white or bleached oak) is facing downwards.
- Secure each blade assembly to the motor housing using the screws provided. Ensure all screws are tight.
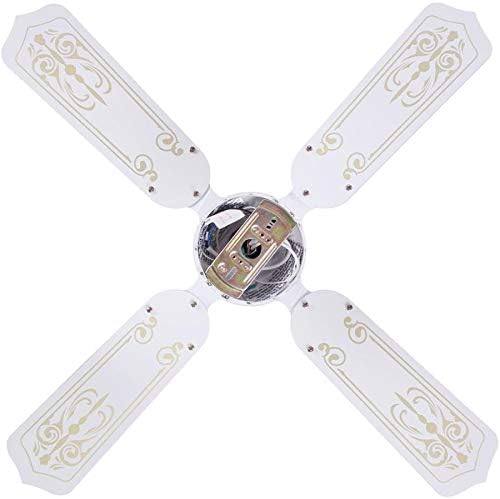

Figure 3.3: Images showing the blade attachment points on the motor housing (left) and the assembled blades from a top-down perspective (right).
3.4 Installing the Light Kit
- Connect the light kit wires to the corresponding wires from the fan motor housing (usually white to white, blue to black).
- Secure the light kit assembly to the bottom of the motor housing with the provided screws.
- Install the appropriate light bulb(s) (not included) into the sockets.
- Carefully attach the mushroom globe glass to the light kit by twisting or securing with screws, depending on the design.

Figure 3.4: Close-up view of the fan's light kit with the mushroom globe glass.
3.5 Final Steps
- Carefully slide the canopy up against the ceiling and secure it with the provided screws.
- Restore power at the circuit breaker.
4. Operating Instructions
The Canarm Unity ceiling fan is operated by two pull chains.
- Fan Speed Control: One pull chain controls the fan speed. Pull the chain repeatedly to cycle through the three available speeds (High, Medium, Low) and Off.
- Light Control: The second pull chain controls the light. Pull the chain to turn the light On or Off.
- Blade Reversal: To change the direction of the fan blades (e.g., for summer cooling or winter heat circulation), locate the slide switch on the motor housing. With the fan off, slide the switch to the opposite position. This fan features reversible white/bleached oak blades.

Figure 4.1: The Canarm Unity fan installed, demonstrating its function within a living space.
5. Maintenance
Regular maintenance ensures optimal performance and extends the life of your ceiling fan.
- Cleaning: Periodically clean the fan blades and motor housing with a soft, damp cloth. Do not use abrasive cleaners or solvents.
- Tightening Screws: Check all screws on the blade attachments and mounting hardware annually. Tighten any loose screws to prevent wobbling or noise.
- Light Bulb Replacement: Disconnect power before replacing light bulbs. Allow bulbs to cool before handling. Use bulbs of the correct wattage and type as specified in the fan's electrical ratings.
6. Troubleshooting
Before attempting any repairs, ensure power is disconnected at the circuit breaker.
| Problem | Possible Cause | Solution |
|---|---|---|
| Fan does not start | No power to the fan; Loose wire connections; Motor malfunction | Check circuit breaker/fuse; Verify all wire connections are secure; Contact a qualified electrician or customer support. |
| Light does not work | Bulb faulty or loose; Loose wire connections; Light kit malfunction | Replace bulb; Tighten bulb; Check light kit wiring; Contact customer support. |
| Fan wobbles | Loose blade screws; Unbalanced blades; Loose mounting bracket | Tighten all blade screws; Ensure blades are balanced (balancing kit may be needed); Verify mounting bracket is secure. |
| Noisy operation | Loose screws; Motor bearings; Canopy rubbing ceiling | Check and tighten all screws; Ensure canopy is not touching the ceiling; If motor noise persists, contact customer support. |
7. Specifications
| Brand | Canarm |
| Model Number | CF2336411L |
| Product Dimensions | 91.44 x 91.44 x 20.32 cm (36 x 36 x 8 inches) |
| Item Weight | 3.53 kg |
| Colour | White |
| Number of Blades | 4 |
| Blade Finish | Reversible White/Bleached Oak |
| Number of Speeds | 3 |
| Power/Wattage | 60 watts |
| Mounting Type | Downrod Mount |
| Controller Type | Pull Chain Control |
8. Warranty and Support
This product is covered by the manufacturer's standard warranty. Please refer to the warranty card included in your original packaging for specific terms and conditions.
For technical assistance, missing parts, or warranty claims, please contact Canarm customer support. Contact information can typically be found on the manufacturer's website or on the product packaging.
Please retain this manual for future reference.


