
1. Introduction
The BSIDE ACM91 Digital Clamp Multimeter is a versatile and essential tool designed for accurate electrical measurements. This True RMS auto-ranging meter can measure AC/DC current, AC/DC voltage, resistance, capacitance, temperature, frequency, and continuity. It also features Non-Contact Voltage (NCV) detection, Live Wire Check, and a Low Impedance (LoZ) mode for identifying ghost voltages. Its compact design and comprehensive functions make it suitable for both automotive and household electrical troubleshooting.

Figure 1.1: The BSIDE ACM91 Clamp Multimeter being used to measure current in an automotive application. The display shows a reading of 0.039 amps.
2. Safety Information
To ensure safe operation and service of the meter, follow these instructions:
- Always adhere to local and national safety codes.
- Do not use the meter if it appears damaged or if the insulation on the test leads is compromised.
- Do not apply more than the rated voltage, as marked on the meter, between the terminals or between any terminal and earth ground.
- Exercise extreme caution when working with voltages above 30V AC RMS, 42V peak, or 60V DC. These voltages pose a shock hazard.
- Before measuring current, ensure the circuit is de-energized and the meter is properly connected in series.
- Before measuring resistance or continuity, ensure the circuit is de-energized and all capacitors are discharged.
- Remove the test leads from the meter before opening the battery cover.
- Replace the batteries immediately when the low battery indicator appears to ensure accurate readings.
- This device conforms to IEC-61010-1, IEC-61010-2-030, IEC-61010-2-032, IEC-61010-2-033 standards. Over-voltage protection class CAT III 300V, CAT II 600V, pollution degree II.
3. Package Contents
Verify that all items listed below are included in your package. If any items are missing or damaged, please contact your vendor.
- 1 x BSIDE ACM91 Digital Clamp Meter
- 1 x Pair of Test Leads (Red and Black)
- 1 x Thermocouple (for temperature measurement)
- 1 x User Manual (this document)
- 1 x Carrying Case
- Note: 1.5V (AAA) x 2 batteries are not included due to aviation security regulations.
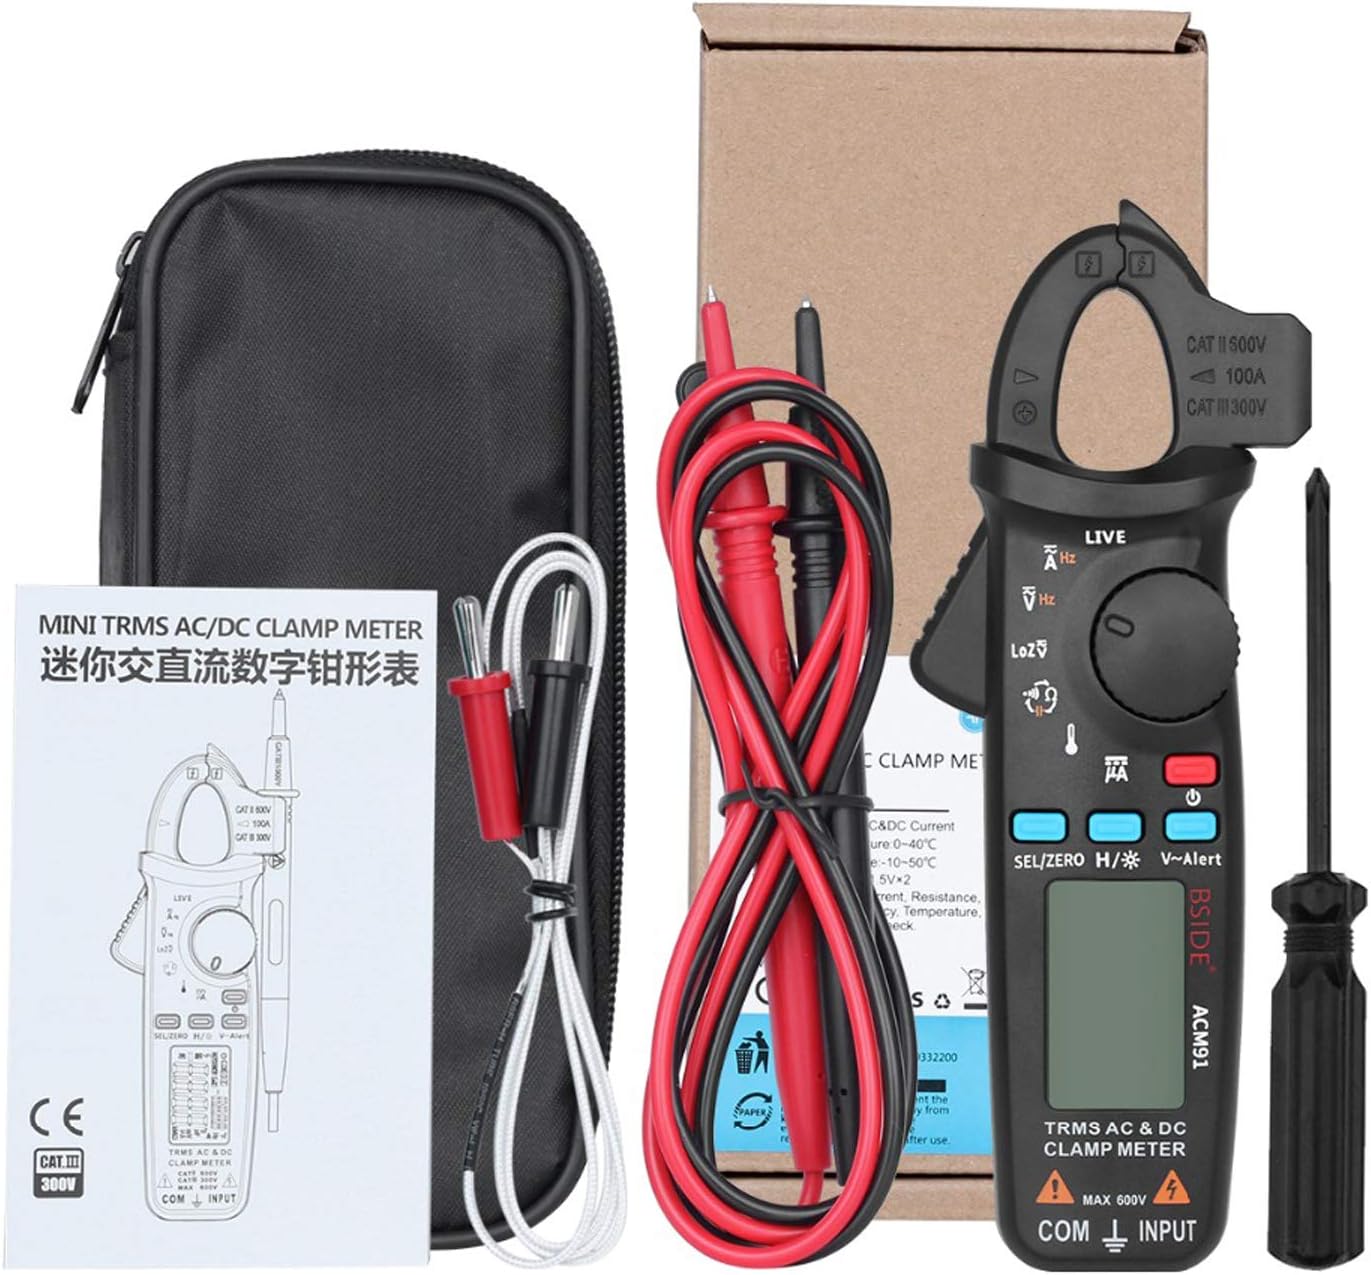
Figure 3.1: All components included in the BSIDE ACM91 Clamp Multimeter package.
4. Product Overview
Familiarize yourself with the various parts of the BSIDE ACM91 Clamp Multimeter.

Figure 4.1: Labeled diagram of the BSIDE ACM91 Clamp Multimeter components.
- Jaws: Used for non-contact AC/DC current measurement. Jaw capacity is 20mm.
- Trigger: Opens the jaws.
- Rotary Switch: Selects the measurement function (e.g., Voltage, Resistance, Current).
- Power Button: Turns the meter ON/OFF.
- SEL/ZERO H/* V-Alert Button:
- Press to select measurement modes (e.g., AC/DC, Resistance/Continuity/Capacitance).
- Long press to activate the Zero function for DC current.
- Long press to activate the V-Alert (NCV) function.
- Short press to activate Data Hold (H) or Backlight (*).
- Display: Shows measurement readings, units, and function indicators. Features a dual-line display.
- Input Terminals (COM, INPUT): For connecting test leads for voltage, resistance, capacitance, frequency, and temperature measurements.
- V-Alert Sensor Area: Detects non-contact AC voltage.
- Slot for Test Lead: Convenient storage for one test lead.
5. Setup
5.1 Battery Installation
The meter requires two 1.5V AAA batteries (not included).
- Ensure the meter is turned OFF and disconnect any test leads from the input terminals.
- Locate the battery compartment cover on the back of the meter.
- Use a screwdriver to loosen the screw on the battery cover.
- Remove the battery cover.
- Insert two AAA batteries, observing the correct polarity (+ and -) as indicated inside the compartment.
- Replace the battery cover and secure it with the screw.
5.2 Connecting Test Leads
For measurements requiring test leads (voltage, resistance, capacitance, frequency, temperature), connect them as follows:
- Insert the black test lead into the "COM" (common) input terminal.
- Insert the red test lead into the "INPUT" terminal.
6. Operating Instructions
Turn on the meter by pressing the power button. Select the desired function using the rotary switch.
6.1 AC/DC Current Measurement (Clamp)
This meter can measure both AC and DC current using the clamp jaws, with a minimum resolution of 1mA.
- Rotate the switch to the A~ (AC Current) or A= (DC Current) position.
- For DC current, if the reading is unstable or needs to be zeroed, long press the "SEL/ZERO" button to activate the zero function.
- Open the clamp jaws using the trigger.
- Enclose only one conductor (wire) within the jaws. Ensure the jaws are fully closed.
- Read the current value on the display.
6.2 AC/DC Voltage Measurement
Measure voltage using the test leads.
- Rotate the switch to the V~ (AC Voltage) or V= (DC Voltage) position. The meter will auto-detect AC or DC.
- Connect the black test lead to the "COM" terminal and the red test lead to the "INPUT" terminal.
- Connect the test probes in parallel to the circuit or component you wish to measure.
- Read the voltage value on the display.
6.3 Resistance, Continuity, and Capacitance Measurement
These functions share a single rotary switch position.
- Rotate the switch to the Ω (Resistance/Continuity/Capacitance) position.
- Press the "SEL" button to cycle through Resistance (Ω), Continuity ()))), and Capacitance (-||-) modes.
- Connect the test leads to the component. For resistance and continuity, ensure the circuit is de-energized. For capacitance, ensure the capacitor is discharged before measurement.
- Read the value on the display. The continuity beeper sounds if resistance is less than 30Ω.
6.4 Temperature Measurement
Use the included thermocouple for temperature readings.
- Rotate the switch to the °C/°F (Temperature) position.
- Connect the thermocouple to the input terminals, observing polarity.
- Place the thermocouple tip on or near the object whose temperature you wish to measure.
- Read the temperature on the display.
6.5 NCV (Non-Contact Voltage) Detection
Detect AC voltage without direct contact.
- Long press the "V-Alert" button to activate NCV mode. The display will show "NCV".
- Move the top of the meter (V-Alert sensor area) close to the conductor or outlet.
- If AC voltage is detected, the LCD backlight will turn red and the beeper will sound, with increasing frequency as the voltage strength increases.
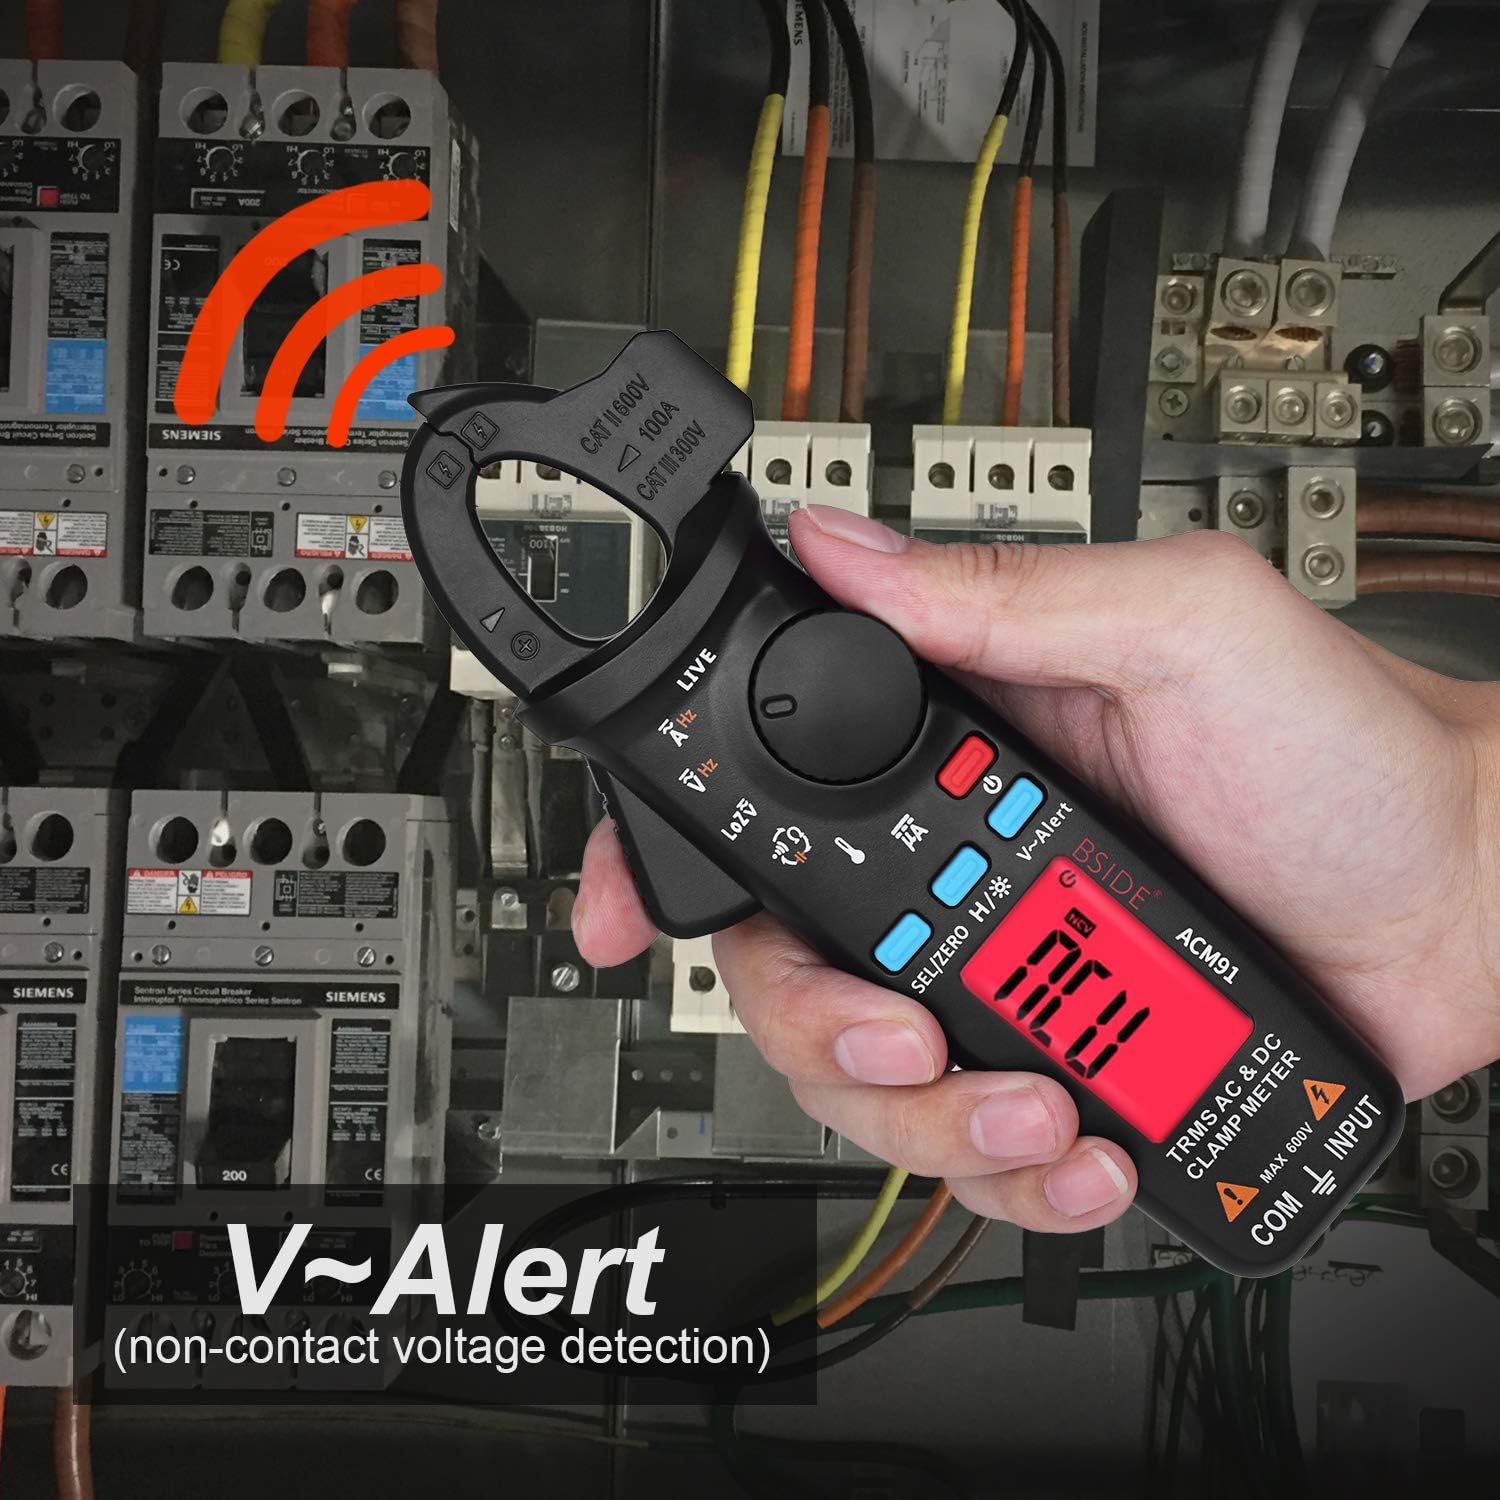
Figure 6.1: NCV (Non-Contact Voltage) detection in progress, showing the meter's ability to detect voltage without physical contact.
6.6 LoZ (Low Impedance) Voltage Measurement
This mode helps identify and eliminate ghost or stray voltages by providing a low impedance path.
- Rotate the switch to the LoZ V~ position.
- Connect the test leads to the circuit.
- Read the voltage value on the display.
6.7 Live Wire Check
Identify live wires in an electrical system.
- Rotate the switch to the LIVE position.
- Connect the red test lead to the "INPUT" terminal and the black test lead to the "COM" terminal.
- Touch the red test probe to the wire or terminal you suspect is live.
- If the wire is live, the LCD backlight will turn red and the beeper will sound.

Figure 6.2: Live Wire Check function in use, indicating a live circuit.
6.8 Data Hold and Backlight
- Data Hold (H): Short press the "H/*" button to freeze the current reading on the display. Press again to release.
- Backlight (*): Long press the "H/*" button to turn the display backlight ON or OFF.

Figure 6.3: The dual line display of the ACM91, capable of showing two measurements simultaneously, such as AC voltage/current and frequency.
7. Specifications
Technical specifications for the BSIDE ACM91 Clamp Multimeter.
| Measurement | Range | Resolution | Accuracy |
|---|---|---|---|
| Display | 6000 counts | ||
| DC Current (Clamp) | 6A/60A/100A | 0.001A/0.01A/0.1A | ±(3.0%+5 counts) |
| DC Current (µA) | 0-200µA | 0.1µA | ±(0.8%+5 counts) |
| AC Current (Clamp) | 6A/60A/100A | 0.001A/0.01A/0.1A | ±(2.5%+5 counts) |
| DC Voltage | 6V/60V/600V | 0.001V/0.01V/0.1V | ±(1.0%+3 counts) |
| AC Voltage | 6V/60V/600V | 0.001V/0.01V/0.1V | ±(1.0%+3 counts) |
| Low Impedance (LoZ) | Max 600V | 0.1V | - |
| Resistance | 600Ω/6kΩ/60kΩ/600kΩ/6MΩ | 0.1Ω/0.001kΩ/0.01kΩ/0.1kΩ/0.001MΩ | ±(1.0%+3 counts) |
| 60MΩ | 0.01MΩ | ±(1.2%+20 counts) | |
| Capacitance | 600µF/6000µF | 0.1µF/1µF | ±(4.0%+3 counts) |
| Frequency (Terminals) | 60Hz/1000Hz | 0.1Hz/1Hz | ±(1.0%+5 counts) |
| Frequency (Jaws) | 60Hz/1000Hz | 0.1Hz/1Hz | ±(1.0%+5 counts) |
| Buzzer (Continuity) | Sounds if resistance is less than 30Ω | ||
| Temperature | -20°C~500°C | 1°C/2°F | ±(2.0%+2 counts) |
| Jaw Capacity | 20mm | ||
| Power | 1.5V (AAA) x 2 | ||
| Size | 179mm x 67mm x 36 mm | ||
| Weight | 137g | ||
8. Maintenance
8.1 Cleaning
Wipe the case with a damp cloth and mild detergent. Do not use abrasives or solvents. Ensure the meter is dry before use.
8.2 Battery Replacement
When the low battery indicator appears on the display, replace the batteries immediately to ensure accurate readings. Refer to Section 5.1 for battery installation instructions.
8.3 Storage
If the meter is not to be used for an extended period, remove the batteries to prevent leakage and damage to the device. Store the meter in its carrying case in a cool, dry place, away from direct sunlight and extreme temperatures.
9. Troubleshooting
| Problem | Possible Cause and Solution |
|---|---|
| Meter does not turn on. |
|
| No reading or "OL" (Overload) displayed. |
|
| Inaccurate readings. |
|
| Continuity beeper does not sound. |
|
10. Warranty and Support
For warranty information or technical support, please refer to the contact details provided with your purchase or visit the official BSIDE website. Keep your purchase receipt as proof of purchase for warranty claims.
This product is designed for reliable performance. Should you encounter any issues not covered in this manual, please contact customer support for assistance.
