
Blastking BDT15CMB2
BLASTKING BDT15CMB2 Active and Passive Speaker System
User Instruction Manual
Introduction
This manual provides comprehensive instructions for the setup, operation, and maintenance of your BLASTKING BDT15CMB2 Active and Passive Speaker Box System. This system is designed for professional audio applications, offering powerful sound output and versatile connectivity options. Please read this manual thoroughly before operating the system to ensure proper use and to maximize its performance and longevity.
Package Contents
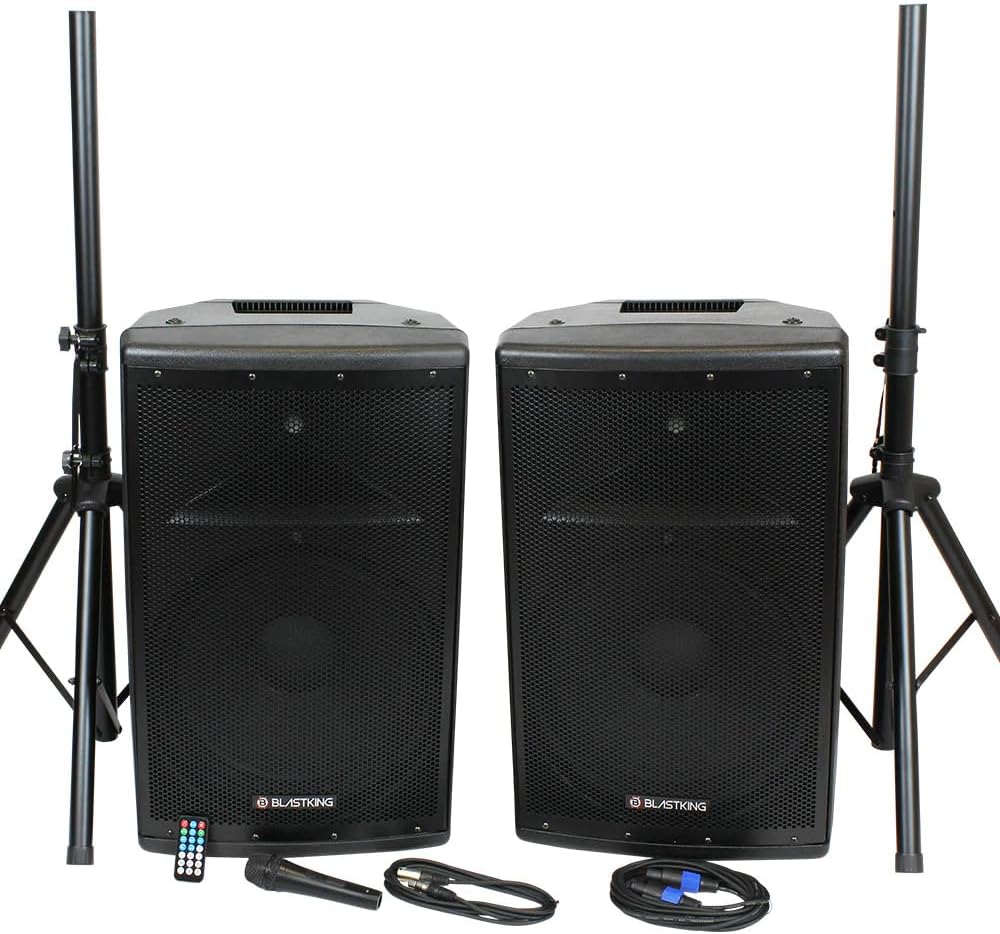
The BLASTKING BDT15CMB2 system includes the following components:
- 1 x Active Speaker
- 1 x Passive Speaker
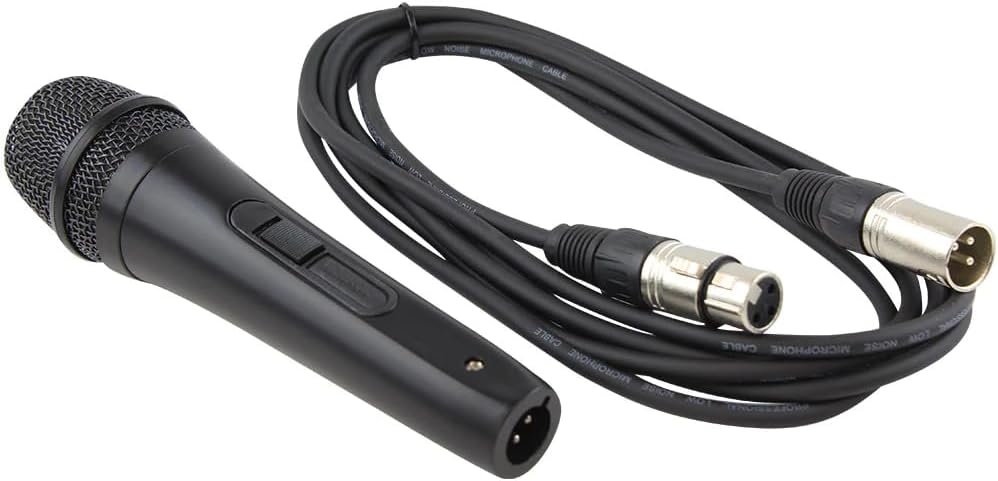
- 1 x Wired Microphone
- 1 x Microphone Cable (XLR)
- 1 x Speaker Cable (Speakon)
- 2 x Speaker Stands
- 1 x Remote Control
Setup Guide
1. Unpacking
Carefully remove all components from the packaging. Inspect each item for any signs of damage. Retain the original packaging for future transport or storage.
2. Speaker Placement
Position the speaker stands on a flat, stable surface. Extend the legs of the stands fully to ensure maximum stability. Mount the active and passive speakers onto the speaker stands. Ensure the speakers are securely seated on the poles.

3. Connecting the System
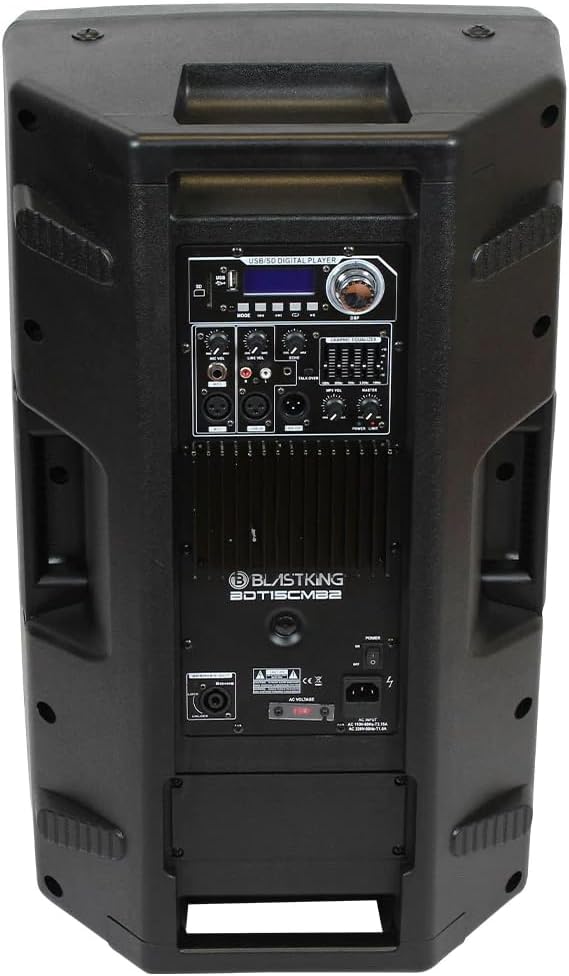
- Connect the active speaker to the passive speaker using the provided Speakon speaker cable. Insert one end into the 'Speakon Output to Passive Speaker Box' on the active unit and the other end into the 'Input' on the passive unit.
- Connect the wired microphone to the 'Mic In' XLR or 1/4" Phone Jack on the active speaker using the provided microphone cable.
- For external audio sources, use the appropriate 'Line In' (RCA, XLR, or 1/8" Phone Jack) connections on the active speaker.
- Ensure all connections are secure before powering on the system.
- Connect the active speaker to a standard 110-220V~50/60Hz power outlet using the power cable.


Operation
1. Powering On/Off
Locate the power switch on the rear panel of the active speaker. Flip the switch to the 'ON' position to power on the system. Flip to 'OFF' to power down.
2. Audio Inputs and Outputs
The active speaker features multiple input options including XLR, 1/4" Phone Jack, RCA, and 1/8" Phone Jack for various audio sources. An XLR 'Line Out' is available for connecting to additional audio equipment.
3. Digital Media Player
The integrated MP3 Digital Media Player supports Bluetooth, USB/SD card playback, and FM Radio. Use the LCD display and control buttons to navigate modes and tracks. The remote control provides convenient wireless operation.
4. Equalizer Adjustment
Utilize the 5-Band Graphic Equalizer on the active speaker's control panel to fine-tune the audio output to your preference or acoustic environment.
5. Microphone Usage
Adjust the microphone input level using the dedicated gain control. Position the microphone appropriately to avoid feedback.
Maintenance and Care
- Cleaning: Use a soft, dry cloth to clean the speaker cabinets. For stubborn dirt, a slightly damp cloth can be used, but ensure no moisture enters the speaker grilles or control panel. Avoid abrasive cleaners or solvents.
- Storage: When not in use, store the speakers in a cool, dry place, away from direct sunlight and extreme temperatures. If possible, use the original packaging for protection.
- Handling: Always use the top and side handles for easy transport. Avoid dropping or subjecting the speakers to strong impacts.

Troubleshooting
| Issue | Probable Cause | Solution |
|---|---|---|
| No Sound | Power not connected or switched off. Input source not connected or volume too low. Speaker cable between active and passive unit loose or faulty. | Check power connection and switch. Verify audio input cables are securely connected and source volume is adequate. Ensure Speakon cable is firmly connected at both ends. |
| Distorted Sound | Input signal too high (clipping). Equalizer settings are extreme. Speaker damaged. | Reduce input volume from the source or on the speaker. Adjust equalizer settings to a more neutral position. If distortion persists, contact support. |
| Bluetooth Connectivity Issues | Device not in pairing mode. Speaker too far from device. Interference. | Ensure speaker is in Bluetooth mode and discoverable. Move device closer to speaker. Avoid other wireless devices that may cause interference. |
| Microphone Feedback | Microphone too close to speakers. Microphone gain too high. | Reposition microphone further from speakers. Reduce microphone gain level. |
Technical Specifications
| Feature | Specification |
|---|---|
| Woofer | 15”, 2.5” VC |
| Compression Driver | 1.35” VC |
| RMS Power | 500W |
| Max Power | 1000W |
| Frequency Response | 58Hz-20KHz |
| Sensitivity | 95dB |
| Impedance | 8 Ohm |
| Amplifier Class | Class-H |
| Equalizer | 5-Band Graphic |
| Digital Media Player | MP3 with LCD, Bluetooth, USB/SD, FM Radio |
| Mic In | XLR & 1/4” Phone Jack |
| Line In | RCA, XLR & 1/8” Phone Jack |
| Line Out | XLR |
| Speakon Output | To Passive Speaker Box |
| Power Supply | 110-220V~50/60Hz |
| Handles | Top and Side |
| Active Speaker Dimensions (H x W x D) | 27.9”/ 710 mm x 16.9”/ 430 mm x 14.7”/ 375 mm |
| Active Speaker Weight | 39.2 Lbs / 17.8 Kg |
| Passive Speaker Dimensions (H x W x D) | 27.9”/ 710 mm x 16.9”/ 430 mm x 14.7”/ 375 mm |
| Passive Speaker Weight | 33.7 Lbs / 15.3 Kg |
| Mounting Type | Plug Mount |
| Power Source | Corded Electric |
| Connector Type | XLR |
| Number of Channels | 4 |
| Color | Black |
| Connectivity Technology | Bluetooth, RCA, USB |
| UPC | 686811894177 |
Warranty and Support
For warranty information and technical support, please refer to the contact details provided with your purchase or visit the official Blastking website. Keep your proof of purchase for any warranty claims.
Related documentsBDT15CMB2


Ask a question about this manual
Ask about setup, troubleshooting, compatibility, parts, safety, or missing instructions. Manuals+ will review the question and use this page’s manual context to help answer it.