
SURKER 4D
SURKER 4D Electric Rotary Shaver User Manual
Model: 4D
Brand: SURKER
1. Important Safety Information
Please read all instructions carefully before using this appliance. Keep this manual for future reference.
- Use with caution near water. This appliance is waterproof, but ensure the charging port is dry before charging.
- Keep out of reach of children.
- Always hold the shaver away from your skin while turning it on or off to avoid injury.
- Do not disassemble the product or attempt to repair it yourself. Contact qualified personnel for service.
- Do not use if the appliance or any attachment is damaged.
- Avoid prolonged charging. Unplug the charger once the battery is full to prevent potential damage.
2. Product Overview
The SURKER 4D Electric Rotary Shaver is a versatile 5-in-1 grooming kit designed for various facial and head grooming needs. It includes multiple interchangeable heads for shaving, trimming, and cleansing.

Image: The main shaver unit with the 4D rotary head attached, alongside the nose trimmer, hair clipper, facial cleansing brush, and soft face sponge attachments.

Image: All components of the grooming kit laid out, including the shaver unit, 4D rotary head, hair clipper with guide combs, nose trimmer, facial cleansing brush, soft face sponge, cleaning brush, and USB charging cable.
Components:
- Main Shaver Unit: Ergonomic handle with power button and LED display.
- 4D Rotary Shaver Head: For close shaving of head and face.
- Precision Hair Clipper: For trimming hair and beard, includes guide combs (3mm, 6mm, 9mm, 12mm).
- Nose/Ear Hair Trimmer: For safe and effective removal of unwanted nose and ear hair.
- Facial Cleansing Brush: For deep cleaning and exfoliation of the face.
- Soft Face Sponge: For gentle facial massage or applying creams.
- USB Charging Cable: For convenient recharging.
- Cleaning Brush: For maintaining the attachments.
3. Setup and Charging
3.1 Initial Charge
Before first use, fully charge the shaver for approximately 2 hours. The LED display will show the battery percentage. A full charge provides extended cordless operation.
3.2 Charging Instructions
- Ensure the shaver is turned off.
- Locate the Micro USB charging port at the bottom of the shaver unit.
- Connect the provided USB charging cable to the shaver and to a compatible USB power source (e.g., computer, power bank, USB wall adapter).
- The LED display will indicate charging status. Once fully charged, disconnect the cable. Avoid overcharging by unplugging promptly.

Image: The shaver unit connected to a USB power source via its Micro USB port, illustrating the convenient charging method.
3.3 Attaching and Detaching Heads
- To attach a head: Align the desired attachment with the main unit and press firmly until it clicks into place.
- To detach a head: Gently pull the attachment away from the main unit.
4. Operating Instructions
4.1 Powering On/Off and Travel Lock
- To Power On: Press and hold the power button for approximately 3 seconds until the shaver starts.
- To Power Off: Press and hold the power button for approximately 3 seconds until the shaver stops.
- Travel Lock: To activate the travel lock, press and hold the power button for 5 seconds until a lock icon appears on the LED display. To deactivate, press and hold the power button for 5 seconds again until the lock icon disappears. This prevents accidental activation during travel.

Image: A close-up view of the shaver's main unit, highlighting the power button and LED display.
4.2 Using the 4D Rotary Shaver Head
This head is ideal for a close shave on your head or face. It can be used for both wet and dry shaving.
- Attach the 4D rotary shaver head to the main unit.
- For dry shaving: Ensure your skin is clean and dry.
- For wet shaving: Apply shaving foam or gel to your skin.
- Gently move the shaver in small, circular motions over the skin, applying light pressure.
- Stretch the skin with your free hand to ensure a smoother shave, especially on contoured areas.

Image: A man using the 4D rotary shaver head to shave his face, demonstrating proper handling and technique.

Image: A man using the 4D rotary shaver head to shave his head, illustrating the shaver's ergonomic design for head grooming.
4.3 Using Other Attachments
Refer to the image below for visual guidance on using the various attachments.

Image: A collage showing the shaver being used for facial shaving, the wide hair trimmer for head hair, the nose trimmer for nose hair, and the hair clipper for sideburns or beard shaping.
- Precision Hair Clipper: Attach the clipper head. Select a guide comb (3mm, 6mm, 9mm, 12mm) and slide it onto the clipper. Use for trimming beards, sideburns, or hair. Move against the direction of hair growth.
- Nose/Ear Hair Trimmer: Attach the nose trimmer head. Gently insert the trimmer tip into your nostril or ear canal. Move in a circular motion to trim unwanted hair. Do not insert too deeply.
- Facial Cleansing Brush: Attach the brush head. Dampen your face and apply a small amount of facial cleanser to the brush. Gently move the brush in circular motions over your face for deep cleansing.
- Soft Face Sponge: Attach the sponge head. Use with facial creams or for a gentle massage.
5. Maintenance and Cleaning
Regular cleaning ensures optimal performance and extends the lifespan of your shaver.
5.1 Cleaning the Shaver Heads
- Ensure the shaver is turned off and disconnected from the charger.
- Detach the shaver head (rotary, clipper, nose trimmer, etc.) from the main unit.
- For the rotary shaver head: Open the individual blade covers by gently prying them open. Rinse the blades and the head under running water. Use the small cleaning brush to remove any stubborn hair clippings.
- For other attachments: Rinse under running water. Use the cleaning brush for the clipper head if needed.
- Shake off excess water and allow all parts to air dry completely before reattaching or storing.
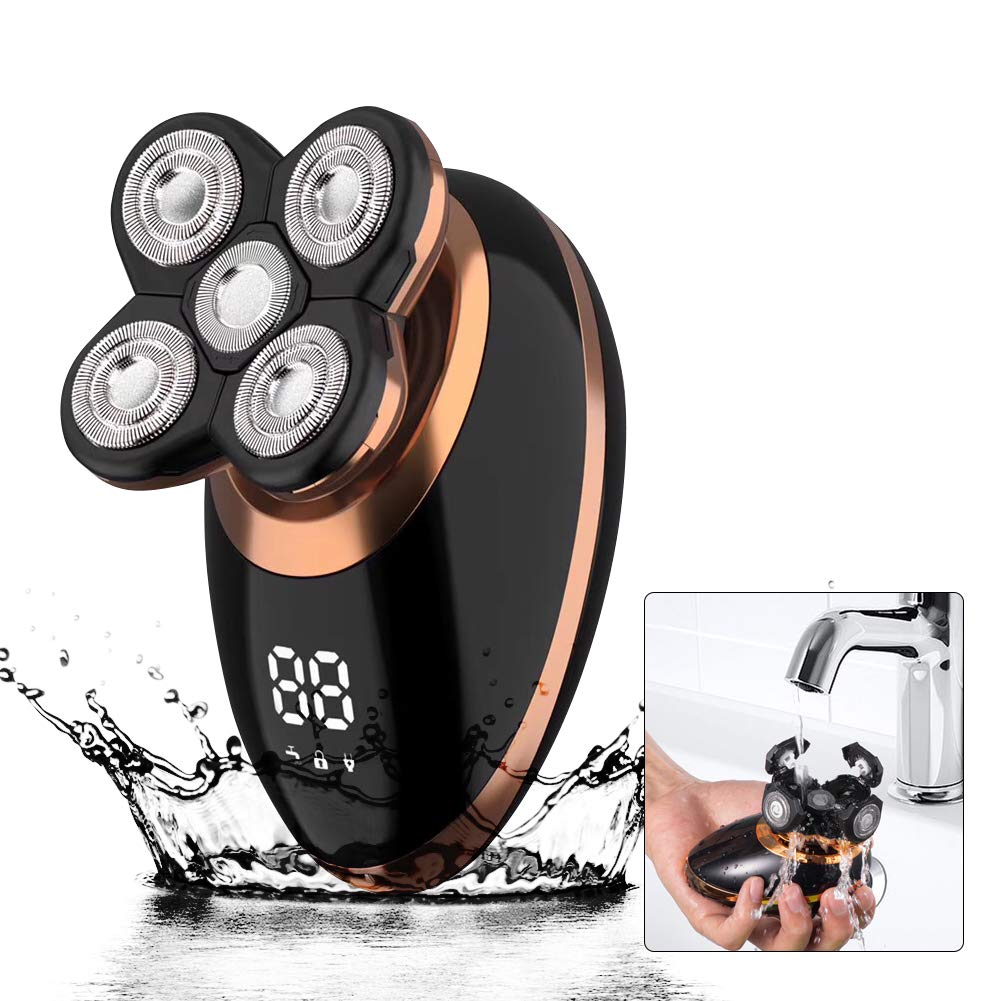
Image: The 4D rotary shaver head being cleaned under running water, demonstrating its waterproof design for easy maintenance.
5.2 Storage
Store the shaver and its attachments in a cool, dry place, away from direct sunlight and extreme temperatures. Ensure all parts are dry before storage.
6. Troubleshooting
| Problem | Possible Cause | Solution |
|---|---|---|
| Shaver does not turn on. | Battery is low or depleted. Travel lock is activated. | Charge the shaver fully. Deactivate the travel lock by pressing and holding the power button for 5 seconds. |
| Poor shaving performance. | Blades are dull or clogged with hair. Insufficient pressure or incorrect technique. | Clean the shaver head thoroughly. Ensure blades are free of debris. Apply light, circular motions. Consider replacing the shaver head if blades are worn. |
| Shaver stops unexpectedly. | Battery is low. | Recharge the shaver. |
| Irritation after shaving. | Skin not prepared properly. Blades are dull. Excessive pressure. | Ensure skin is clean. Use shaving foam/gel for wet shaving. Use light pressure. Consider replacing the shaver head. |
7. Specifications
- Model Name: 4D
- Brand: SURKER
- Power Source: Battery Powered (Rechargeable)
- Battery Type: 1 AAA battery required (included) - Note: This likely refers to an internal rechargeable battery, not a removable AAA.
- Recommended Uses: Beard, Head
- Special Feature: Rechargeable, Waterproof
- Package Dimensions: 11.1 x 6.81 x 3.58 inches
- Weight: 1.06 Pounds
8. Warranty and Support
Specific warranty information for the SURKER 4D Electric Rotary Shaver is not provided in the available product data. For warranty claims, technical support, or replacement parts, please contact the seller or manufacturer directly through your purchase platform.
It is recommended to retain your proof of purchase for any warranty-related inquiries.
Ask a question about this manual
Ask about setup, troubleshooting, compatibility, parts, safety, or missing instructions. Manuals+ will review the question and use this page’s manual context to help answer it.