1. Introduction
The Tilswall 50W Hot Glue Gun is a versatile tool designed for various crafting, DIY projects, and minor home repairs. Featuring rapid heating and an anti-drip design, it provides efficient and clean adhesive application. This manual provides essential information for safe and effective operation, maintenance, and troubleshooting.
2. Important Safety Instructions
- Always use the glue gun on a stable, heat-resistant surface.
- Do not touch the nozzle or melted glue directly. The nozzle reaches approximately 165°C and can cause severe burns.
- Keep the device out of reach of children and pets.
- Ensure adequate ventilation in the work area.
- Unplug the glue gun from the power outlet when not in use, during maintenance, or when changing glue sticks.
- Never attempt to remove a partially used glue stick from the back of the gun while it is hot. Allow it to cool completely.
- Do not use the glue gun in damp or wet conditions.
- Use only glue sticks with a 7mm diameter. Using incorrect sizes may damage the tool or cause malfunction.
- Do not leave the hot glue gun unattended.
3. Package Contents
Verify that all items are present in the package:
- 1 x Tilswall 50W Hot Glue Gun (Blue)
- 60 x Transparent Glue Sticks (7mm x 130mm)
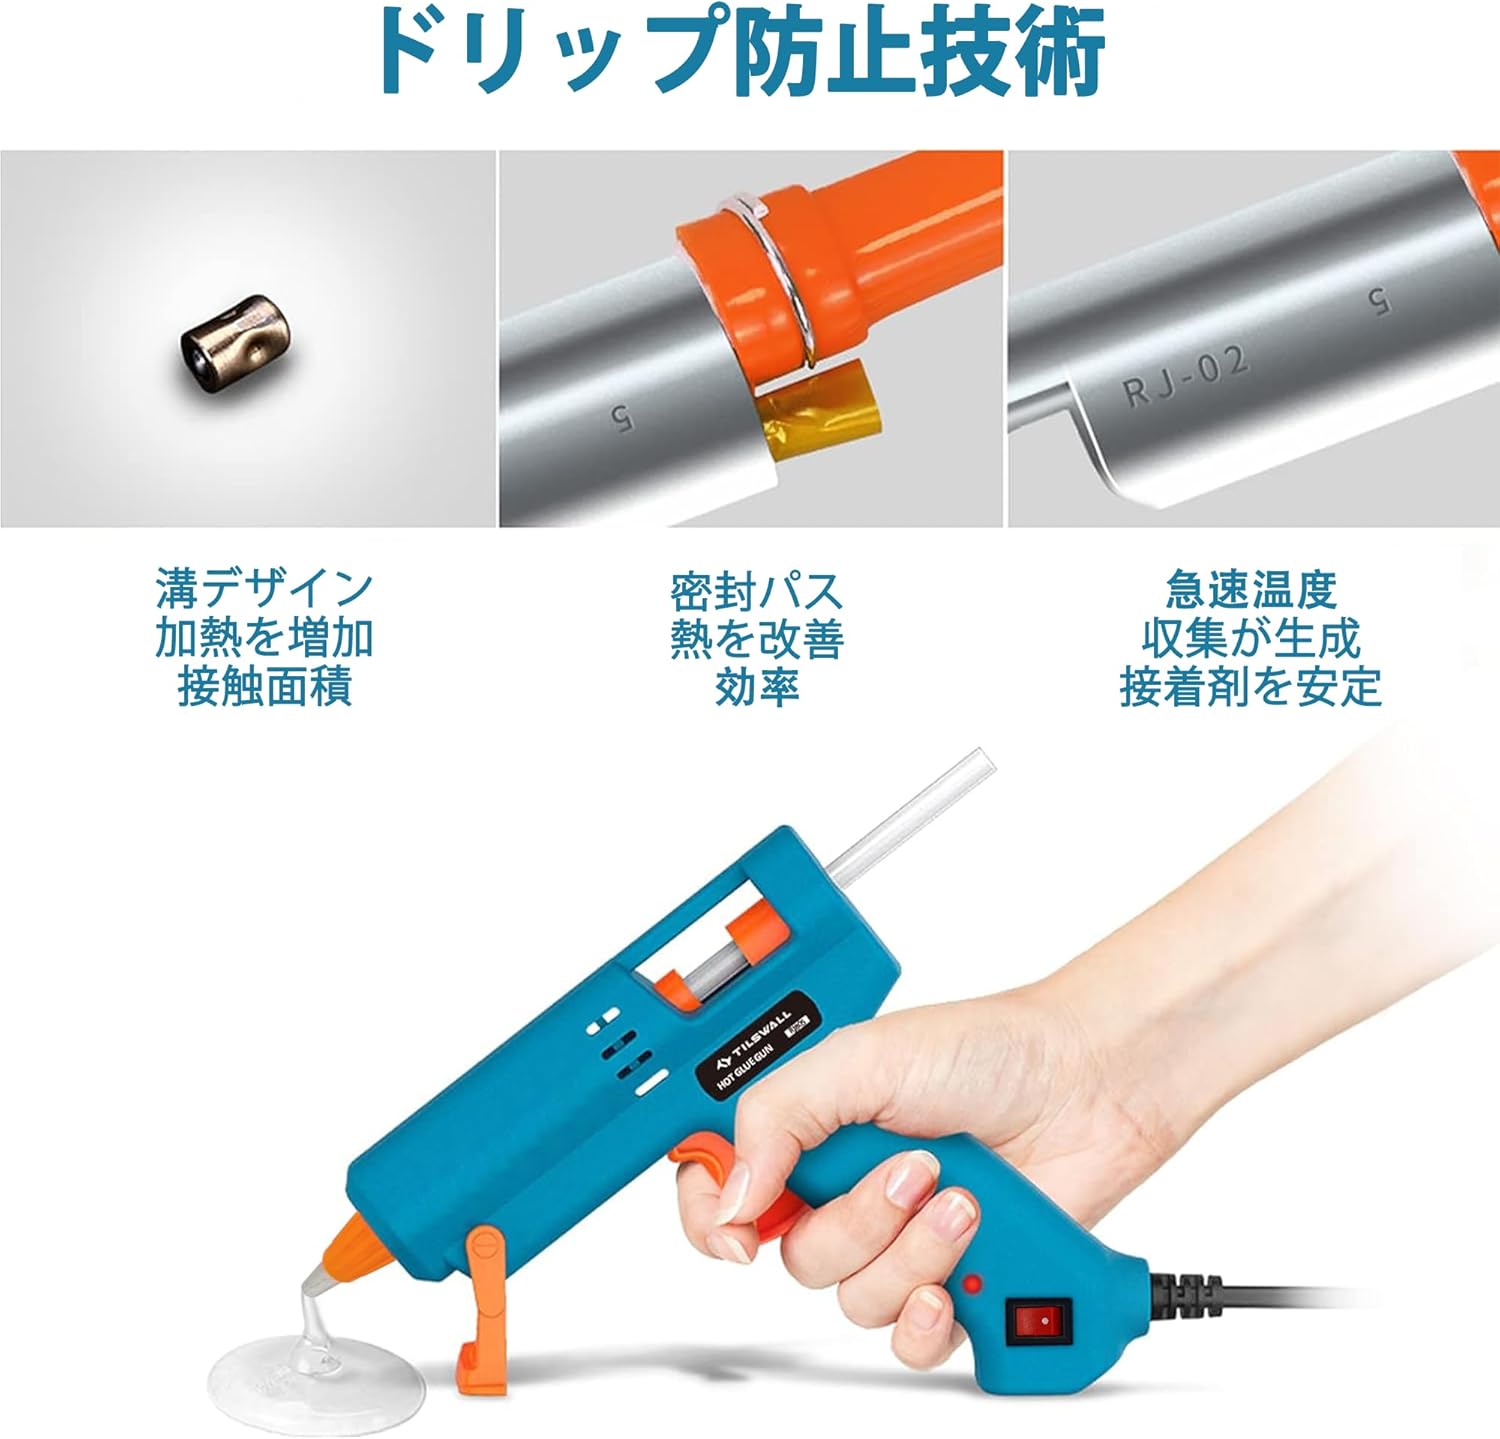
Image: The Tilswall Hot Glue Gun package includes the blue glue gun and 60 transparent glue sticks, each measuring 7mm in diameter and 130mm in length.
4. Product Overview
Familiarize yourself with the components of your Tilswall Hot Glue Gun:
- Nozzle: Heat-resistant silicone nozzle for glue dispensing.
- Trigger: Activates glue dispensing.
- Power Switch: On/Off control for the device.
- Stand: Non-metallic, stable stand to safely rest the hot glue gun.
- Glue Stick Inlet: Where glue sticks are inserted.
- Power Cord: Provides electrical power to the unit.

Image: The Tilswall 50W Hot Glue Gun, showing its blue body, orange trigger, nozzle, and integrated stand.

Image: An internal view of the Tilswall Hot Glue Gun highlighting its drip prevention technology, which includes a multi-spring and sealed structure to prevent glue backflow and dripping.
5. Setup
- Insert Glue Stick: Insert a 7mm diameter glue stick into the inlet at the back of the glue gun. Push it gently until it stops.
- Connect Power: Plug the power cord into a standard electrical outlet.
- Power On: Flip the power switch to the 'ON' position. An indicator light may illuminate.
- Preheat: Allow the glue gun to preheat for approximately 3 minutes. The PTC automatic constant temperature system will bring the nozzle to an optimal working temperature of about 165°C.
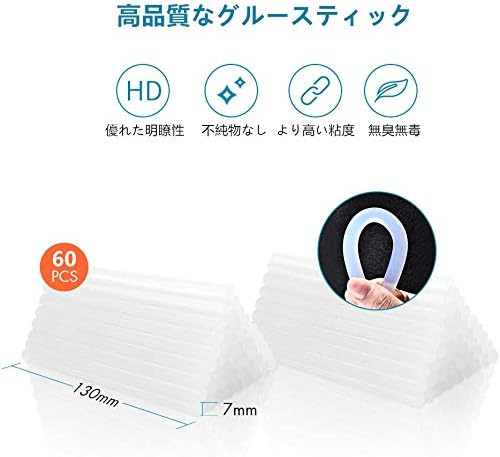
Image: A hand inserting a transparent glue stick into the rear inlet of the blue Tilswall Hot Glue Gun.
6. Operating Instructions
- Apply Glue: Once preheated, gently squeeze the trigger to dispense melted glue from the nozzle. Apply the glue to one of the surfaces you wish to bond.
- Join Surfaces: Immediately press the two surfaces together firmly. Hot glue sets quickly, so work efficiently.
- Secure: Hold the bonded items in place for a few seconds until the glue cools and solidifies.
- Continuous Use: The 1.5m power cord allows for extended reach, and the power switch enables easy on/off control without unplugging.
- Anti-Drip Feature: The glue gun is designed with a multi-spring and sealed structure to minimize dripping. However, placing a protective mat underneath is recommended.
Video: A demonstration of the Tilswall Hot Glue Gun being used to create a decorative sea urchin dome, showcasing the precise application of glue for crafting.
Video: A demonstration of the Tilswall Hot Glue Gun being used to create Halloween-themed decorations, showing how to apply glue to assemble pipe cleaner pumpkins and spiders.
Compatible Materials
The Tilswall Hot Glue Gun is suitable for bonding a wide range of materials, including:
- Wood
- Glass
- Metal
- Plastic
- Paper
- Fabric
- Ceramics
- Leather

Image: The Tilswall Hot Glue Gun shown with examples of materials it can bond, such as wood, glass, metal, stone, ceramics, paper, lace, and fabric.
7. Maintenance
- Cleaning the Nozzle: After use, allow the glue gun to cool completely. Once cool, any excess glue on the nozzle can be carefully peeled or wiped away. Do not use sharp objects to clean the nozzle while hot.
- Storage: Store the glue gun in a dry, clean place, away from direct sunlight and extreme temperatures. Ensure it is unplugged and completely cool before storing.
- Glue Stick Management: Do not force glue sticks into the gun. If a stick is jammed, allow the gun to heat up and gently push it through with a new stick.
8. Troubleshooting
| Problem | Possible Cause | Solution |
|---|---|---|
| No glue dispenses when trigger is squeezed. | Not plugged in, power switch off, not fully heated, glue stick not fully inserted. | Check power connection, turn on switch, allow 3 minutes for heating, ensure glue stick is pushed in completely. |
| Glue drips from the nozzle. | Normal for some hot glue guns, or slight excess pressure. | While this model has anti-drip technology, minor drips can occur. Place a silicone mat or protective surface underneath. Release trigger pressure slowly. |
| Glue gun not heating up. | Power issue, faulty unit. | Verify power outlet is working. Ensure power switch is on. If problem persists, contact customer support. |
9. Specifications
- Brand: Tilswall
- Model: W100
- Power: 50W
- Glue Stick Diameter: 7mm
- Glue Stick Length: 130mm
- Heating Temperature: Approx. 165°C
- Heat-up Time: Approx. 3 minutes
- Power Source: Corded Electric
- Cord Length: 1.5m
- Weight: 273g
- Dimensions (L x W x H): 15.1 x 3.4 x 13.7 cm
- Compatible Materials: Glass, Cotton, Wood, Paper, Metal, Plastic, Fabric, Ceramics, Leather
- Color: Blue
- UPC: 779186687984
10. Warranty and Support
Your Tilswall Hot Glue Gun is covered by a 1-year manufacturer's warranty from the date of purchase. This warranty covers defects in materials and workmanship under normal use.
For warranty claims, technical support, or any questions regarding your product, please contact Tilswall customer service through the retailer where you purchased the product or visit the official Tilswall website for contact information.


