
1. Introduction
The ANENG V7 Digital Multimeter is a versatile and reliable tool designed for accurate electrical measurements. It features a 6000-count display, auto-ranging capabilities, and a range of functions including AC/DC voltage, AC/DC current, resistance, capacitance, frequency, temperature, diode testing, and continuity testing. Its robust design includes intelligent anti-burn protection and a silicone case for durability.

Figure 1.1: Front view of the ANENG V7 Digital Multimeter, showcasing its display, rotary dial, and input jacks.
2. Safety Information
Always adhere to the following safety precautions to prevent personal injury or damage to the multimeter or equipment under test:
- Do not exceed the maximum input values for any function.
- Do not use the multimeter if it is damaged or if the test leads are damaged.
- Exercise extreme caution when working with voltages above 30V AC RMS, 42V peak, or 60V DC. These voltages pose a shock hazard.
- Always disconnect power to the circuit and discharge all high-voltage capacitors before testing resistance, continuity, diodes, or capacitance.
- Ensure the function switch is in the correct position for the desired measurement before connecting the test leads to the circuit.
- Use the proper terminals, function, and range for your measurements.
- Replace the battery as soon as the low battery indicator appears to ensure accurate readings.
3. Product Features
The ANENG V7 Digital Multimeter is equipped with several advanced features to enhance usability and measurement accuracy:
- 6000 Counts Display: Provides high resolution for precise readings.
- HD LCD Display with Backlight: Ensures clear visibility of readings in various lighting conditions, including dark environments.
- True RMS Measurement: Accurately measures AC voltage and current, even for non-sinusoidal waveforms.
- Auto Ranging: Automatically selects the appropriate measurement range, simplifying operation.
- NCV (Non-Contact Voltage) Detection: Allows for safe detection of AC voltage without direct contact.
- Temperature Measurement: Capable of measuring temperature using a thermocouple probe.
- Data Hold Function: Freezes the displayed reading for easy recording.
- Flashlight: Integrated flashlight for illuminating dark work areas.
- Intelligent Anti-Burn Protection: Enhances safety by protecting against incorrect connections.
- Silicone Protection: Durable silicone case provides enhanced drop protection.
- Auto Power Off: Conserves battery life by automatically shutting down after a period of inactivity.

Figure 3.1: Overview of the ANENG V7 Multimeter's main display and key features, including silicone protection, intelligent anti-burn, and flashlight lighting.

Figure 3.2: The multimeter's backlight display, illustrating its utility for measurements in low-light conditions.
4. Setup
4.1 Battery Installation
The ANENG V7 Multimeter requires three (3) AA batteries for operation. To install or replace batteries:
- Ensure the multimeter is turned off and disconnect all test leads from the input terminals.
- Locate the battery compartment cover on the back of the multimeter.
- Use a screwdriver to loosen the screw(s) securing the battery cover.
- Remove the cover and insert the three AA batteries, observing the correct polarity (+/-) as indicated inside the compartment.
- Replace the battery cover and tighten the screw(s).
4.2 Connecting Test Leads
Always connect the black test lead to the 'COM' (Common) terminal. Connect the red test lead to the appropriate input terminal based on the measurement type:
- For Voltage, Resistance, Capacitance, Frequency, Diode, and Continuity measurements: Connect the red lead to the 'VΩHz-||+' terminal.
- For Current (mA/µA) measurements: Connect the red lead to the 'mAµA' terminal.
- For High Current (A) measurements: Connect the red lead to the '20A' terminal.
5. Operating Instructions
5.1 General Operation
- Turn the rotary dial to the desired measurement function. The multimeter will typically auto-range.
- Connect the test leads to the circuit or component under test.
- Read the measurement value on the LCD display.
- To activate the backlight or flashlight, press the HOLD/ button briefly. Press again to cycle or turn off.
- To hold the current reading on the display, press the HOLD/ button for approximately 2 seconds. Press again to release.
5.2 Specific Measurement Modes
- Voltage (DCV/ACV): Turn the dial to 'V' (DC) or 'V~' (AC). Connect leads in parallel with the circuit.
- Current (DCA/ACA): Turn the dial to 'mAµA' or '20A'. Connect leads in series with the circuit. Ensure the circuit is open before connecting.
- Resistance (Ω): Turn the dial to 'Ω'. Connect leads across the component. Ensure power is off and capacitors are discharged.
- Capacitance (F): Turn the dial to 'F'. Connect leads across the capacitor. Ensure capacitor is discharged before testing.
- Frequency (Hz): Turn the dial to 'Hz'. Connect leads to the signal source.
- Temperature (°C/°F): Turn the dial to 'TEMP'. Insert the thermocouple probe into the input jacks and place the probe tip on the object to be measured.
- Diode Test: Turn the dial to 'Diode'. Connect the red lead to the anode and black lead to the cathode of the diode.
- Continuity Test: Turn the dial to 'Continuity'. If the resistance is below a certain threshold (typically <50Ω), the buzzer will sound.
- NCV (Non-Contact Voltage) Detection: Turn the dial to 'NCV'. Move the top of the multimeter near the AC voltage source. The LED will flash and the buzzer will sound if voltage is detected.
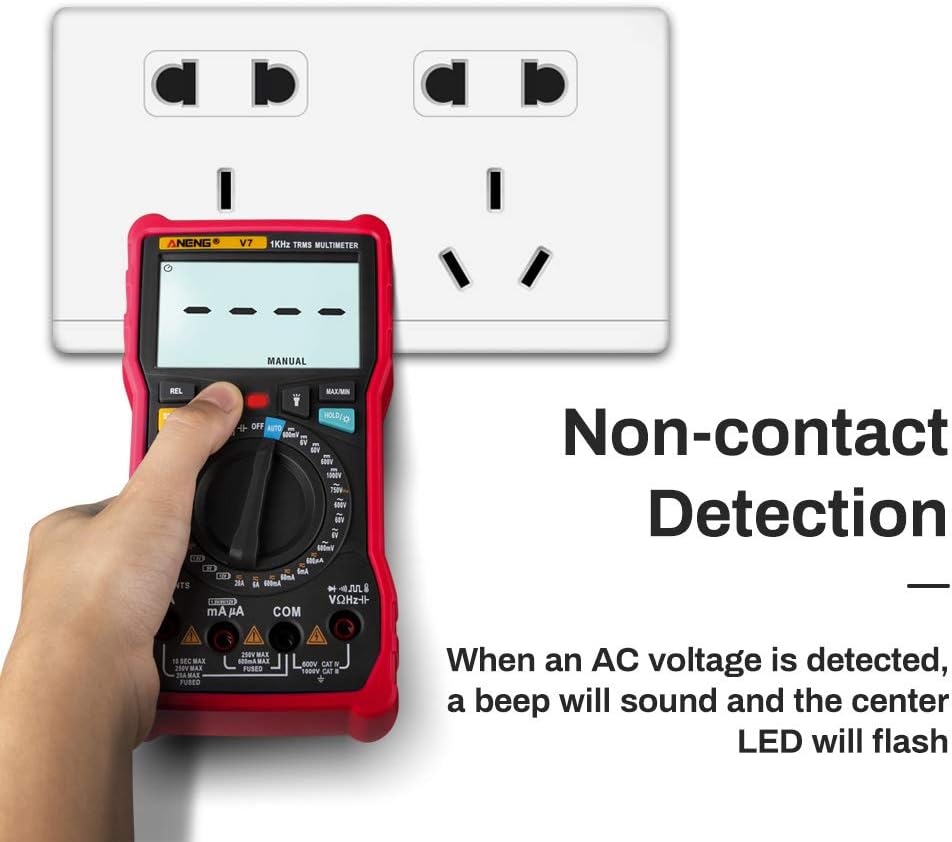
Figure 5.1: The multimeter demonstrating its Non-Contact Voltage (NCV) detection feature, indicating AC voltage presence with a beep and flashing LED.
6. Specifications
| Parameter | Specification |
|---|---|
| Display | 6000 Counts |
| DC Voltage | 600mV / 6.000V / 60.00V / 600.0V / 1000V |
| AC Voltage | 600mV / 6.000V / 60.00V / 600.0V / 750V |
| DC Current | 600µA / 6.000mA / 60.00mA / 600.0mA / 6.000A / 20.00A |
| AC Current | 600µA / 6.000mA / 60.00mA / 600.0mA / 6.000A / 20.00A |
| Temperature | (-20~1000)°C / (-4~1832)°F |
| Capacitance | 9.999nF / 99.99nF / 999.9nF / 9.999µF / 99.99µF / 999.9µF / 9.999mF |
| Resistance | 600.0Ω / 6.000kΩ / 60.00kΩ / 600.0kΩ / 6.000MΩ / 60.00MΩ |
| Frequency | 9.999Hz / 99.99Hz / 999.9Hz / 9.999kHz / 99.99kHz / 999.9kHz / 9.999MHz |
| Ranging | Auto |
| Material | ABS/PVC |
| Update Rate | 3 times/second |
| Power Source | 3 x AA Batteries |
| Dimensions (L x W x H) | 175mm x 90.3mm x 48mm (6.9in x 3.57in x 1.89in) |
| Net Weight | 332g |
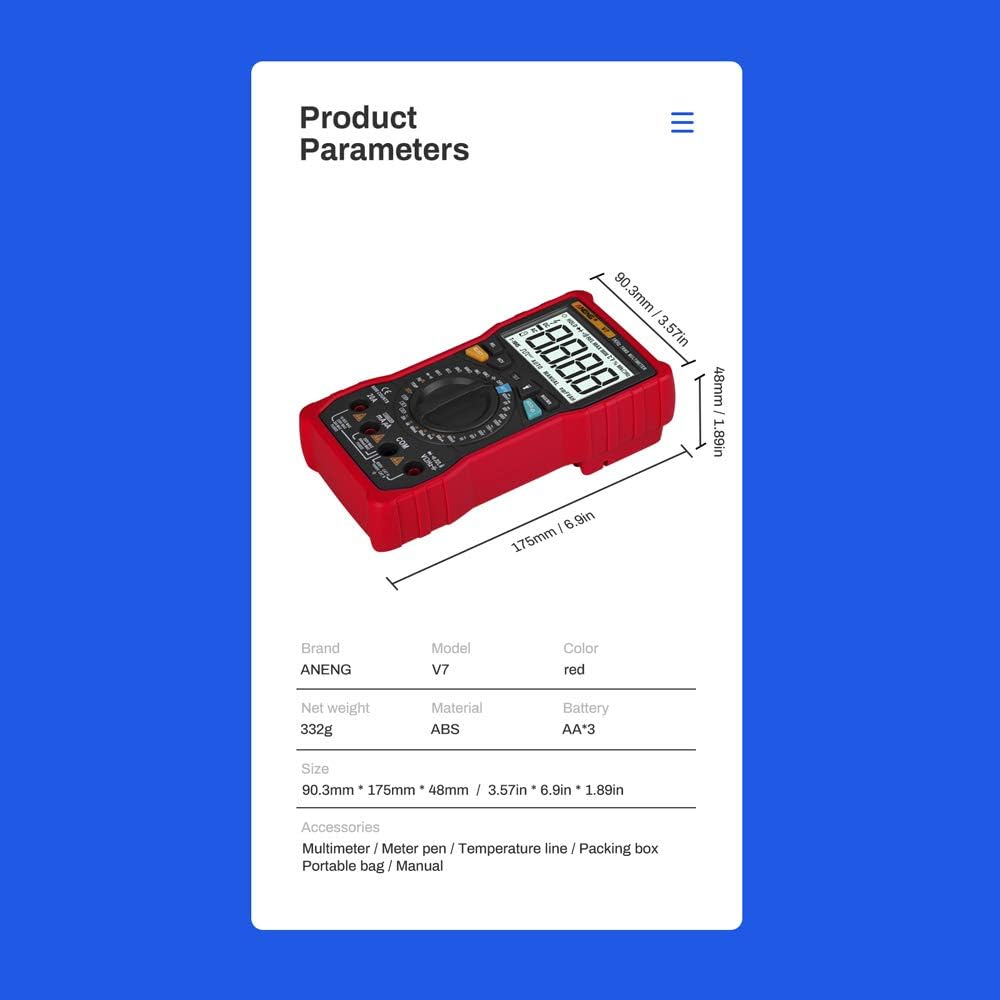
Figure 6.1: Product parameters diagram, including dimensions and weight of the ANENG V7 Multimeter.
7. Maintenance
7.1 Cleaning
To maintain the multimeter's performance and appearance, clean it regularly:
- Wipe the case with a damp cloth and mild detergent. Do not use abrasives or solvents.
- Keep the input terminals free of dirt and moisture.
7.2 Battery Replacement
Replace the batteries when the low battery indicator appears on the display. Refer to Section 4.1 for detailed battery installation instructions.
7.3 Storage
If the multimeter is not used for an extended period, remove the batteries to prevent leakage and damage to the device. Store the multimeter in a cool, dry place away from direct sunlight.

Figure 7.1: Exploded view of the ANENG V7 Multimeter, showing its internal components and robust construction.
8. Troubleshooting
| Problem | Possible Cause | Solution |
|---|---|---|
| Multimeter does not power on | Dead or incorrectly installed batteries | Check battery polarity; replace batteries if necessary. |
| No reading or "OL" displayed | Incorrect range selected (if not auto-ranging), open circuit, or measurement exceeds range. | Ensure correct function is selected. Check for open circuits. If auto-ranging, the value might be out of the meter's maximum range. |
| Inaccurate readings | Low battery, incorrect connection, or external interference. | Replace batteries. Verify test lead connections. Move away from strong electromagnetic fields. |
| Buzzer does not sound during continuity test | Resistance is too high, or test leads are not making good contact. | Ensure good contact with the circuit. Check if the resistance is above the continuity threshold. |
9. Warranty and Support
This ANENG V7 Digital Multimeter is designed for reliability and performance. For any technical support or warranty inquiries, please contact your original point of purchase or the manufacturer's customer service. Keep your purchase receipt as proof of purchase.


