Introduction
Thank you for choosing the Landmann 82800 Lumberjack Series Adjustable Log Rack. This manual provides essential information for the safe assembly, operation, and maintenance of your log rack. Please read these instructions carefully before assembly and retain them for future reference.
Safety Information
WARNING: Failure to follow these safety instructions may result in injury or property damage.
- Always assemble the log rack on a flat, stable, and level surface.
- Ensure all hardware is securely tightened before placing any logs on the rack. Periodically check and re-tighten hardware.
- Do not overload the rack beyond its intended capacity. Overloading can lead to structural failure and injury.
- Keep children and pets away from the log rack, especially when it is loaded with firewood.
- Use appropriate personal protective equipment, such as gloves, during assembly and when handling firewood.
- Position the log rack away from flammable materials, structures, and heat sources.
- Be aware of the weight and stability of logs when stacking and removing them to prevent shifting or falling.
Package Contents
Verify that all components listed below are present before beginning assembly. If any parts are missing or damaged, do not proceed with assembly and contact customer support.
- 2 x U-shaped Brackets (Top Sections)
- 2 x Straight Posts (Bottom Sections)
- 1 x Hardware Kit (Bolts, Washers, Nuts)
Note: Standard 4x4 lumber is required for assembly and is NOT included with this product. You will need to purchase two pieces of 4x4 lumber separately, cut to your desired length.
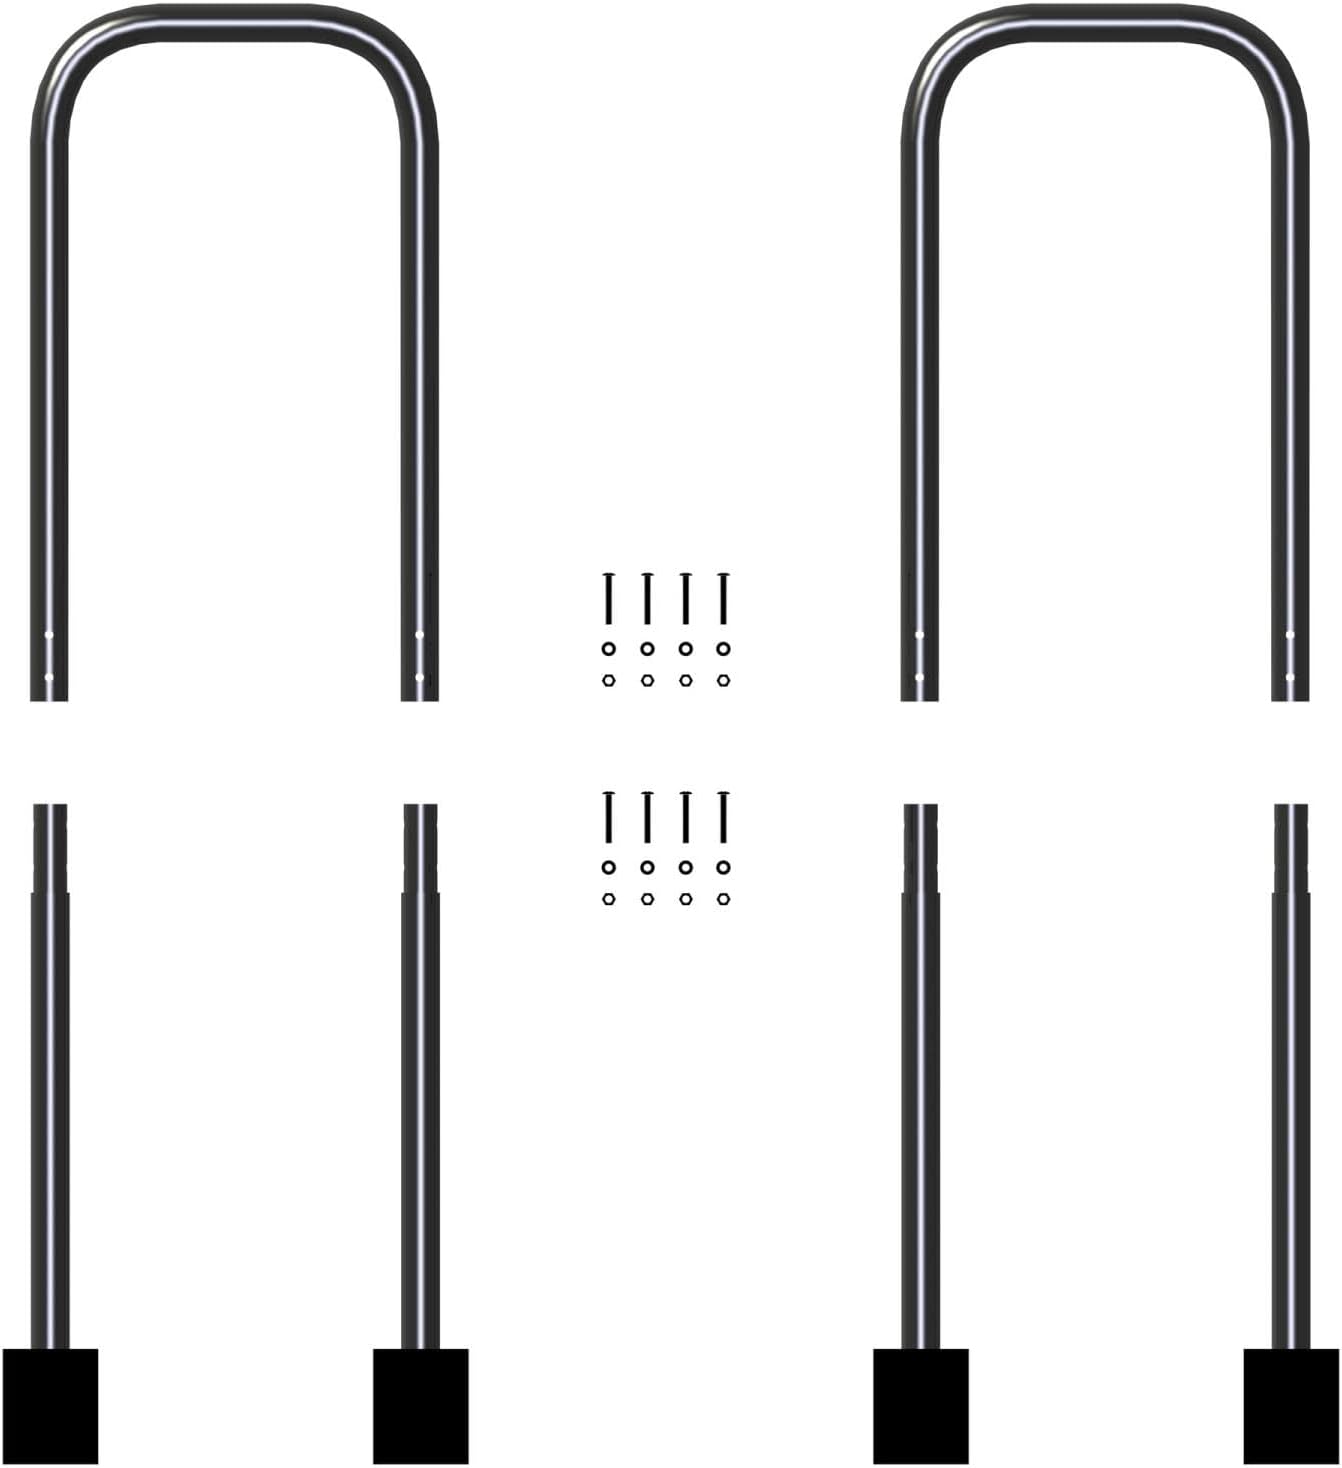
Image 1: All components included in the package, laid out for inspection.
Setup and Assembly
Follow these steps to assemble your Landmann 82800 Log Rack. A rubber mallet and a wrench (not included) may be helpful.
- Prepare Lumber: Obtain two pieces of standard 4x4 lumber (actual dimensions approximately 3.5 inches x 3.5 inches) cut to your desired length. The length of these 4x4s will determine the overall length of your log rack.
- Insert Bottom Post: Take one straight post (bottom section) and insert one end of a 4x4 lumber piece into its opening. Ensure the lumber is fully seated.
- Attach Top Bracket: Slide one U-shaped bracket (top section) onto the other end of the same 4x4 lumber piece. Align the pre-drilled holes on the U-shaped bracket with the holes on the straight post.
- Secure Hardware: Insert the provided bolts through the aligned holes and secure them with washers and nuts. Hand-tighten initially.
- Repeat for Second Side: Repeat steps 2-4 for the second 4x4 lumber piece, the remaining straight post, and the remaining U-shaped bracket. You will now have two independent side assemblies.
- Final Seating and Tightening: Ensure both 4x4 lumber pieces are fully seated within all four brackets. Then, use a wrench to securely tighten all bolts and nuts. Do not overtighten, but ensure a firm connection.
- Placement: Place the assembled log rack on a firm, level surface where it will be used.
Tip: Standard 4x4 lumber dimensions can vary slightly. If the fit is tight, gently sand or trim the edges of the 4x4 lumber. A rubber mallet can assist in seating the lumber into the brackets without damage.

Image 2: Side view of the log rack brackets with 4x4 lumber properly inserted.
Operating Instructions
Proper use of your log rack ensures stability and longevity.
- Loading Logs: Stack logs evenly within the rack, distributing the weight across the entire length of the 4x4 lumber. Avoid concentrating heavy loads in one area.
- Maintain Stability: As logs are added or removed, periodically check the rack's stability. If any instability is observed, redistribute the logs or verify the rack's placement on a level surface.
- Height Limit: Do not stack logs higher than the top of the rack's vertical supports. Over-stacking can compromise stability and lead to logs falling.
- Airflow: Arrange logs to allow for adequate air circulation. This promotes proper seasoning of firewood and helps prevent rot.

Image 3: Top-down view of the assembled log rack, showing the space for firewood.
Maintenance
Regular maintenance will help extend the life of your log rack.
- Regular Inspection: Periodically inspect the log rack for any signs of wear, damage, or loose hardware.
- Tighten Hardware: Re-tighten all bolts and nuts as needed to ensure the structural integrity of the rack.
- Cleaning: Clean the rack with a damp cloth to remove dirt, dust, or debris. The high-quality powder-coat finish helps protect against rust, but regular cleaning can extend its lifespan.
- Rust Prevention: While the rack features a durable powder-coat finish, prolonged exposure to harsh weather conditions can cause wear. Consider touching up any scratches or chips in the finish with rust-inhibiting paint to prevent corrosion.
Troubleshooting
If you encounter issues with your log rack, refer to the following common problems and solutions:
- Problem: The log rack feels unstable or wobbly.
Solution: Ensure the rack is placed on a flat, level, and firm surface. Verify that all bolts and nuts are securely tightened. Check if the 4x4 lumber pieces are fully seated within all brackets. - Problem: Difficulty inserting the 4x4 lumber into the brackets.
Solution: Standard 4x4 lumber dimensions can vary slightly. If the fit is too tight, gently sand or trim the edges of the 4x4 lumber. A rubber mallet can assist in seating the lumber into the brackets. Do not force the lumber excessively, as this may damage the brackets. - Problem: Logs are falling out of the rack.
Solution: Ensure logs are stacked evenly and not piled too high. Do not exceed the height of the vertical supports. Re-evaluate the stability of the stacked logs.
Specifications
| Model Number: | 82800 |
| Product Dimensions (per rail/bracket set): | 3.4 x 14.3 x 24.7 inches |
| Item Weight (brackets only): | 10.94 pounds |
| Material: | Steel with high-quality powder-coat finish |
| Lumber Compatibility: | Designed for standard 4x4 lumber (not included) |
Warranty and Customer Support
Warranty information for the Landmann 82800 Lumberjack Series Adjustable Log Rack is typically provided with the product packaging or can be found on the official Landmann website. For specific warranty details, product registration, or customer support inquiries, please refer to the manufacturer's contact information provided with your purchase or visit the Landmann official website.


