
EF ELECFREAKS microbit Starter Kit
ELECFREAKS microbit Starter Kit Instruction Manual
Model: microbit Starter Kit
1. Introduction
The ELECFREAKS microbit Starter Kit is designed for individuals beginning to learn about electric circuits and programming. This kit provides a foundation for understanding basic electronics and coding principles through hands-on experimentation. It allows users to create various projects, such as traffic lights or light-controlled LEDs, by integrating electronic components with the micro:bit board.
Important Note: The micro:bit board is not included in this kit and must be purchased separately.

Image 1.1: Overview of the ELECFREAKS microbit Starter Kit packaging and included components.
2. Kit Contents
This kit includes 24 types of electronic components to facilitate various learning projects. The components are selected to introduce fundamental concepts in electronics and programming.

Image 2.1: Detailed packing list illustrating all components provided in the kit.
List of Components:
- Servo (x1)
- Adapter (x1)
- Breadboard (x1)
- Battery Holder (x1)
- Transistor (x1)
- Temperature Sensor (x1)
- Photocell (x1)
- Diode (x2)
- Rainbow LED Ring (x1)
- RGB LED (x1)
- Red LED (x5)
- Blue LED (x5)
- Yellow LED (x5)
- Green LED (x5)
- 10k Trimpot (x1)
- Push button Switch (x2)
- Self-lock Switch (x1)
- Mini Speaker (x1)
- 10K Ohm Resistors (x1)
- 100 Ohm Resistors (x5)
- 5V Motors (x1)
- Mini Fan (x1)
- USB Cable (x1)
- Jumper Wire (x1)
- Clip Wire (x1)
3. Setup
To begin using your ELECFREAKS microbit Starter Kit, follow these general setup steps:
- Acquire a micro:bit Board: Ensure you have a micro:bit board (V1 or V2 compatible) as it is essential for the kit's functionality and is not included.
- Familiarize Yourself with Components: Review the packing list and identify each component. Understanding their basic function will aid in project assembly.
- Connect the micro:bit to the Adapter: Insert your micro:bit board into the provided adapter. This adapter typically expands the micro:bit's pins for easier connection to the breadboard.
- Prepare the Breadboard: The breadboard is used to build circuits without soldering. Understand how its rows and columns are connected internally (typically, horizontal rows are connected for power rails, and vertical columns are connected for component connections).
- Power Supply: Connect the battery holder to the adapter or breadboard as required by your project. Alternatively, use the USB cable to power the micro:bit directly from a computer for programming and testing.
- Access Learning Resources: Refer to the guidance manual included with the kit or visit the ELECFREAKS wiki for detailed tutorials and project instructions. The wiki can be found at wiki.elecfreaks.com/en/.
4. Operating Principles and Project Examples
The microbit Starter Kit enables users to explore fundamental electronic concepts and programming logic through practical projects. Each project typically involves connecting components on the breadboard and writing code for the micro:bit to control their behavior.
4.1. Programming Environments
This kit supports multiple programming languages, allowing users to choose the method best suited to their skill level and learning objectives:
- MakeCode Graphical Programming: An intuitive block-based editor provided by Microsoft, ideal for beginners. It allows users to drag and drop code blocks to create programs.
- JavaScript Programming: MakeCode also offers a JavaScript view, allowing users to transition from block-based coding to text-based coding.
- Python: An advanced text-based programming language widely used in various fields, including artificial intelligence.
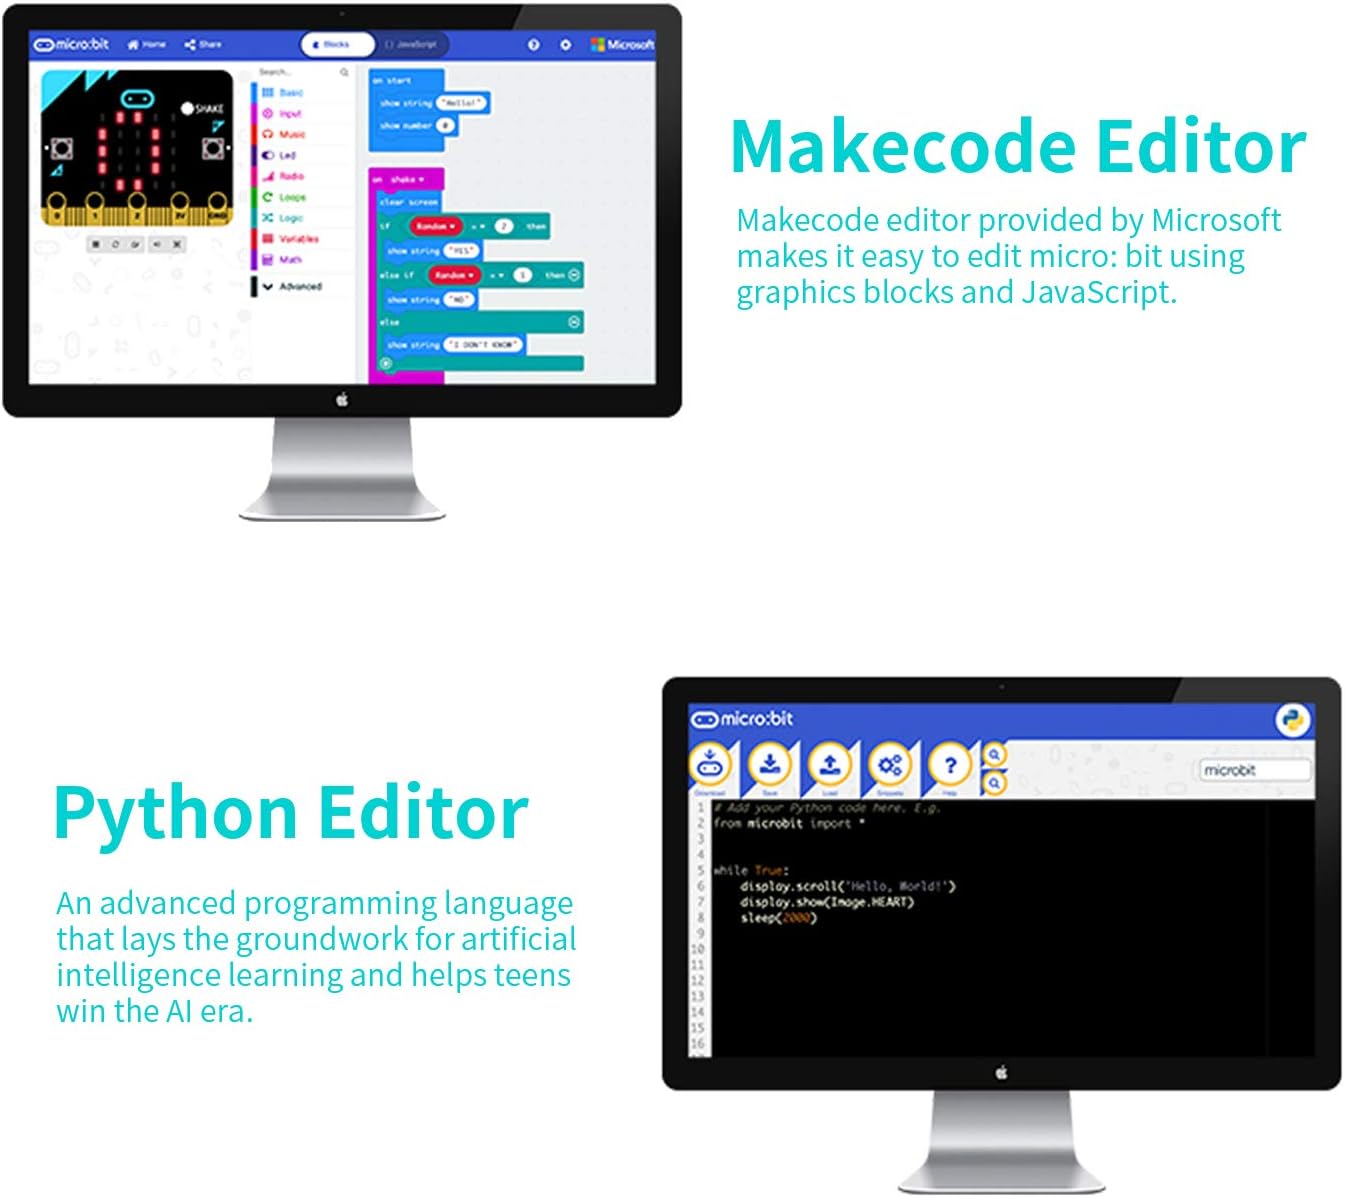
Image 4.1: The MakeCode editor, featuring a graphical block-based interface for programming the micro:bit.

Image 4.2: The Python editor, demonstrating text-based coding for the micro:bit.
4.2. Example Projects
The kit includes instructions for 14 case studies to help users master electronic circuits and basic programming. Here are two examples:
Motor Control Project
This project demonstrates how to control a small motor using the micro:bit. It typically involves connecting the motor to the breadboard and the micro:bit via jumper wires, then writing code to turn the motor on or off, or control its speed.

Image 4.3: A completed circuit for a motor control project, showing the micro:bit, breadboard, battery pack, and motor connected.
RGB Rainbow LED Project
This project explores controlling an RGB LED ring to display various colors and patterns. Users will connect the RGB LED ring to the micro:bit and program it to cycle through colors or respond to inputs.
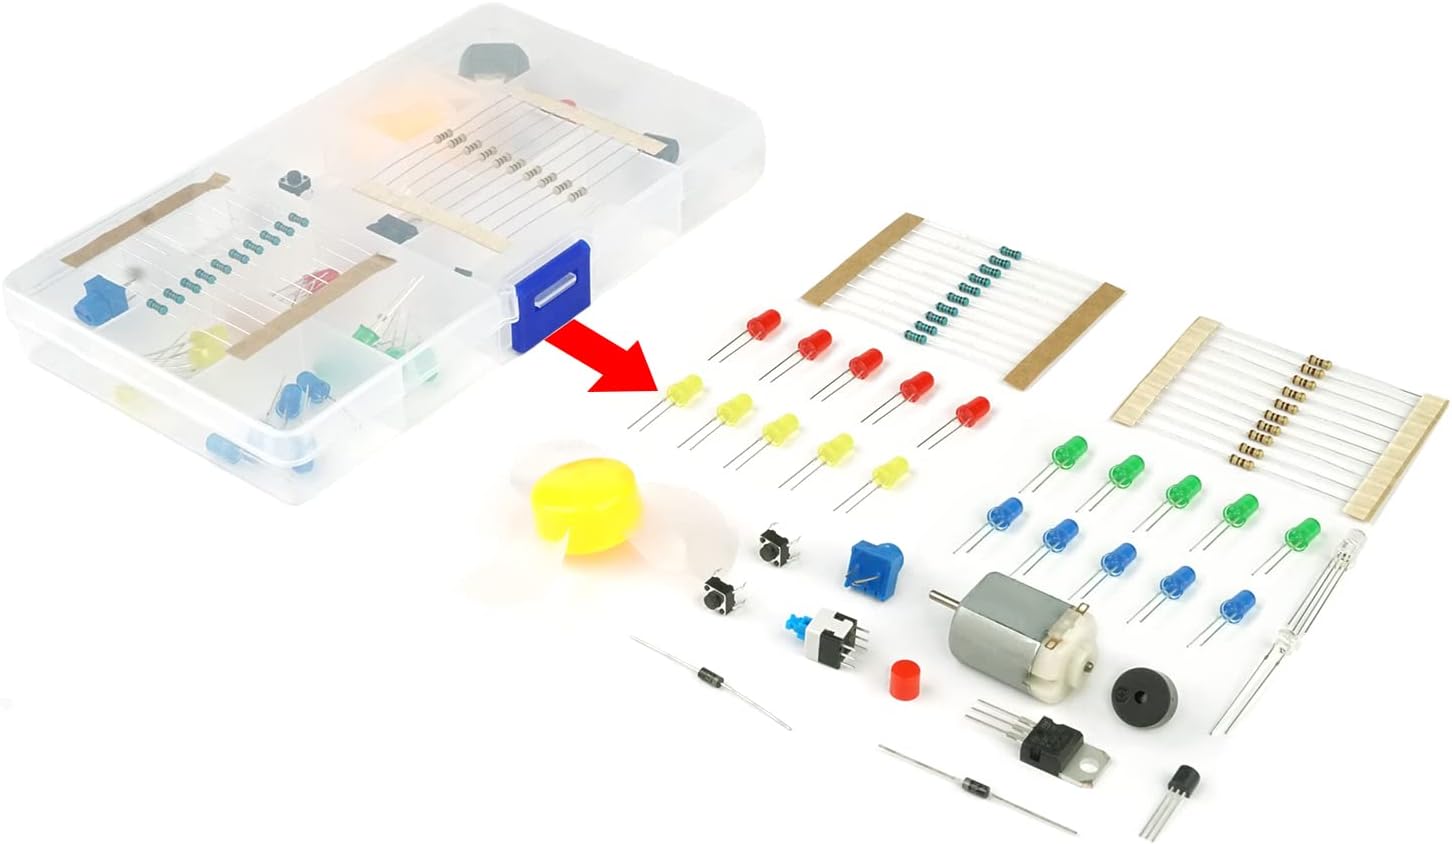
Image 4.4: A completed circuit for an RGB Rainbow LED project, showing the micro:bit, breadboard, battery pack, and RGB LED ring connected.
5. Care and Maintenance
Proper care of your ELECFREAKS microbit Starter Kit components will ensure their longevity and continued functionality:
- Storage: Store all components in their original packaging or a dedicated storage box to prevent loss or damage. Keep them in a dry, cool environment away from direct sunlight.
- Handling: Handle electronic components with care. Avoid bending pins excessively or applying undue force.
- Cleaning: If necessary, gently clean components with a soft, dry cloth. Avoid using liquids or harsh chemicals.
- Power Safety: Always ensure correct polarity when connecting batteries or power sources. Disconnect power when assembling or disassembling circuits.
- Age Recommendation: This kit is recommended for ages 10 years and up. Adult supervision is advised for younger users.
6. Troubleshooting
If you encounter issues while using the kit, consider the following troubleshooting steps:
- No Power: Check battery connections and ensure batteries are charged. If using USB, verify the cable is securely connected to both the micro:bit and the computer.
- Component Not Working: Double-check all wiring connections on the breadboard. Ensure components are inserted correctly and in the right orientation (e.g., LEDs have correct polarity).
- Code Issues: Review your code for syntax errors or logical flaws. Use the debugger features in MakeCode or Python editor if available. Ensure the code has been successfully uploaded to the micro:bit.
- Micro:bit Not Detected: If your computer does not recognize the micro:bit when connected via USB, try a different USB port or cable. Ensure necessary drivers are installed (though often plug-and-play).
- Refer to Wiki: The ELECFREAKS wiki provides extensive tutorials and troubleshooting guides for various projects and components. Visit wiki.elecfreaks.com/en/ for detailed assistance.
7. Product Specifications
| Manufacturer | EF ELECFREAKS |
| Model | microbit Starter Kit |
| ASIN | B0822LXMV8 |
| Package Dimensions | 7.99 x 5.43 x 2.24 inches |
| Item Weight | 13.6 ounces |
| Recommended Age | 13 years and up (Manufacturer recommended) |
8. Warranty Information
For specific warranty details regarding your ELECFREAKS microbit Starter Kit, please refer to the documentation included with your purchase or contact EF ELECFREAKS directly. Standard return policies may apply as per the retailer's terms of sale.
9. Support and Resources
For further assistance, technical support, or additional learning resources, please use the following channels:
- Online Wiki Tutorials: A comprehensive collection of tutorials and guides is available on the ELECFREAKS wiki. Visit: wiki.elecfreaks.com/en/
- Technical Support: For direct technical inquiries, please contact EF ELECFREAKS support. You can typically find a 'Contact Us' or 'Ask a question' option on the seller's store page on Amazon or their official website.
Ask a question about this manual
Ask about setup, troubleshooting, compatibility, parts, safety, or missing instructions. Manuals+ will review the question and use this page’s manual context to help answer it.