
NICHE 519-CSM2334O
NICHE Starter Motor Assembly Instruction Manual
Model: 519-CSM2334O
1. Introduction
This manual provides essential information for the proper installation, operation, maintenance, and troubleshooting of your NICHE Starter Motor Assembly. Please read these instructions carefully before installation to ensure safe and efficient performance. This high-torque starter motor is engineered to meet or exceed OEM specifications for reliable engine starting.
2. Product Features
- High Torque Design: Engineered to exceed OEM specifications for powerful and consistent starting.
- Durable Construction: Features a brush-type carbon motor for longevity.
- Precise Fit: Designed for direct compatibility with specified Mercury Marine engines.
- Specifications: Torque (Nm) 6.5; Cycle Rating 10000; Teeth 9; Rotational Direction Counter Clockwise.
3. Compatibility
This NICHE Starter Motor Assembly (Model: 519-CSM2334O) is compatible with the following:
- OEM Part Numbers: Mercury Marine 50-893888T
- Engine Models: Mercury Marine 40 HP Fourstroke, 50 HP Fourstroke, 60 HP Fourstroke
4. What's in the Box
- (1) NICHE Starter Motor Assembly
5. Specifications
| Attribute | Value |
|---|---|
| Brand | NICHE |
| Model Number | 519-CSM2334O |
| Material | Metal |
| Item Weight | 0.5 Pounds |
| Product Dimensions (L x W x H) | 10.8 x 5 x 4.8 inches |
| Wattage | 1.4 KW |
| Brush Type | Carbon |
| Torque | 6.5 Nm |
| Cycle Rating | 10000 |
| Teeth | 9 |
| Rotational Direction | Counter Clockwise |

Figure 5.1: Torque comparison chart showing NICHE vs. OEM starter motor performance.
6. Setup and Installation
Safety First: Before beginning any installation, ensure the engine is turned off and the battery is disconnected to prevent accidental starting or electrical shock. Wear appropriate personal protective equipment (PPE) such as safety glasses and gloves.
- Preparation:
- Gather necessary tools: Wrench set, battery terminal cleaner, wire brush, dielectric grease (optional).
- Locate the existing starter motor on your Mercury Marine engine.
- Disconnect Battery:
- Disconnect the negative (-) battery terminal first, followed by the positive (+) terminal.
- Remove Old Starter Motor:
- Carefully disconnect all electrical connections from the old starter motor. Note their positions for reinstallation.
- Remove the mounting bolts securing the starter motor to the engine block. There are typically 3 bolts.
- Gently remove the old starter motor from its mounting location.
- Inspect and Clean:
- Inspect the mounting surface on the engine block for any debris or corrosion. Clean as necessary with a wire brush.
- Clean battery terminals and cable ends to ensure good electrical contact.
- Install New Starter Motor:
- Position the new NICHE Starter Motor Assembly into the mounting location.
- Secure the starter motor with the mounting bolts. Tighten them according to your engine's service manual specifications.
- Reconnect the electrical connections to the new starter motor. Ensure all connections are clean and tight. Apply dielectric grease if desired for added protection against corrosion.
- Reconnect Battery:
- Reconnect the positive (+) battery terminal first, followed by the negative (-) terminal.
- Final Check:
- Double-check all connections to ensure they are secure.
- Verify that no tools or loose items are left in the engine compartment.

Figure 6.1: NICHE Starter Motor Assembly and its packaging.

Figure 6.2: Side view of the starter motor, showing its compact design.
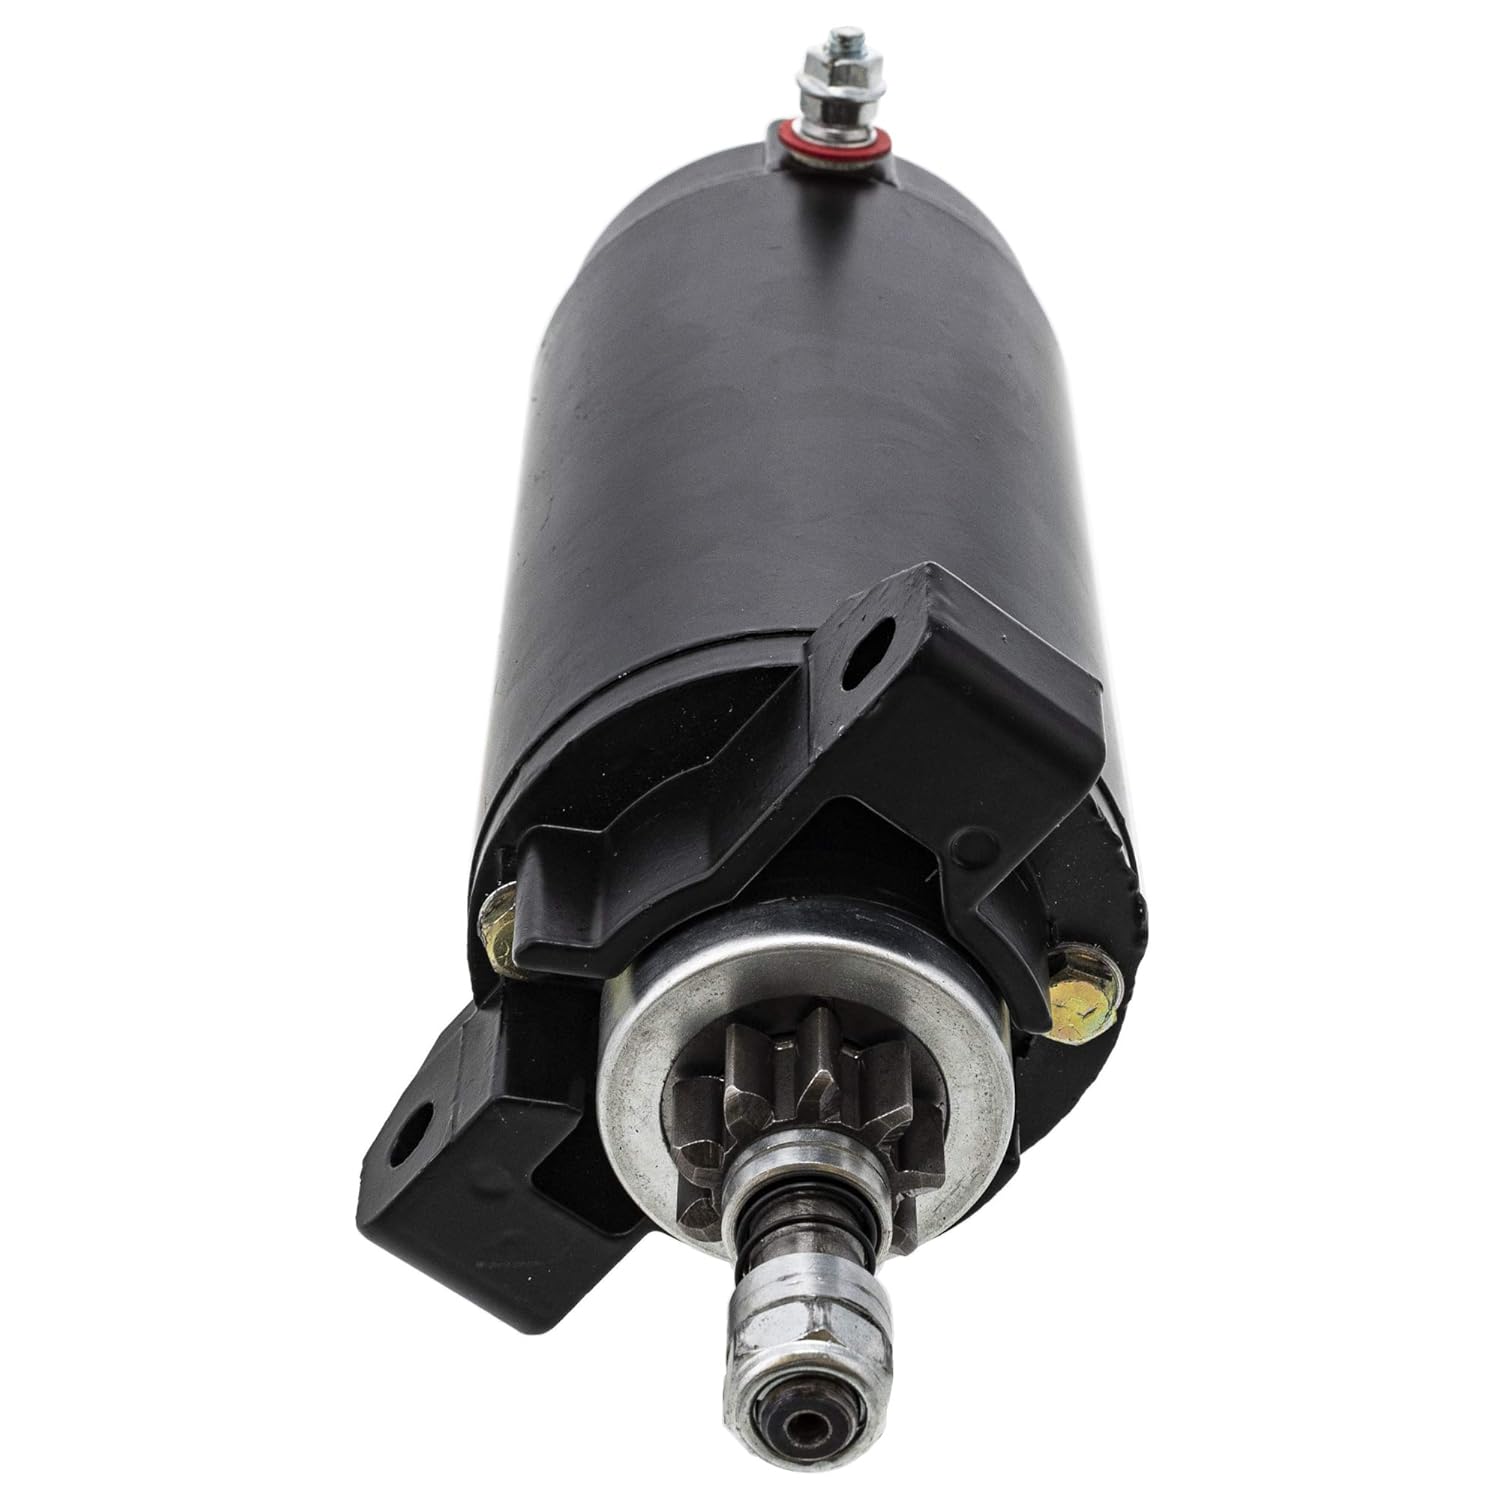
Figure 6.3: Front view of the starter motor, highlighting the 9-tooth gear.

Figure 6.4: Rear view of the starter motor, showing the main electrical terminal.

Figure 6.5: Close-up of the electrical terminal, showing the secure connection point.

Figure 6.6: Angled view of the starter motor, providing a comprehensive look at its structure.
7. Operating Instructions
Once the NICHE Starter Motor Assembly is correctly installed and all connections are secure, you can proceed with starting your engine. Follow your engine manufacturer's specific starting procedures.
- Initial Start-up:
- Ensure the engine is in neutral and all safety precautions are observed.
- Turn the ignition key to the "START" position. The starter motor should engage and crank the engine.
- Release the key once the engine starts. Do not hold the key in the "START" position for more than 5-10 seconds to prevent overheating the starter.
- Multiple Attempts:
- If the engine does not start on the first attempt, wait at least 30 seconds before trying again. This allows the starter motor to cool down.
- If the engine repeatedly fails to start, refer to the Troubleshooting section or consult a qualified marine technician.
8. Maintenance
Regular maintenance helps ensure the longevity and optimal performance of your starter motor. While the NICHE Starter Motor is designed for durability, periodic checks are recommended.
- Electrical Connections: Periodically inspect all electrical connections to the starter motor and battery for corrosion or looseness. Clean and tighten as necessary.
- Battery Condition: Ensure your marine battery is in good condition and fully charged. A weak battery can put excessive strain on the starter motor.
- Mounting Bolts: Check the starter motor's mounting bolts for tightness to prevent vibration and potential damage.
- Environmental Exposure: If operating in harsh marine environments, consider applying a protective coating or dielectric grease to exposed electrical terminals to prevent corrosion.
9. Troubleshooting
If you experience issues with your starter motor, consult the table below for common problems and solutions. Always ensure safety precautions are followed before attempting any troubleshooting.
| Problem | Possible Cause | Solution |
|---|---|---|
| Starter does not crank or clicks once. | Weak or dead battery; Loose or corroded battery cables/connections; Faulty solenoid or ignition switch. | Charge or replace battery. Clean and tighten all battery and starter connections. Test solenoid and ignition switch. |
| Starter cranks slowly. | Low battery charge; Corroded battery cables; High resistance in circuit. | Charge battery. Clean battery terminals and cable ends. Inspect all wiring for damage. |
| Starter spins but engine does not crank. | Bendix gear not engaging flywheel; Damaged flywheel teeth. | Inspect starter bendix and flywheel for damage. May require starter replacement or professional repair. |
| Starter makes grinding noise. | Misalignment; Damaged bendix gear or flywheel teeth. | Check starter mounting. Inspect bendix and flywheel for wear or damage. |
If the problem persists after attempting these solutions, it is recommended to consult a certified marine mechanic.
10. Warranty and Support
NICHE products are backed by a 2-year warranty. For warranty claims, technical support, or further assistance, please contact NICHE customer service through their official channels. You can also visit the NICHE Store on Amazon for more information.

Figure 10.1: NICHE Industries 2-Year Warranty Badge.
11. Additional Resources
For an overview of the NICHE brand and its commitment to quality aftermarket powersports parts, please watch the following video:
Video 11.1: "NICHE Your Aftermarket Powersports Replacement Parts Brand" - This video provides a general overview of the NICHE brand and its product range, showcasing their commitment to quality in powersports parts.
Ask a question about this manual
Ask about setup, troubleshooting, compatibility, parts, safety, or missing instructions. Manuals+ will review the question and use this page’s manual context to help answer it.