
1. Important Safety Instructions
Please read all instructions carefully before using the CREATE Thera Classic Espresso Machine. Retain this manual for future reference. Incorrect operation may result in damage to the appliance or personal injury.
- Ensure the appliance is connected to a grounded power outlet with the correct voltage (240V).
- Do not immerse the appliance, power cord, or plug in water or other liquids.
- Keep hands and cords away from hot surfaces and steam. The steam wand and portafilter can become very hot during operation.
- Always turn off the machine and unplug it before cleaning or when not in use.
- Do not operate the machine with a damaged cord or plug, or if the appliance malfunctions or has been damaged in any manner.
- This appliance is for household use only. Do not use outdoors.
- Children should be supervised to ensure they do not play with the appliance.
2. Product Overview and Components
Familiarize yourself with the parts of your CREATE Thera Classic Espresso Machine.

Image 2.1: Front view of the CREATE Thera Classic Espresso Machine, showing the control panel, portafilter, and drip tray with two espresso cups.

Image 2.2: All removable components of the espresso machine laid out, including the portafilter, single and double shot filter baskets, measuring spoon with tamper, and the water tank.
Main Components:
- Control Panel: Power button, single shot button, double shot button, pressure gauge, steam knob.
- Water Tank: Removable tank for fresh water. Capacity: 1.25 Liters.
- Portafilter: Handle with filter basket holder.
- Filter Baskets: For single and double espresso shots, or ESE pods.
- Steam Wand: For frothing milk and dispensing hot water.
- Drip Tray: Removable tray to collect excess liquids.
- Measuring Spoon/Tamper: For measuring ground coffee and tamping it into the filter basket.
3. Setup and First Use
3.1 Unpacking
- Carefully remove all packaging materials and ensure all components are present.
- Clean the water tank, portafilter, filter baskets, and drip tray with warm water and mild detergent. Rinse thoroughly.
- Wipe the exterior of the machine with a damp cloth.
3.2 Filling the Water Tank
- Remove the water tank from the back of the machine.
- Fill the tank with fresh, cold water up to the MAX level indicator. Do not exceed the MAX line.
- Place the water tank back into its position, ensuring it is seated correctly.
3.3 Priming the Machine (First Use or After Extended Storage)
Priming ensures the water system is filled and ready for operation.
- Ensure the water tank is filled.
- Place a large container under the portafilter head and another under the steam wand.
- Plug in the machine and press the power button (usually indicated by a power symbol or a light). The indicator light will illuminate.
- Once the machine has heated up (indicator light stops flashing or turns solid), press the double shot button to run water through the portafilter head until water flows steadily.
- Turn the steam knob to release steam/hot water through the steam wand until water flows steadily. Close the steam knob.
- The machine is now primed and ready for use.
4. Operating Instructions
4.1 Making Espresso with Ground Coffee
- Prepare the Machine: Ensure the water tank is filled and the machine is powered on and preheated.
- Prepare the Portafilter: Insert the desired filter basket (single or double) into the portafilter.
- Add Coffee: Use the measuring spoon to add freshly ground espresso coffee to the filter basket. For a single shot, use one level spoon; for a double, use two.
- Tamp the Coffee: Use the tamper end of the measuring spoon to press the coffee grounds firmly and evenly. Ensure the surface is level.
- Attach Portafilter: Align the portafilter with the group head (INSERT position) and twist it firmly to the right until it is securely locked (LOCK position).
- Place Cups: Position one or two espresso cups on the drip tray directly under the portafilter spouts.
- Brew Espresso: Press the single shot or double shot button. The machine will begin brewing. The pressure gauge will indicate the brewing pressure.
- Stop Brewing: The machine may stop automatically, or you can press the button again to stop brewing manually when the desired volume is reached.
- Remove Portafilter: Carefully twist the portafilter to the left to remove it. Dispose of the used coffee grounds.
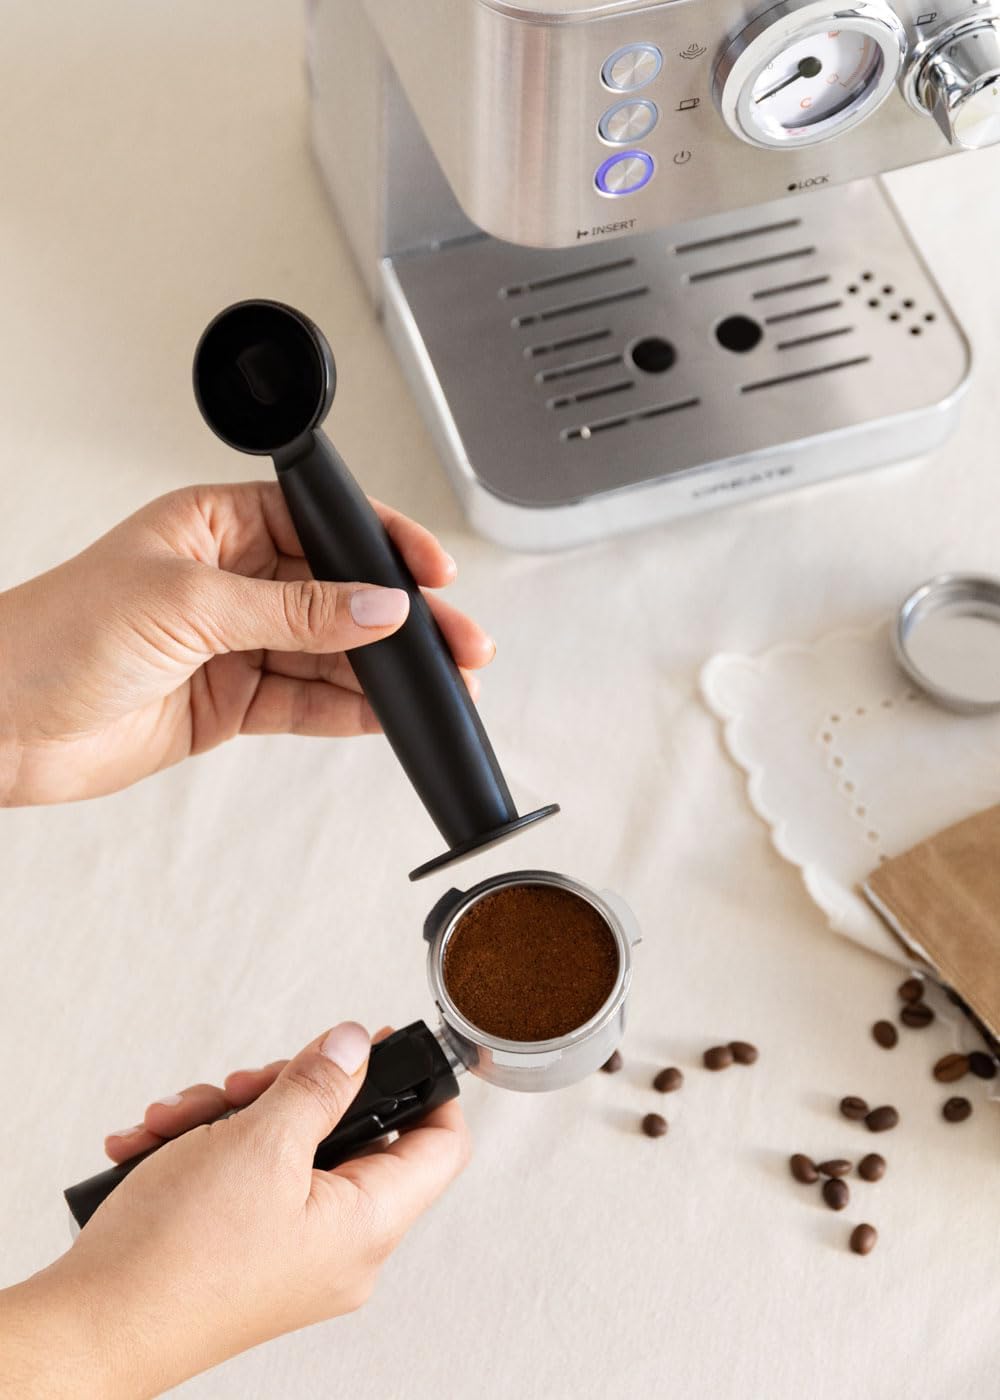
Image 4.1: A hand tamping ground coffee into the portafilter for espresso preparation.
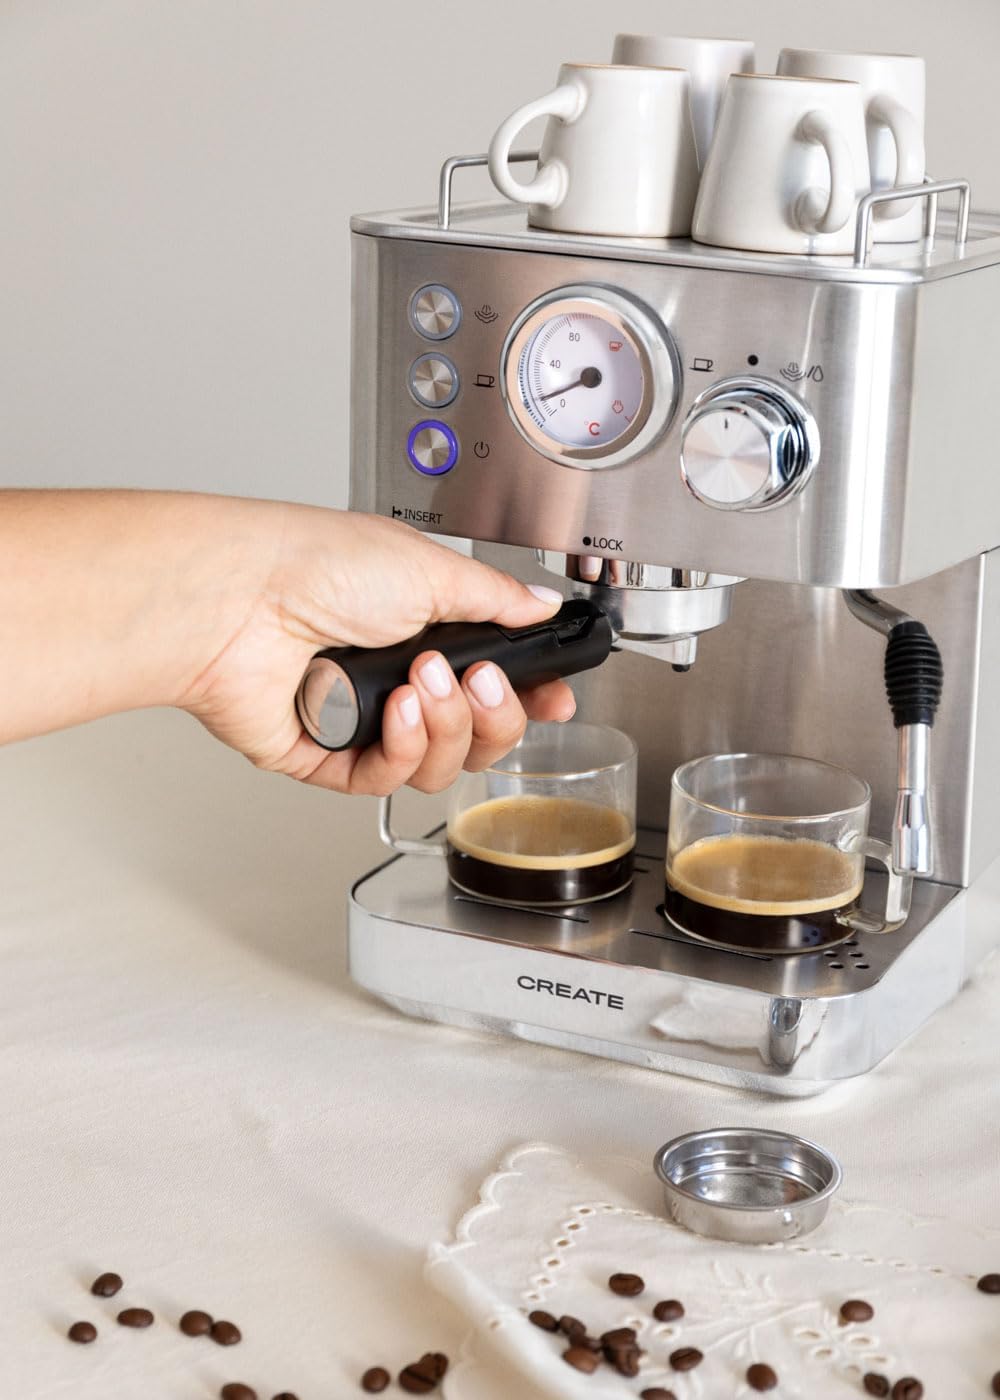
Image 4.2: A hand inserting the portafilter into the group head of the espresso machine.

Image 4.3: Espresso being brewed into two clear glass cups, showing the rich crema.
4.2 Making Espresso with ESE Single-Dose Pods
- Follow steps 1-2 from 'Making Espresso with Ground Coffee'. Use the specific filter basket designed for ESE pods if provided.
- Place one ESE pod into the filter basket. Do not tamp.
- Follow steps 5-9 from 'Making Espresso with Ground Coffee'.
4.3 Steaming Milk
- Prepare Milk: Fill a stainless steel frothing pitcher with cold milk (dairy or non-dairy) to just below the spout.
- Activate Steam: Ensure the machine is preheated. Turn the steam knob to the steam position. Wait for the steam indicator light to illuminate steadily, indicating the machine has reached steaming temperature.
- Purge Steam Wand: Briefly open the steam knob to release any condensed water from the wand into the drip tray, then close it.
- Froth Milk: Insert the steam wand tip just below the surface of the milk. Open the steam knob fully. Move the pitcher up and down slightly to create foam.
- Heat Milk: Once desired foam is achieved, lower the wand deeper into the milk to heat it without adding more air. Continue until the pitcher is hot to the touch.
- Stop Steaming: Close the steam knob, then remove the pitcher.
- Clean Steam Wand: Immediately wipe the steam wand with a damp cloth to remove any milk residue. Briefly open the steam knob again to clear any milk from inside the wand, then close it.

Image 4.4: A hand holding a frothing pitcher while the steam wand froths milk.
5. Maintenance and Cleaning
Regular cleaning ensures optimal performance and extends the life of your espresso machine.
5.1 Daily Cleaning
- Portafilter and Filter Baskets: After each use, remove the portafilter, discard coffee grounds, and rinse the portafilter and filter basket under hot water.
- Steam Wand: As described in section 4.3, clean immediately after each use.
- Drip Tray: Empty and rinse the drip tray daily or when the indicator floats up.
- Exterior: Wipe the exterior of the machine with a soft, damp cloth. Do not use abrasive cleaners or scouring pads.
5.2 Descaling
Over time, mineral deposits (limescale) can build up in the machine, affecting performance. Descale your machine every 2-3 months, or more frequently if you have hard water.
- Use a commercially available descaling solution specifically designed for espresso machines. Follow the manufacturer's instructions for mixing the solution with water.
- Fill the water tank with the descaling solution.
- Place a large container under the portafilter and steam wand.
- Run half of the solution through the portafilter by pressing the double shot button.
- Open the steam knob to run the remaining solution through the steam wand.
- Turn off the machine and let it sit for 15-20 minutes.
- Empty and rinse the water tank thoroughly. Fill it with fresh water.
- Repeat steps 3-5 with fresh water to rinse the machine completely.
6. Troubleshooting
If you encounter issues with your machine, refer to the following common problems and solutions.
| Problem | Possible Cause | Solution |
|---|---|---|
| No coffee dispenses | No water in tank; Clogged filter; Machine not primed. | Fill water tank; Clean filter basket; Prime the machine. |
| Coffee brews too slowly or not at all | Coffee grounds too fine or tamped too hard; Clogged filter. | Use coarser grind; Tamp less firmly; Clean filter. |
| Coffee brews too quickly, weak coffee | Coffee grounds too coarse or not enough coffee; Not tamped enough. | Use finer grind; Use more coffee; Tamp more firmly. |
| No steam from wand | Steam wand clogged; Machine not at steaming temperature. | Clean steam wand; Wait for steam indicator light to be solid. |
| Water leaking from machine | Water tank not seated correctly; Drip tray full; Portafilter not secured. | Reseat water tank; Empty drip tray; Secure portafilter firmly. |
If the problem persists after attempting these solutions, please contact customer support.
7. Specifications
Technical details for the CREATE Thera Classic Espresso Machine.

Image 7.1: Dimensional drawing of the espresso machine, indicating height, width, and depth measurements.
- Brand: CREATE
- Model Number: AXleftj (also 59225_115714)
- Style: CLASSIC
- Power: 1100 W
- Voltage: 240 V
- Pressure: 20 bar
- Water Tank Capacity: 1.25 Liters
- Product Dimensions: 30.1 x 20.2 x 31.3 cm (L x W x H)
- Weight: 4.5 kg
- Material: Stainless Steel
- Compatibility: Ground coffee and ESE single-dose pods
8. Warranty and Support
For warranty information, please refer to the documentation provided at the time of purchase. This typically includes details on coverage period and terms.
For technical support, spare parts, or service inquiries, please visit the official CREATE website or contact their customer service department. Contact details can usually be found on the product packaging or the manufacturer's website.


