
Introduction
This manual provides detailed instructions for the installation, operation, and maintenance of the Beninca K PR24 USA Electromechanical Swing Gate Opener Kit. This system is designed for automating swing gates up to 10 feet per leaf, suitable for frequent use in residential and light commercial applications.
The 24Vdc motor ensures maximum safety and allows operation even during power failures when connected to an optional battery pack. The robust anti-shearing articulated arm design provides reliable performance.
Important Safety Instructions
WARNING: Failure to follow these instructions may result in serious injury or death.
- Installation and maintenance must be performed by qualified personnel only.
- Disconnect power before any service or maintenance.
- Ensure all safety devices (photocells, safety edges) are correctly installed and functioning.
- Do not allow children to play near the gate. Keep remote controls out of reach of children.
- Do not operate the gate if any part of the system is damaged or malfunctioning.
- Always ensure the gate's movement path is clear before operation.
Refer to local regulations and standards for gate automation safety.
Kit Components
The K PR24 USA kit typically includes the following components:
- 2 Electromechanical Actuators PR 45.24 (24Vdc Motor): These are the primary mechanisms that move the gate leaves.
- 2 Articulated Arms DU.E2: These arms connect the actuators to the gate leaves, allowing for the swing motion.
- 1 Control Panel / Receiver BRAINY 24: The central unit that manages the gate's operation and receives signals from remote controls.
- 2 Beninca Long-Range 2 Button ARE 128 Remote Controls: Devices for wirelessly operating the gate.
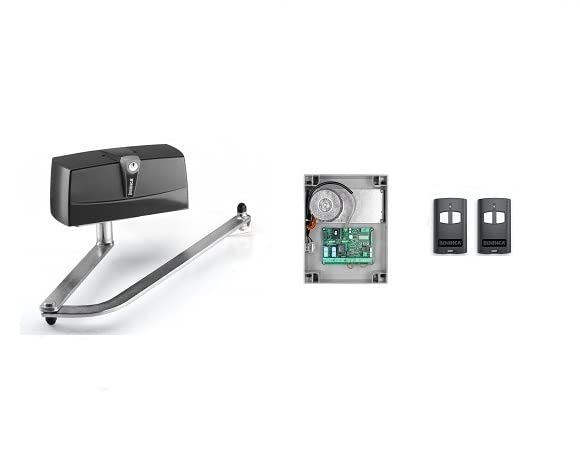
Image: Overview of the Beninca K PR24 USA kit, showing the main actuator unit, the control board, and two remote controls.
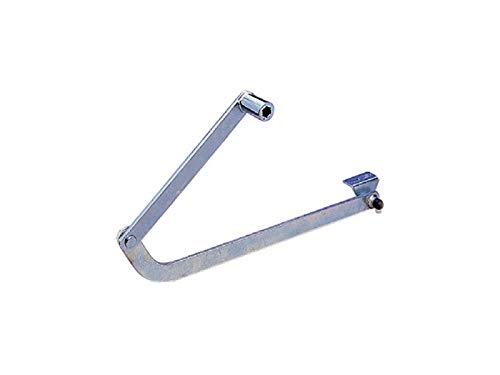
Image: A single Beninca PR 45.24 electromechanical actuator with its articulated arm extended.
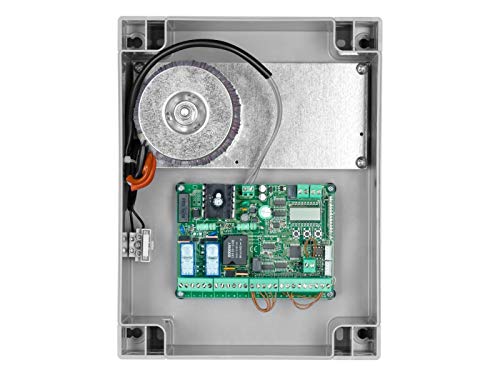
Image: The DU.E2 articulated arm, a key component for the gate's movement.
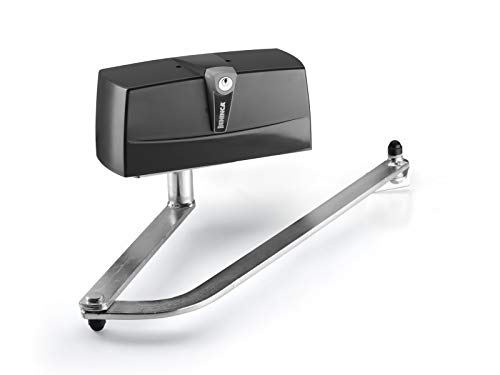
Image: The BRAINY 24 control panel, showing the circuit board and internal components.
Setup and Installation
Note: Professional installation is highly recommended for optimal performance and safety.
Pre-Installation Checks
- Ensure the gate structure is sound, moves freely, and is properly hinged.
- Verify adequate space for the articulated arms to operate without obstruction.
- Confirm power supply (24VDC) is available at the installation site.

Image: The Beninca K PR24 USA kit, highlighting its branding and model name.
Mounting the Actuators
The actuators are designed for post mounting.
- Determine the optimal mounting position on the gate post, ensuring the articulated arm can achieve full gate travel.
- Securely fasten the actuator bracket to the post using appropriate hardware (not included).
- Attach the actuator to the bracket.
Image: The PR 45.24 actuator, demonstrating its design for post mounting.
Connecting the Articulated Arms
Connect the DU.E2 articulated arm to the actuator and to the gate leaf. Ensure smooth articulation.
Image: The DU.E2 articulated arm, showing its pivot points for connection.
Electrical Connections (Control Panel BRAINY 24)
CAUTION: All electrical work must be performed by a licensed electrician.
- Mount the BRAINY 24 control panel in a secure, weather-protected location near the gate.
- Connect the 24VDC power supply to the control panel.
- Wire the two PR 45.24 actuators to the designated terminals on the BRAINY 24 board.
- Connect any optional safety devices (photocells, flashing lights, keypads) according to the control panel's wiring diagram (refer to the separate BRAINY 24 manual for detailed schematics).
Image: The internal components of the BRAINY 24 control panel, showing the circuit board and wiring terminals.
Limit Switch Adjustment
Adjust the mechanical or electronic limit switches on each actuator to define the gate's open and closed positions. This is critical for proper operation and preventing over-travel.
Operating Instructions
Remote Control Programming (ARE 128)
The ARE 128 remote controls are pre-programmed to the BRAINY 24 receiver. If re-programming is needed:
- On the BRAINY 24 control panel, press and hold the programming button (refer to BRAINY 24 manual for exact location).
- While holding the button, press the desired button on the ARE 128 remote control.
- Release both buttons. The remote should now be programmed.
Image: The two Beninca ARE 128 remote controls included in the kit, used for operating the gate.
Manual Release
In case of power failure or system malfunction, the gate can be operated manually.
- Locate the manual release mechanism on each actuator (usually a key-operated lock).
- Insert the key and turn to disengage the motor.
- Manually push the gate open or closed.
- To re-engage, reverse the process, ensuring the mechanism locks back into place.
Maintenance
Regular maintenance ensures the longevity and safe operation of your gate opener.
- Monthly:
- Inspect the gate hinges and ensure they are well-lubricated and free of rust.
- Check the articulated arms for any signs of wear or damage.
- Test all safety devices (photocells, safety edges) for proper function.
- Clear any debris from the gate's path and around the actuators.
- Every 6 Months:
- Check all electrical connections for tightness and corrosion.
- Inspect the actuator mounting points for stability.
- Verify the gate's open and closed limits are still correctly set.
For any complex repairs or internal component issues, contact a qualified technician.
Troubleshooting
Common Issues and Solutions
| Problem | Possible Cause | Solution |
|---|---|---|
| Gate does not open/close | No power | Check power supply, circuit breaker. |
| Remote control battery dead | Replace remote control battery. | |
| Safety device activated (e.g., photocell blocked) | Clear obstruction from photocell path. | |
| Manual release engaged | Re-engage manual release mechanism. | |
| Gate opens partially | Limit switches incorrectly set | Re-adjust limit switches. |
| Obstruction in gate path | Remove obstruction. | |
| Gate makes unusual noise | Lack of lubrication | Lubricate hinges and moving parts. |
| Worn components | Contact a qualified technician for inspection. |
If the problem persists after attempting these solutions, contact Beninca customer support or a certified technician.
Technical Specifications
Model: K PR24 USA
| Feature | Value |
|---|---|
| Input Voltage | 24 Vdc (from control panel) |
| Current | 9 Amp |
| Torque | 320 Nm |
| Time for 90° Opening | 9 sec |
| Max Cycles | 300 cycles/day |
| Max Gate Weight (per leaf) | 1000 lb |
| Max Gate Length (per leaf) | 12 ft |
| Max Gate Offset | 10 inches |
| Actuator Weight | 30 lb |
| Manufacturer | Beninca |
| Item Model Number | K PR24 USA |
| ASIN | B0812C18LD |

Image: A table detailing the technical specifications for the PR 24 system, including input voltage, current, torque, and gate capacities.
Warranty Information and Customer Support
For warranty details, please refer to the documentation provided with your purchase or contact Beninca customer support directly.
For technical assistance, troubleshooting beyond this manual, or spare parts, please contact your authorized Beninca dealer or visit the official Beninca website.
Beninca Official Website: www.beninca.com


