
1. Introduction
This manual provides essential instructions for the safe and effective use, installation, and maintenance of your UpStart Components 4-Pack 12-Inch Chainsaw Chain. This product is designed as a replacement for the Ryobi RY40500 chainsaw model, featuring a 12-inch length, 3/8" low profile pitch, .043" gauge, and 45 drive links. Please read this manual thoroughly before installation and operation to ensure proper function and safety.
Important Note: This is an UpStart Components brand replacement part and is not an OEM product. It is not affiliated with any OEM brands and is not covered under any warranties offered by the original manufacturers. Any warranties for this product are offered solely by Upstart Battery. All mentions of brand names or model descriptions are made strictly to illustrate compatibility.
2. Safety Information
Operating a chainsaw can be hazardous. Always prioritize safety. Failure to follow safety instructions can result in serious injury or death.
- Always wear appropriate personal protective equipment (PPE), including safety glasses, hearing protection, gloves, and sturdy footwear.
- Ensure the chainsaw is turned off and the spark plug cap (for gas models) or battery (for electric/cordless models) is disconnected before performing any maintenance, including chain replacement.
- Inspect the chainsaw and chain for damage before each use. Do not operate with a damaged chain or chainsaw.
- Keep bystanders, children, and animals away from the work area.
- Maintain a firm grip on the chainsaw with both hands during operation.
- Be aware of kickback and how to avoid it.
3. Compatibility and Verification
This chainsaw chain is specifically designed as a replacement for the Ryobi RY40500 model. To ensure correct fitment, it is crucial to verify the specifications of your existing chain or chainsaw bar. Chainsaws can have different bar lengths and chain specifications even within the same model series.
Key Specifications to Verify:
- Length: 12 inches
- Pitch: 3/8" Low Profile
- Gauge: .043"
- Drive Links: 45
Always consult your chainsaw's original manual or the markings on your existing chain/bar to confirm these measurements before installation.
4. Setup and Installation
Follow these steps carefully to replace your chainsaw chain. Refer to your chainsaw's specific instruction manual for detailed steps on removing the bar and chain.
- Prepare the Chainsaw: Ensure the chainsaw is turned off, the engine is cool, and the spark plug cap (if applicable) or battery is disconnected to prevent accidental starting. Engage the chain brake.
- Remove Bar Cover: Loosen the bar nuts and remove the side cover that holds the bar and chain in place.
- Loosen Chain Tension: Use the chain tensioning screw to loosen the chain tension completely.
- Remove Old Chain: Carefully remove the old chain from the guide bar and drive sprocket. Dispose of the old chain responsibly.
- Inspect Components: Inspect the guide bar for wear, burrs, or damage. Check the drive sprocket for wear. Replace any worn or damaged components.
- Install New Chain: Place the new UpStart Components chain onto the drive sprocket, ensuring the cutting edges of the teeth face forward (in the direction of rotation).
- Fit Chain to Bar: Guide the drive links into the groove of the guide bar.
- Reattach Bar Cover: Slide the guide bar back into position and reattach the side cover, hand-tightening the bar nuts.
- Adjust Chain Tension: Adjust the chain tensioning screw until the chain is snug but can still be pulled freely around the bar by hand. There should be no slack on the underside of the bar, but the chain should not be overly tight. A properly tensioned chain will have the drive links seated in the bar groove, and you should be able to pull the chain up slightly (about 1/8 to 1/4 inch) in the middle of the bar.
- Tighten Bar Nuts: Fully tighten the bar nuts to secure the guide bar and maintain chain tension.
- Final Check: Reconnect the spark plug cap or battery. Briefly run the chainsaw at low speed to allow the chain to seat, then re-check and adjust the tension if necessary. New chains may stretch slightly after initial use, requiring re-tensioning.

Figure 1: Close-up view of the UpStart Components chainsaw chain, showing the cutting teeth and drive links. This image illustrates the design of the chain for proper installation.
5. Operating Guidelines
Once the new chain is installed and properly tensioned, follow these general operating guidelines:
- Chain Lubrication: Ensure your chainsaw's automatic oiler is functioning correctly and the oil reservoir is filled with appropriate bar and chain oil. Proper lubrication is critical for chain life and performance.
- Chain Tension: Regularly check chain tension during operation, especially during the first hour of use with a new chain. A loose chain can derail, and an overly tight chain can cause premature wear to the chain, bar, and sprocket.
- Cutting Technique: Allow the chain to do the work. Do not force the chainsaw through wood. Maintain a steady, controlled cut.
- Avoid Obstacles: Do not cut into dirt, rocks, or metal, as this will dull or damage the chain instantly.
6. Maintenance
Regular maintenance extends the life of your chainsaw chain and ensures safe operation.
- Sharpening: A sharp chain cuts efficiently and safely. Sharpen the chain regularly using a round file appropriate for a 3/8" low profile chain (typically 5/32" or 4.0mm). Maintain the correct filing angles as specified by your chainsaw manufacturer. Replace the chain when it can no longer be sharpened effectively or if teeth are severely damaged.
- Cleaning: After each use, clean sawdust and debris from the chain, guide bar groove, and sprocket area.
- Storage: When not in use, store the chain in a clean, dry place. Applying a light coat of oil can help prevent rust during long-term storage.
- Rotation: If you have multiple chains, rotating them can help distribute wear evenly.
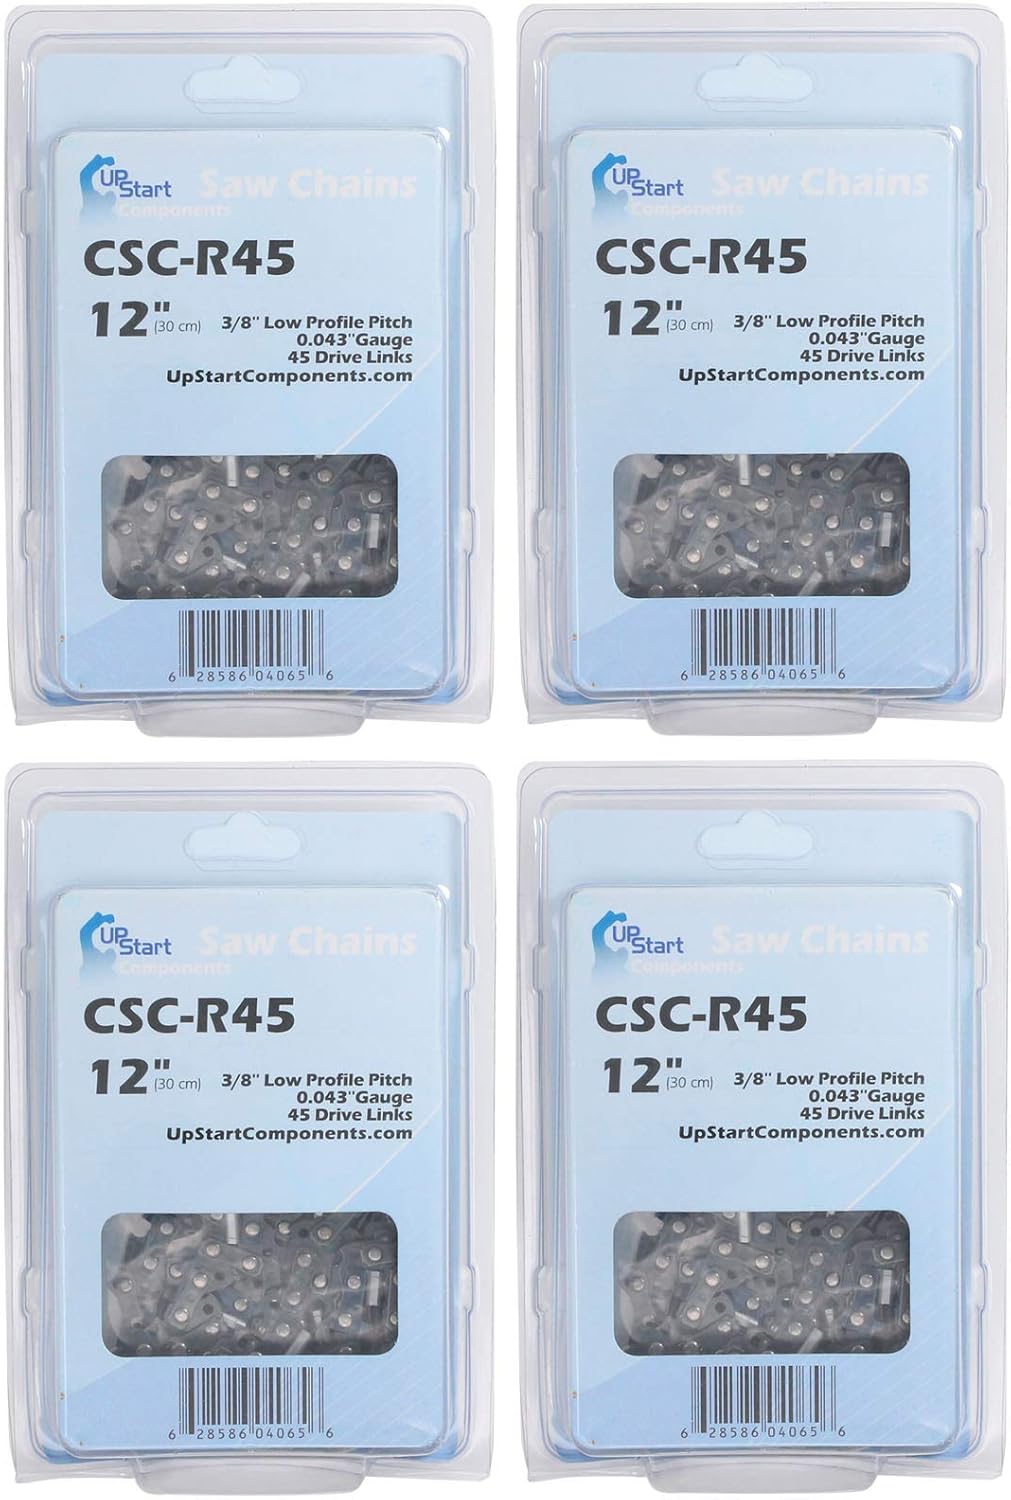
Figure 2: The UpStart Components 4-pack of 12-inch chainsaw chains in their individual packaging. Each pack displays the model number CSC-R45 and key specifications. UPC: 0628586040656.
7. Troubleshooting
| Problem | Possible Cause | Solution |
|---|---|---|
| Chain not cutting efficiently | Dull chain, incorrect sharpening angle, improper chain tension. | Sharpen the chain, verify sharpening angles, adjust chain tension. |
| Chain smoking or overheating | Insufficient lubrication, chain too tight, dull chain, worn guide bar. | Check bar oil level and oiler function, loosen chain tension, sharpen chain, inspect/replace guide bar. |
| Chain derails from bar | Chain too loose, worn guide bar groove, damaged drive links. | Adjust chain tension, inspect/replace guide bar, inspect chain for damage. |
| Excessive vibration | Dull chain, damaged chain, worn sprocket, improper chain tension. | Sharpen or replace chain, inspect sprocket, adjust chain tension. |
8. Specifications
- Brand: UpStart Components
- Model Number: CSC-R45-4PK-DL31
- Compatible With: Ryobi RY40500 (verify specifications)
- Chain Length: 12 inches
- Pitch: 3/8" Low Profile
- Gauge: .043"
- Drive Links: 45
- Quantity: 4-Pack
- UPC: 0628586040656
9. Warranty and Support
As an UpStart Components brand replacement part, this product is not covered under any warranties offered by the original equipment manufacturers (OEMs). Any warranties for this product are offered solely by Upstart Battery.
For support or warranty inquiries regarding your UpStart Components chainsaw chain, please contact Upstart Battery directly. Contact information can typically be found on their official website or product packaging.

Figure 3: A single pack of the UpStart Components 12-inch chainsaw chain, highlighting the brand and model information. UPC: 0628586040656.