
Homealexa XR-MM-C03
Homealexa Cute Rabbit Induction Alarm Clock User Manual
Model: XR-MM-C03 | Brand: Homealexa
1. Introduction
Thank you for purchasing the Homealexa Cute Rabbit Induction Alarm Clock. This intelligent alarm clock features a charming rabbit design, automatic light adjustment, breathing light, time/date/temperature display, and voice/shake control. This manual provides detailed instructions for setup, operation, and maintenance to ensure optimal performance and a pleasant user experience.
2. Safety Information
- Do not expose the device to extreme temperatures, direct sunlight, or high humidity.
- Keep away from water and other liquids.
- Do not disassemble or attempt to repair the device yourself. Contact qualified personnel for service.
- Use only the provided charging cable or a certified equivalent.
- Keep out of reach of small children to prevent accidental ingestion of small parts.
3. Package Contents
Please check the package for the following items:
- Homealexa Cute Rabbit Induction Alarm Clock (Model: XR-MM-C03)
- USB Charging Cable
- User Manual
- Metal Sticker (for magnetic mounting)
4. Product Overview
Familiarize yourself with the various parts and functions of your alarm clock.

Figure 4.1: Front View of the Alarm Clock
This image displays the main unit of the Homealexa Cute Rabbit Induction Alarm Clock. It is pale pink with prominent rabbit ears that illuminate. The circular digital display shows the time, and there are small feet at the base.

Figure 4.2: Dimensions and Magnetic Function
This image illustrates the dimensions of the alarm clock: approximately 9.5 cm (3.74 inches) in width and 18 cm (7.08 inches) in height. It also highlights the magnetic adsorption function, allowing the clock to be mounted on metallic surfaces, and the soft, environmentally friendly silicone shell.
Controls and Indicators:
- Digital Display: Shows time, date, temperature, and alarm status.
- Rabbit Ears: Serve as the night light and wake-up light.
- Control Buttons: Located on the sides and back for setting time, alarms, and other functions.
- Microphone: For voice control features (e.g., activating display).
- USB Charging Port: For power input.
5. Setup
5.1 Initial Charging
Before first use, fully charge the alarm clock. Connect the provided USB cable to the charging port on the device and plug the other end into a USB power adapter (not included) or a computer USB port. The display will indicate charging status. A full charge typically provides several weeks of operation.
Note: The display remains lit while charging. A carrot icon will appear on the screen when the battery is low.
5.2 Power On/Off
The device typically powers on automatically when charged. To turn off the display for complete darkness, the clock will automatically turn off its display after a period of inactivity to save power. To reactivate the display, gently tap the clock, clap your hands, or shake the device.
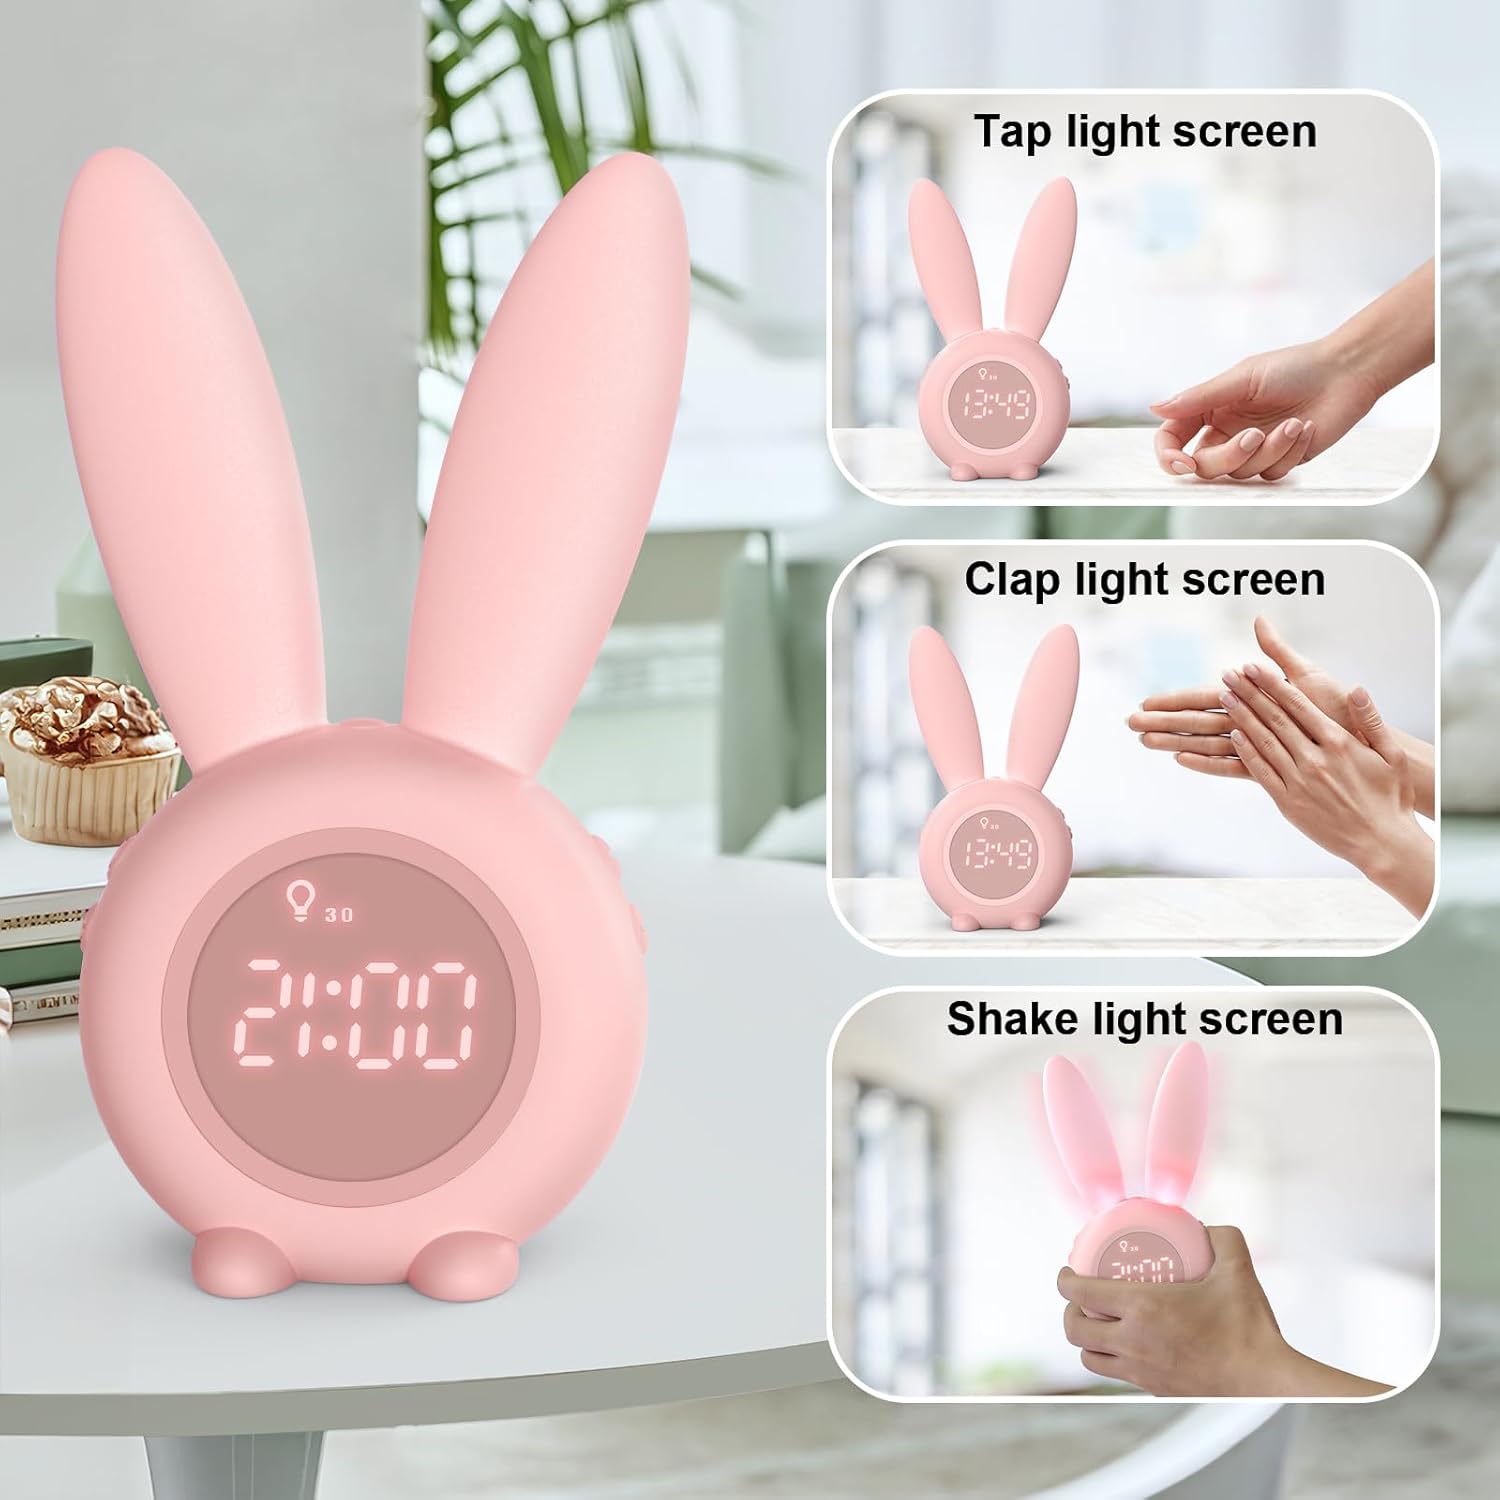
Figure 5.1: Screen Activation Methods
This image shows three ways to activate the alarm clock's display: by tapping the surface it rests on, by clapping your hands nearby, or by gently shaking the clock itself.
6. Operating Instructions
6.1 Setting Time and Date
- Locate the "Time Setting" button (often marked with a clock icon or "SET").
- Press and hold the button to enter time setting mode.
- Use the "+" and "-" buttons to adjust the hour, then press the "SET" button to confirm and move to minutes.
- Repeat for minutes, then date (year, month, day).
- To switch between 12-hour and 24-hour format, press the "SET" button briefly when the time is displayed.
- To view the date, briefly press the "Time Setting" button.

Figure 6.1: 12h/24h Time Format Selection
This image demonstrates the alarm clock's ability to display time in either 12-hour (AM/PM) or 24-hour format, which can be toggled via settings.

Figure 6.2: Time Setting Button
A close-up view showing the specific button used for adjusting the time settings on the alarm clock.
6.2 Setting Alarms (R1, R2)
The alarm clock supports two independent alarms (R1 and R2).
- Press the "Alarm Setting" button (often marked with an alarm icon) to select R1 or R2.
- Press and hold the "Alarm Setting" button to enter alarm time setting mode for the selected alarm.
- Use the "+" and "-" buttons to adjust the hour, then press the "Alarm Setting" button to confirm and move to minutes.
- Repeat for minutes.
- After setting the time, you can select the ringtone and volume.
- To activate/deactivate an alarm, briefly press the "Alarm Setting" button until the alarm icon appears/disappears on the display.

Figure 6.3: Alarm R1 and R2 Settings
This image illustrates the display when setting Alarm 1 (R1) and Alarm 2 (R2), indicating the ability to configure two separate wake-up times.

Figure 6.4: Alarm Setting Button
A close-up view showing the specific button used for adjusting the alarm settings on the alarm clock.
6.3 Ringtone Selection and Volume
The alarm clock offers 6 different ringtones. During alarm setting, or by pressing a dedicated ringtone button, you can cycle through the available sounds. Use the volume control buttons (often "+" and "-") to adjust the alarm volume to your preference.
6.4 Timed Night Light and Sleep Function
The rabbit ears can function as a timed night light. You can set the night light to stay on for 30 or 60 minutes, providing a soft, breathing light that gradually dims, ideal for accompanying sleep without disturbing it.
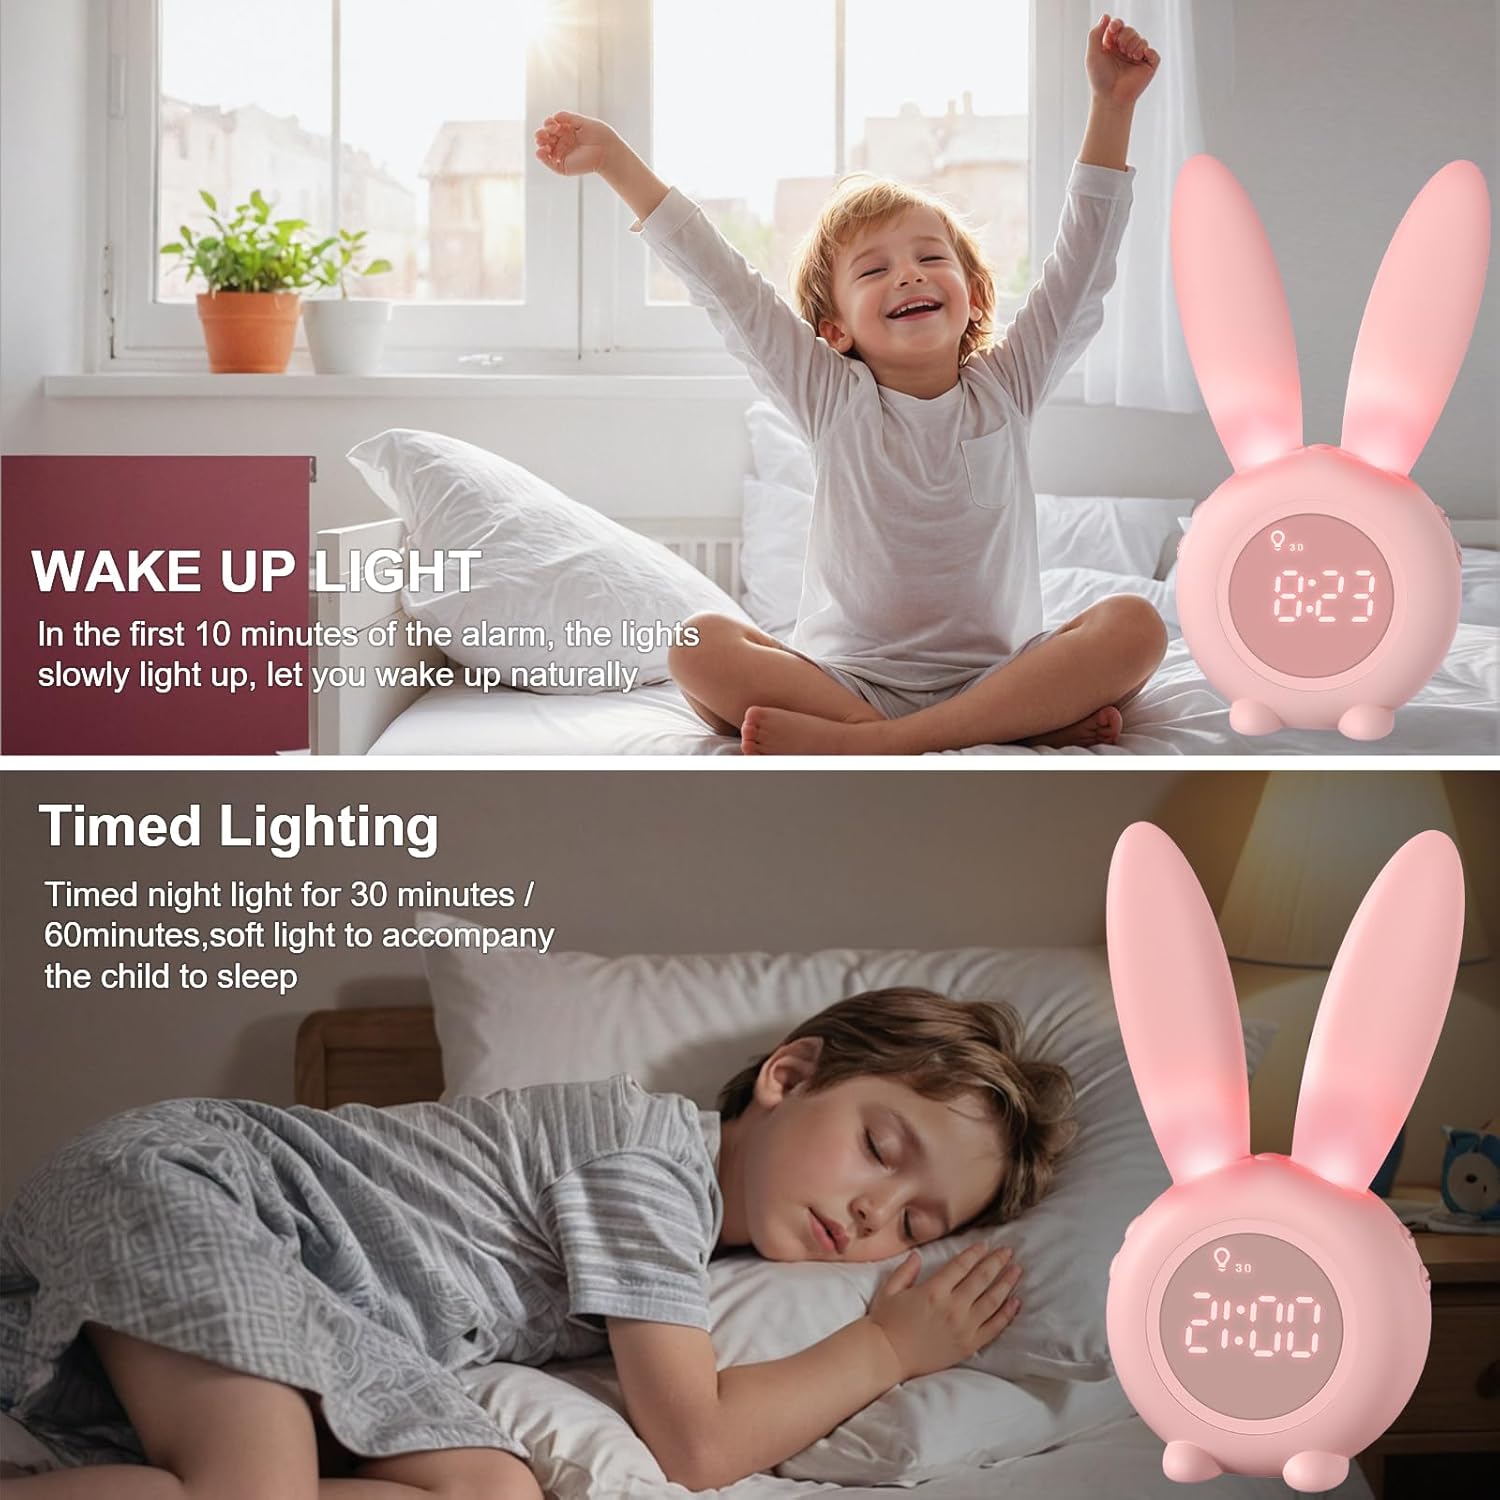
Figure 6.5: Timed Lighting Feature
This image illustrates the alarm clock's timed lighting feature, where the rabbit ears emit a soft glow for a set duration (30 or 60 minutes) to aid sleep.
6.5 Wake-Up Light Function
For a more natural awakening, the alarm clock features a wake-up light. If an alarm is set between noon and 8 AM, the light will slowly illuminate 10 minutes before the alarm sounds, gradually brightening to help you wake up gently.
6.6 Sleep Sound Machine
The alarm clock includes a sleep sound machine with 6 soothing sounds to help you relax and fall asleep. These sounds include waves, violin, birdsong, wind, ticking, and piano. Refer to the specific button for activating and cycling through these sounds.

Figure 6.6: Sleep Sound Machine Features
This image displays the alarm clock's sleep sound machine functionality, listing six available sleep sounds (waves, violin, birdsong, wind, ticking, piano) and sleep timer options (5, 30, 60 minutes).
6.7 Countdown Timer
The alarm clock features a countdown timer function, adjustable from 1 to 59 minutes. This is useful for short tasks or reminders. After the countdown, the clock will provide a reminder with 3 points and a long-term dazzling reminder to prevent forgetting important tasks.

Figure 6.7: Countdown Timer Display
This image shows the alarm clock's display indicating "DP1" and "DP2" modes, which are likely related to the countdown timer or other display settings.
6.8 Temperature Display
The digital display shows the current ambient temperature in Celsius. You can switch to Fahrenheit by pressing a specific button (refer to the device's side buttons or manual for exact control).

Figure 6.8: Temperature Unit Selection
This image demonstrates the alarm clock's capability to display temperature in both Celsius (°C) and Fahrenheit (°F) units.
7. Maintenance
- Clean the device with a soft, dry cloth. Do not use abrasive cleaners or solvents.
- Ensure the charging port is free of dust and debris.
- Store the alarm clock in a cool, dry place when not in use for extended periods.
8. Troubleshooting
| Problem | Possible Cause | Solution |
|---|---|---|
| Display is off or unresponsive. | Battery is low or dead; display is in power-saving mode. | Charge the alarm clock. Tap, clap, or shake the device to activate the display. |
| Alarm does not sound. | Alarm is not activated; volume is too low; incorrect alarm time set. | Ensure the alarm is enabled (icon visible). Increase alarm volume. Verify alarm time. |
| Temperature reading seems inaccurate. | Device placed near heat sources or in direct sunlight. | Relocate the alarm clock to a stable ambient temperature. Note that the temperature sensor provides an approximation. |
| Voice/Shake control not working. | Microphone blocked; ambient noise too high; feature deactivated. | Ensure the microphone opening is clear. Try in a quieter environment. Check settings if feature can be toggled. |
| Battery drains quickly. | Frequent use of light/sound features; aging battery. | Reduce continuous use of light and sound features. Ensure full charge cycles. |
9. Specifications
| Feature | Detail |
|---|---|
| Brand | Homealexa |
| Model Number | XR-MM-C03 |
| Dimensions (L x W x H) | 9.5 x 3.81 x 18 cm (3.74 x 1.5 x 7.08 inches) |
| Weight | 323 grams (0.71 lbs) |
| Color | A-rose Pâle (Pale Pink) |
| Material | Acrylonitrile Butadiene Styrene (ABS) |
| Battery | 1 Lithium-ion (included) |
| Power Source | Cable Electric (USB charging) |
| Special Features | Temperature Display, Alarm, Timed Night Light, Wake-up Light, Sleep Sound Machine, Voice/Shake Control, Magnetic Mounting |
| Installation Type | Table Mount |
| Country of Origin | China |
10. Warranty and Support
For warranty information and customer support, please refer to the product packaging or contact your retailer. Keep your purchase receipt as proof of purchase.
For further assistance, please visit the Homealexa official website or contact their customer service department.
Related documentsXR-MM-C03


Ask a question about this manual
Ask about setup, troubleshooting, compatibility, parts, safety, or missing instructions. Manuals+ will review the question and use this page’s manual context to help answer it.