
1. Important Safety Information
Read all safety warnings and instructions before using this product. Failure to follow the warnings and instructions may result in electric shock, fire, and/or serious injury. Keep this manual for future reference.
- Always wear appropriate safety gear, including gloves, eye protection, and a respirator suitable for the materials being sprayed.
- Do not point the spray gun at people or animals.
- Keep the spray gun away from heat sources, open flames, and sparks.
- Ensure adequate ventilation in the work area to prevent the accumulation of hazardous fumes.
- Do not use the spray gun with flammable liquids or in explosive atmospheres unless specifically designed for such use.
- Dispose of paint, solvents, and packaging responsibly according to local environmental regulations.
- Always follow the manufacturer's instructions for the paint and cleaning solutions used.
- Disconnect the air supply before cleaning, performing maintenance, or when the gun is not in use.
2. Product Overview
The TOTAL 400cc Air Spray Gun (TAT10401) is designed for precise paint application, particularly for base coats. It features a durable metal construction and offers adjustable controls for pattern width, fluid output, and air pressure.
Components and Features
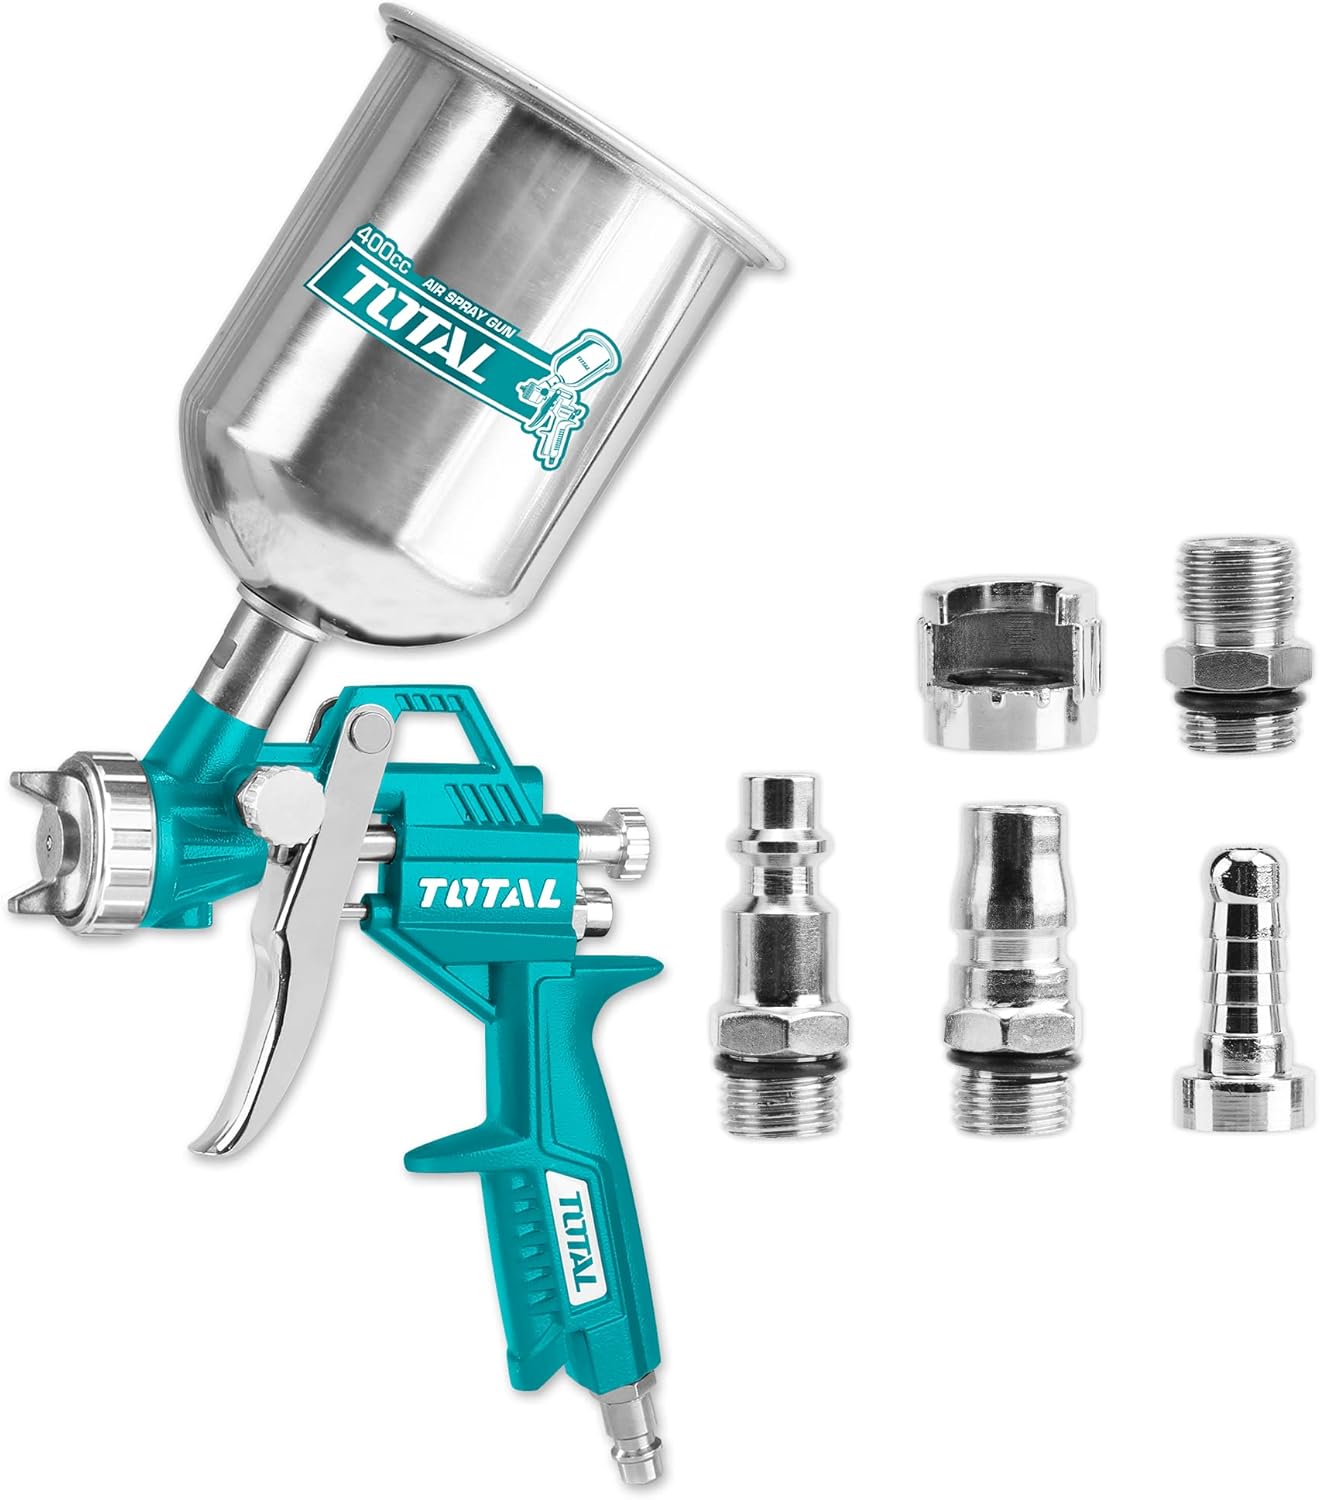
Figure 2.1: The TOTAL 400cc Air Spray Gun shown with its included air connectors (Europe, USA, Nitto, Italy types).

Figure 2.2: Detailed view of the spray gun's nozzle, trigger mechanism, and the 400cc aluminum alloy paint cup.

Figure 2.3: Controls for the spray gun, including the air inlet, pattern adjustment knob, and fluid control knob.
- Standard Nozzle: Equipped with a 1.5mm nozzle, suitable for general paint application.
- Adjustable Pattern Width: Allows for pattern width adjustment from 180mm to 250mm.
- Ample Paint Capacity: Features a 400cc paint cup for efficient work without frequent refilling.
- Base Coat Compatibility: Optimized for effective and even application of base coats.
- Multiple Connector Types: Includes Europe, USA, Nitto, and Italy type connectors for broad air compressor compatibility.
- Optional Nozzle Sizes: Supports optional nozzle sizes from 1.2mm to 1.8mm for various paint viscosities and applications (sold separately).
3. Technical Specifications
| Specification | Value |
|---|---|
| Model | TAT10401 |
| Standard Nozzle Size | 1.5mm |
| Optional Nozzle Sizes | 1.2mm - 1.8mm |
| Paint Capacity | 400cc |
| Operating Pressure | 3-4 bar |
| Air Consumption | 4.2-7.1cfm (119-200l/min) |
| Pattern Width | 180mm - 250mm |
| Material | Metal |
| Item Weight | 790 Grams (1.74 pounds) |
| Product Dimensions | 8.66 x 5.28 x 4.72 inches |

Figure 3.1: Approximate dimensions of the spray gun and paint cup.
4. Setup and Preparation
4.1 Unpacking
Carefully remove all components from the packaging. Verify that all parts listed in the product overview are present and undamaged. Retain packaging for storage or return if necessary.
4.2 Connecting to Air Compressor
- Ensure your air compressor is turned off and depressurized.
- Select the appropriate air connector (Europe, USA, Nitto, or Italy type) for your air hose.
- Thread the chosen connector onto the air inlet at the bottom of the spray gun handle. Tighten securely.
- Connect your air hose to the installed connector.
- Set your air compressor to the recommended operating pressure of 3-4 bar (43-58 PSI).
4.3 Preparing Paint
- Always refer to the paint manufacturer's instructions for proper thinning ratios and recommended viscosity for spray application.
- Use a viscosity cup (often included) to measure the paint's viscosity. Adjust with appropriate thinner until the desired consistency is achieved.
- Strain the prepared paint through a paint strainer to remove any impurities or clumps that could clog the nozzle.
- Pour the strained paint into the 400cc paint cup. Do not overfill.
- Securely attach the paint cup to the spray gun body.
5. Operation
5.1 Adjusting Spray Pattern
The spray pattern can be adjusted by rotating the pattern adjustment knob (refer to Figure 2.3). Turning the knob changes the shape of the spray from a round pattern to a wide fan pattern. Test the pattern on a scrap piece of material before applying to your project.
5.2 Adjusting Fluid Control
The fluid control knob (refer to Figure 2.3) regulates the amount of paint flowing through the nozzle. Turn clockwise to decrease fluid output and counter-clockwise to increase it. Adjust this based on the paint's viscosity and desired coverage.
5.3 Adjusting Air Pressure
Maintain the recommended operating pressure of 3-4 bar (43-58 PSI) at the gun. Adjust the air pressure regulator on your compressor or inline regulator as needed. Too little pressure can result in a heavy, uneven spray, while too much can cause overspray and paint waste.
5.4 Spraying Technique
- Hold the spray gun perpendicular to the surface, approximately 6-8 inches away.
- Move the gun at a consistent speed across the surface, overlapping each pass by about 50%.
- Begin moving the gun before pulling the trigger and release the trigger before stopping the movement to avoid paint buildup at the start and end of each stroke.
- Apply multiple thin coats rather than one thick coat for a smoother, more durable finish.

Figure 5.1: Demonstrating proper technique for painting a surface with the spray gun.

Figure 5.2: The spray gun can be used for various applications such as painting furniture, vehicles, and walls.
6. Maintenance and Cleaning
Proper cleaning and maintenance are essential for the longevity and optimal performance of your spray gun. Clean the gun immediately after each use.
6.1 After Each Use
- Disconnect the air supply.
- Empty any remaining paint from the cup. Clean the cup thoroughly with the appropriate cleaning solution (water for water-based paints, solvent for oil-based paints).
- Pour a small amount of clean cleaning solution into the cup and spray it through the gun until it runs clear.
- Remove the air cap, fluid nozzle, and needle. Clean these components with a brush and cleaning solution. Do not use metal objects to clean the nozzle openings, as this can damage them.
- Wipe down the exterior of the gun.
6.2 Regular Cleaning
Periodically, a more thorough cleaning may be required. Disassemble the gun completely (refer to the included instruction guide for detailed disassembly steps) and soak all paint-contacting parts in cleaning solution. Use the provided cleaning kit brushes to remove dried paint from all passages. Lubricate moving parts with the included gun lubricant before reassembly.
6.3 Storage
Store the clean and dry spray gun in a safe, dry place, away from extreme temperatures and direct sunlight. Ensure all components are properly reassembled or stored securely to prevent loss or damage.
7. Troubleshooting
This section addresses common issues you might encounter with your spray gun.
| Problem | Possible Cause | Solution |
|---|---|---|
| Uneven spray pattern | Clogged air cap or nozzle; incorrect air pressure; paint too thick. | Clean air cap and nozzle; adjust air pressure to 3-4 bar; thin paint to recommended viscosity. |
| Paint spitting or sputtering | Insufficient paint in cup; loose fluid nozzle; clogged air vent in cup lid; air leak. | Refill paint cup; tighten fluid nozzle; clear air vent; check all connections for leaks. |
| No paint flow | Clogged nozzle or fluid passage; needle not retracting; paint too thick. | Clean nozzle and fluid passage; check needle movement; thin paint. |
| Excessive overspray | Too high air pressure; gun too far from surface; paint too thin. | Reduce air pressure; move gun closer to surface; thicken paint slightly. |
8. Warranty and Support
For warranty information, technical support, or to purchase replacement parts, please refer to the contact information provided with your product packaging or visit the official TOTAL Tools website. Keep your purchase receipt as proof of purchase.


