
1. Safety Information
Always read and understand all safety warnings and instructions before operating this product. Failure to follow the warnings and instructions may result in electric shock, fire, and/or serious injury.
- Personal Safety: Always wear eye protection, hearing protection, and heavy-duty gloves when operating the blower/vacuum/mulcher. Wear long pants and sturdy footwear.
- Electrical Safety: Ensure the power source matches the tool's requirements. Use only extension cords rated for outdoor use and in good condition. Do not operate in wet conditions.
- Work Area Safety: Keep children, bystanders, and pets at a safe distance (at least 50 feet) from the operating area. Clear the work area of any objects that could be thrown by the air stream or vacuum.
- Tool Handling: Never point the blower nozzle at people or animals. Do not operate without all guards and safety devices in place. Disconnect from power before making adjustments or cleaning.
2. Product Overview
The SENIX BLVE12-M is a versatile 3-in-1 electric tool designed for efficient yard maintenance. It functions as a leaf blower, vacuum, and mulcher, providing comprehensive solutions for clearing leaves and debris.
Key Features:
- 3-in-1 Versatility: Easily switch between blowing, vacuuming, and mulching modes.
- Powerful 12-Amp Motor: Delivers up to 420 CFM airflow and 179 MPH wind speed for effective debris removal.
- Reusable Collection Bag: Includes a 1.24-bushel capacity bag for vacuumed debris.
- Concentrator Nozzle: Provides focused airflow for stubborn debris and narrow spaces.
- Built-in Cord Retainer: Secures extension cord to prevent accidental disconnection.
- Lightweight & Ergonomic Design: Designed for comfortable one-handed operation.

Figure 2.1: Overview of SENIX BLVE12-M features and 3-in-1 functionality.
3. Setup
Before first use, assemble the necessary components for your desired mode of operation (blower or vacuum/mulcher).
3.1 Blower Mode Assembly
- Ensure the power cord is unplugged.
- Attach the blower tube to the air outlet port on the front of the motor housing. Align the tabs on the tube with the slots on the housing and twist to lock securely.
- For concentrated airflow, attach the concentrator nozzle to the end of the blower tube.

Figure 3.1: Blower mode with concentrator nozzle for precise clearing.
3.2 Vacuum/Mulcher Mode Assembly
- Ensure the power cord is unplugged.
- Remove the blower tube if attached by pressing the release button and twisting.
- Open the impeller cover by unscrewing the knob on the side of the housing.
- Attach the vacuum tube assembly to the main intake port. Ensure it clicks into place and is fully seated.
- Attach the collection bag to the air outlet port. Secure the bag's collar over the port and twist to lock.
- Close and secure the impeller cover.

Figure 3.2: Tool-less conversion process for switching between blower and vacuum modes.
4. Operation
Familiarize yourself with the controls and operating procedures before starting work.
4.1 Starting the Tool
- Connect the tool's power cord to a suitable outdoor-rated extension cord. Use the built-in cord retainer to secure the connection.
- Plug the extension cord into a 120V AC power outlet.
- Press the ON/OFF switch to start the motor.
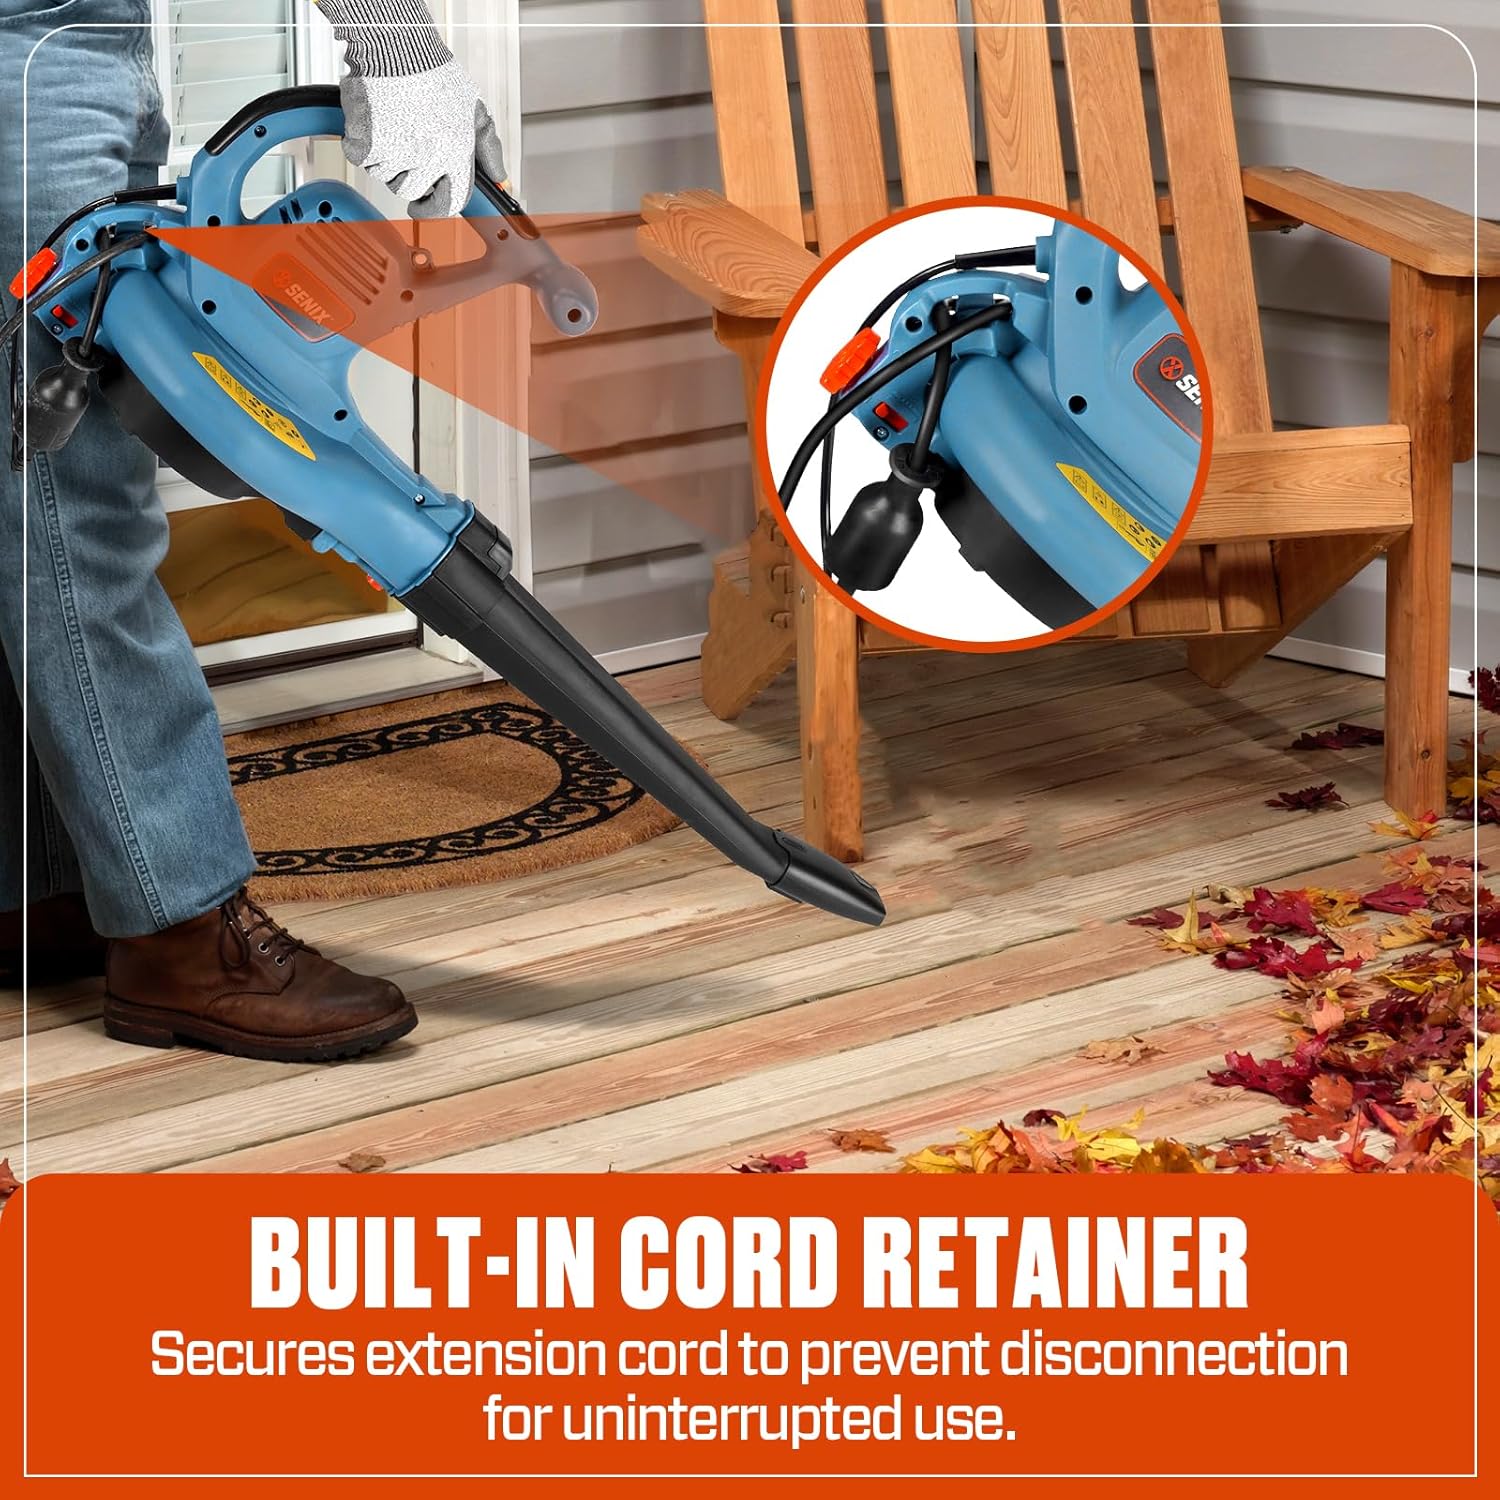
Figure 4.1: Securing the extension cord with the built-in retainer.
4.2 Blower Mode
Hold the blower firmly with one hand, directing the nozzle towards the debris. Sweep the nozzle from side to side to gather leaves and debris into piles. Adjust the 6-speed control for optimal airflow.

Figure 4.2: Operating the blower with one-handed control.

Figure 4.3: Adjusting the 6-speed control for different tasks.
4.3 Vacuum/Mulcher Mode
With the vacuum tube and collection bag attached, lower the vacuum tube over the debris. The tool will vacuum and mulch leaves, reducing their volume significantly (up to a 14:1 mulch ratio). Empty the collection bag when full using the zipper design.

Figure 4.4: Vacuuming leaves with the collection bag attached.

Figure 4.5: The mulching capability of the tool, demonstrating volume reduction.
Video 4.1: Demonstration of the 12 Amp Corded Electric 3-in-1 Leaf Blower/Vacuum/Mulcher in action, showcasing its various functions.
5. Maintenance
Regular maintenance ensures optimal performance and extends the life of your tool. Always disconnect the tool from the power source before performing any maintenance.
- Cleaning: After each use, clean the exterior of the tool with a damp cloth. Remove any debris from the air intake vents and the impeller area.
- Collection Bag: Empty and clean the collection bag regularly to prevent clogging and maintain vacuum efficiency.
- Inspection: Periodically inspect the power cord for damage. Check all fasteners for tightness. Ensure the blower and vacuum tubes are free of obstructions.
- Storage: Store the tool in a dry, secure location out of reach of children.
6. Troubleshooting
If your SENIX BLVE12-M experiences issues, consult the following common troubleshooting steps:
- Tool Does Not Start:
- Check if the power cord is securely plugged into a working outlet.
- Ensure the extension cord is not damaged and is rated for outdoor use.
- Verify that the impeller cover is fully closed and secured in vacuum/mulcher mode.
- Reduced Airflow/Suction:
- Inspect the blower/vacuum tubes for blockages.
- Check the collection bag for fullness or obstructions.
- Clean any debris from the impeller fan.
- Excessive Vibration:
- Disconnect power and inspect the impeller for damage or debris.
- Ensure all attachments are securely fastened.
For issues not covered here, please contact SENIX customer support.
7. Specifications
| Brand | SENIX |
| Model Name | 12 AMP Leaf Blower (BLVE12-M) |
| Power Source | Corded Electric (AC) |
| Voltage | 120 Volts |
| Amperage | 12 Amps |
| Air Flow Capacity | Up to 420 CFM |
| Maximum Speed | Up to 179 MPH |
| Mulch Ratio | 14:1 |
| Collection Bag Capacity | 1.24 Bushels |
| Item Weight | 7.05 Pounds |
| Product Dimensions | 47.24"L x 9.45"W x 28.74"H |
| Noise Level | 79 Decibels |
8. Warranty & Support
The SENIX BLVE12-M is backed by a three-year limited warranty. For warranty claims, technical support, or replacement parts, please contact SENIX customer service.
SENIX Customer Service: Refer to the contact information provided in your product packaging or visit the official SENIX website for assistance.