
MONGITI 8GB Ultra Thin Digital Voice Recorder
MONGIFI 8GB Ultra Thin Digital Voice Recorder User Manual
Model: 8GB Ultra Thin Digital Voice Recorder
1. Introduction
The MONGIFI 8GB Ultra Thin Digital Voice Recorder is a compact and portable device designed for high-quality audio recording and MP3 playback. Its ultra-thin design and simple one-button operation make it ideal for various recording needs, including lectures, meetings, interviews, and personal notes. With 8GB of built-in memory, it offers ample storage for extended recording sessions.
2. Safety Information
- Do not expose the device to extreme temperatures, direct sunlight, or high humidity.
- Avoid dropping or subjecting the device to strong impacts.
- Keep the device away from water and other liquids.
- Do not attempt to disassemble or repair the device yourself. Refer to qualified service personnel.
- Use only the supplied accessories to prevent damage.
3. Package Contents
Please check the package for the following items:
- MONGIFI 8GB Ultra Thin Digital Voice Recorder
- USB to 3.5mm Audio Adaptor Cable
- Earbuds
- User Manual (this document)

Image: The package contents, showing the compact voice recorder, the USB charging/data transfer cable, and a pair of earbuds.
4. Product Overview
The MONGIFI voice recorder is designed for simplicity and portability.

Image: The MONGIFI voice recorder held in a hand, demonstrating its extremely small and portable form factor.
4.1. Physical Dimensions

Image: A diagram illustrating the precise dimensions of the voice recorder, which are approximately 4.5 cm (1.77 inches) in length, 1.7 cm (0.67 inches) in width, and 0.5 cm (0.2 inches) in thickness.
4.2. Components
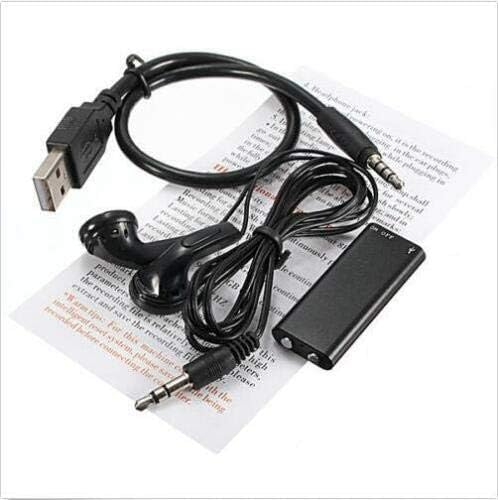
Image: A close-up view of the top of the voice recorder, clearly showing the ON/OFF slide switch and the 3.5mm jack which doubles as the USB port.
- ON/OFF Switch: Used to power the device on and off, initiating and stopping recordings.
- 3.5mm Jack (USB/Headphone Port): This single port serves multiple functions: connecting the USB cable for charging and data transfer, and connecting the earbuds for audio playback.
- Built-in Microphone: Located internally, designed for all-round sound capture.
- LED Indicator: A small light (not visible during recording) indicates device status.
5. Setup
5.1. Charging the Device
Before first use, fully charge the voice recorder. A full charge typically takes about one hour and provides up to 12 hours of recording time.
- Ensure the recorder is in the "OFF" position.
- Connect the supplied USB to 3.5mm audio adaptor cable to the recorder's 3.5mm jack.
- Connect the USB end of the cable to a computer's USB port or a USB wall adapter.
- The LED indicator will show charging status (e.g., solid light while charging, off when fully charged).
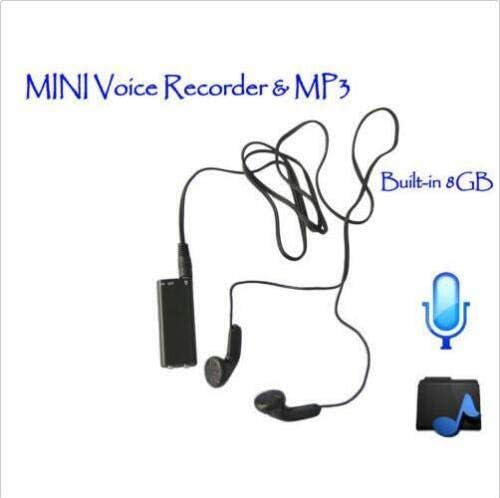
Image: The voice recorder connected via its 3.5mm jack to the USB cable, ready for charging or data transfer.
6. Operating Instructions
6.1. Recording Audio
The device features a simple one-button operation for recording.
- Ensure nothing is plugged into the 3.5mm jack.
- Slide the ON/OFF switch to the "ON" position.
- The device will automatically begin recording. The LED indicator will not be on during recording to ensure discretion.
- To stop recording and save the file, slide the ON/OFF switch back to the "OFF" position.
6.2. Playing Back Recordings
Recordings can be played back directly on the device using the supplied earbuds.
- Plug the supplied earbuds into the 3.5mm jack.
- Slide the ON/OFF switch to the "ON" position.
- The device will automatically begin playing the recorded files in sequence.
- To stop playback, slide the ON/OFF switch to the "OFF" position.
6.3. Transferring Files to Computer (PC/Mac)
Recorded files can be easily transferred to your computer for storage, playback, or editing.
- Ensure the recorder is in the "OFF" position.
- Connect the supplied USB to 3.5mm audio adaptor cable to the recorder's 3.5mm jack.
- Connect the USB end of the cable to your computer's USB port.
- The computer will recognize the device as a removable disk (like a USB flash drive).
- Open the device folder on your computer and copy the recorded audio files (WAV format) to your desired location.
6.4. Advanced Configuration (Via PC)
The device allows for advanced configuration settings by connecting it to a PC. These settings are typically managed via a configuration file on the device's storage.
- Recording Audio Level: Adjust the sensitivity of the microphone.
- Voice-Operated Threshold Level (VOX): Set the sound level at which recording automatically starts or pauses.
- Number of Channels: Configure mono or stereo recording (if supported).
- Sampling Rate: Adjust the audio sampling frequency for different quality levels.
- Bitrate: Select the recording bitrate (e.g., 192Kbps, 1024Kbps) to control file size and quality. Higher bitrates result in better quality but larger files.
- Automatic Maximum File Length: Set the maximum duration for a single recording file before a new file is automatically created. It is recommended to set this to the maximum (e.g., 255 minutes) to avoid short audio gaps between files.
- Internal Clock Synchronization: Synchronize the recorder's internal clock with your PC to ensure recorded files have accurate timestamps.
Refer to the specific configuration file (often a text file) found on the device when connected to a computer for detailed instructions on modifying these settings.
7. Maintenance
- Clean the device with a soft, dry cloth. Do not use liquid cleaners or aerosols.
- Store the device in a cool, dry place when not in use.
- Regularly back up your recordings to a computer to prevent data loss.
- Avoid overcharging the battery; disconnect once fully charged.
8. Troubleshooting
| Problem | Possible Cause | Solution |
|---|---|---|
| Device not turning on. | Low battery. | Charge the device fully. |
| Cannot record. | 3.5mm jack is occupied; memory full. | Ensure nothing is plugged into the 3.5mm jack. Transfer files to PC to free up space. |
| No sound during playback. | Earbuds not properly connected; volume too low; corrupted file. | Ensure earbuds are fully inserted. Check file integrity on PC. |
| Device not recognized by computer. | Improper connection; device not in OFF position; driver issue. | Ensure device is OFF before connecting. Try a different USB port. Restart computer. |
| Poor recording quality. | Microphone obstructed; too far from sound source; low bitrate setting. | Ensure microphone is clear. Move closer to sound source. Adjust bitrate settings via PC. |
9. Specifications
| Feature | Specification |
|---|---|
| Model | 8GB Ultra Thin Digital Voice Recorder |
| Memory Storage Capacity | 8 GB |
| Recording Format | WAV |
| Playback Format | MP3 Audio, WAV |
| Recording Quality | 192Kbps (default), configurable up to 1024Kbps |
| Battery Life (Recording) | Up to 12 hours |
| Charging Time | Approximately 1 hour |
| Product Dimensions | 1.77 x 0.67 x 0.2 inches (4.5 x 1.7 x 0.5 cm) |
| Weight | 30 grams (approx.) |
| Microphone Form Factor | Built-In |
| Headphones Jack | 3.5 millimeters |
| Hardware Interface | USB |
| Compatible Devices | MP3 Player, PC, Mac |
Ask a question about this manual
Ask about setup, troubleshooting, compatibility, parts, safety, or missing instructions. Manuals+ will review the question and use this page’s manual context to help answer it.