
1. Introduction
Thank you for choosing the PONER SAUND Mini Projector. This manual provides essential information for setting up, operating, and maintaining your projector to ensure optimal performance and longevity. This projector is designed to deliver a high-quality visual experience for home theater, gaming, presentations, and various entertainment needs.
Key features include 1280x720P native resolution with 1080P support, 3000:1 contrast ratio, enhanced LED brightness, and a projection size ranging from 40 to 210 inches.
2. Package Contents
Please verify that all items listed below are included in your package:
- PONER SAUND Mini Projector (Model T6)
- Power Cord
- User Manual
- Remote Control
- HDMI Cable
- RCA Cable (AV Cable)

Figure 2.1: Projector dimensions and included accessories.
3. Product Overview
Familiarize yourself with the main components and interfaces of your projector.
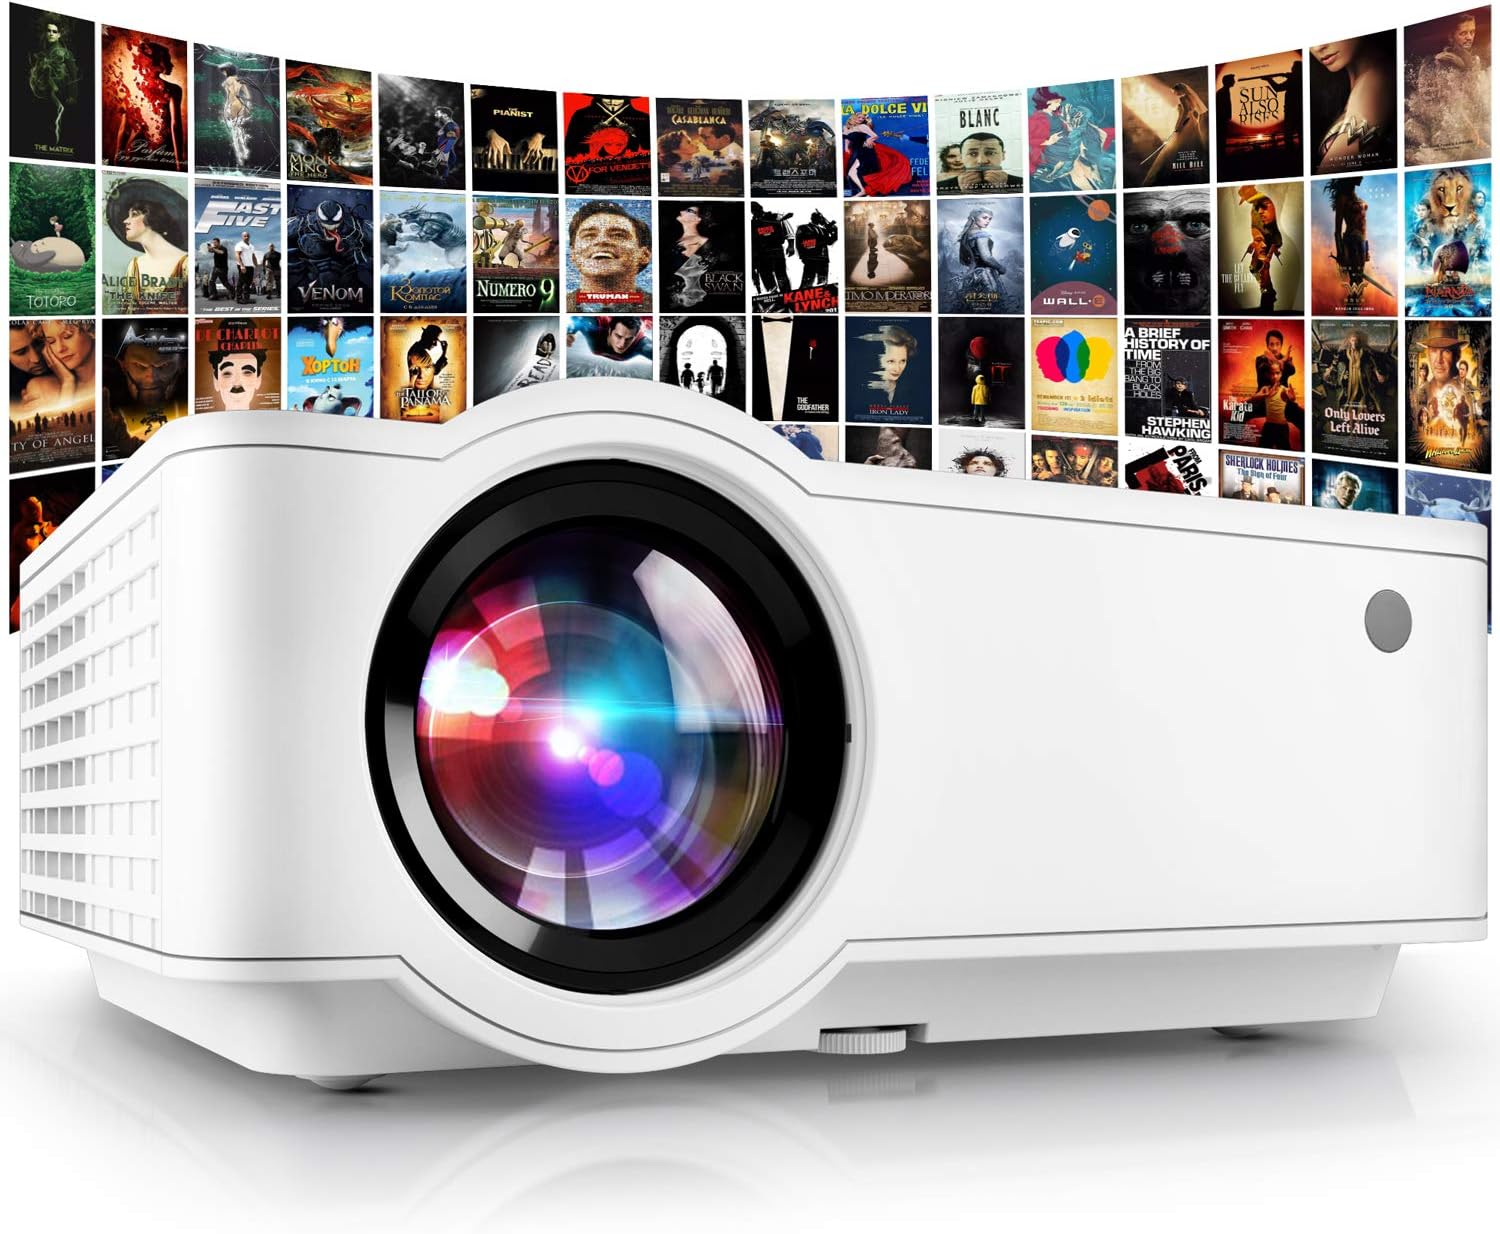
Figure 3.1: Front view of the PONER SAUND Mini Projector in operation.
3.1. Interfaces and Controls
The projector features multiple input and output ports for versatile connectivity.
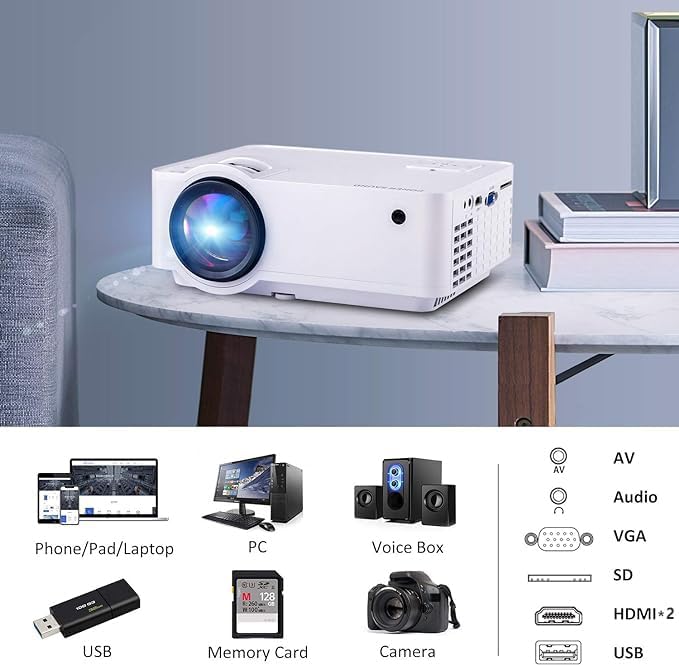
Figure 3.2: Overview of projector input/output ports and compatible devices.
- HDMI Ports (x2): For connecting devices like laptops, gaming consoles (PS3/PS4), TV sticks, and Blu-ray players.
- USB Port: For connecting USB drives to play media files.
- VGA Port: For connecting older computers or laptops.
- AV Port: For connecting devices using RCA cables (e.g., DVD/VCD players).
- SD Card Slot: For playing media directly from an SD card.
- Headphone Jack: For connecting external audio devices or headphones.
- IR Receiver: For remote control signals.
- Focus Ring: Adjusts image clarity.
- Keystone Correction: Adjusts image distortion.
4. Setup
4.1. Placement
Place the projector on a stable, flat surface. Ensure adequate ventilation around the unit. The recommended projection distance is 6.5 feet for optimal viewing, though it supports distances from 5 feet to 15 feet, yielding screen sizes from 40 to 210 inches.
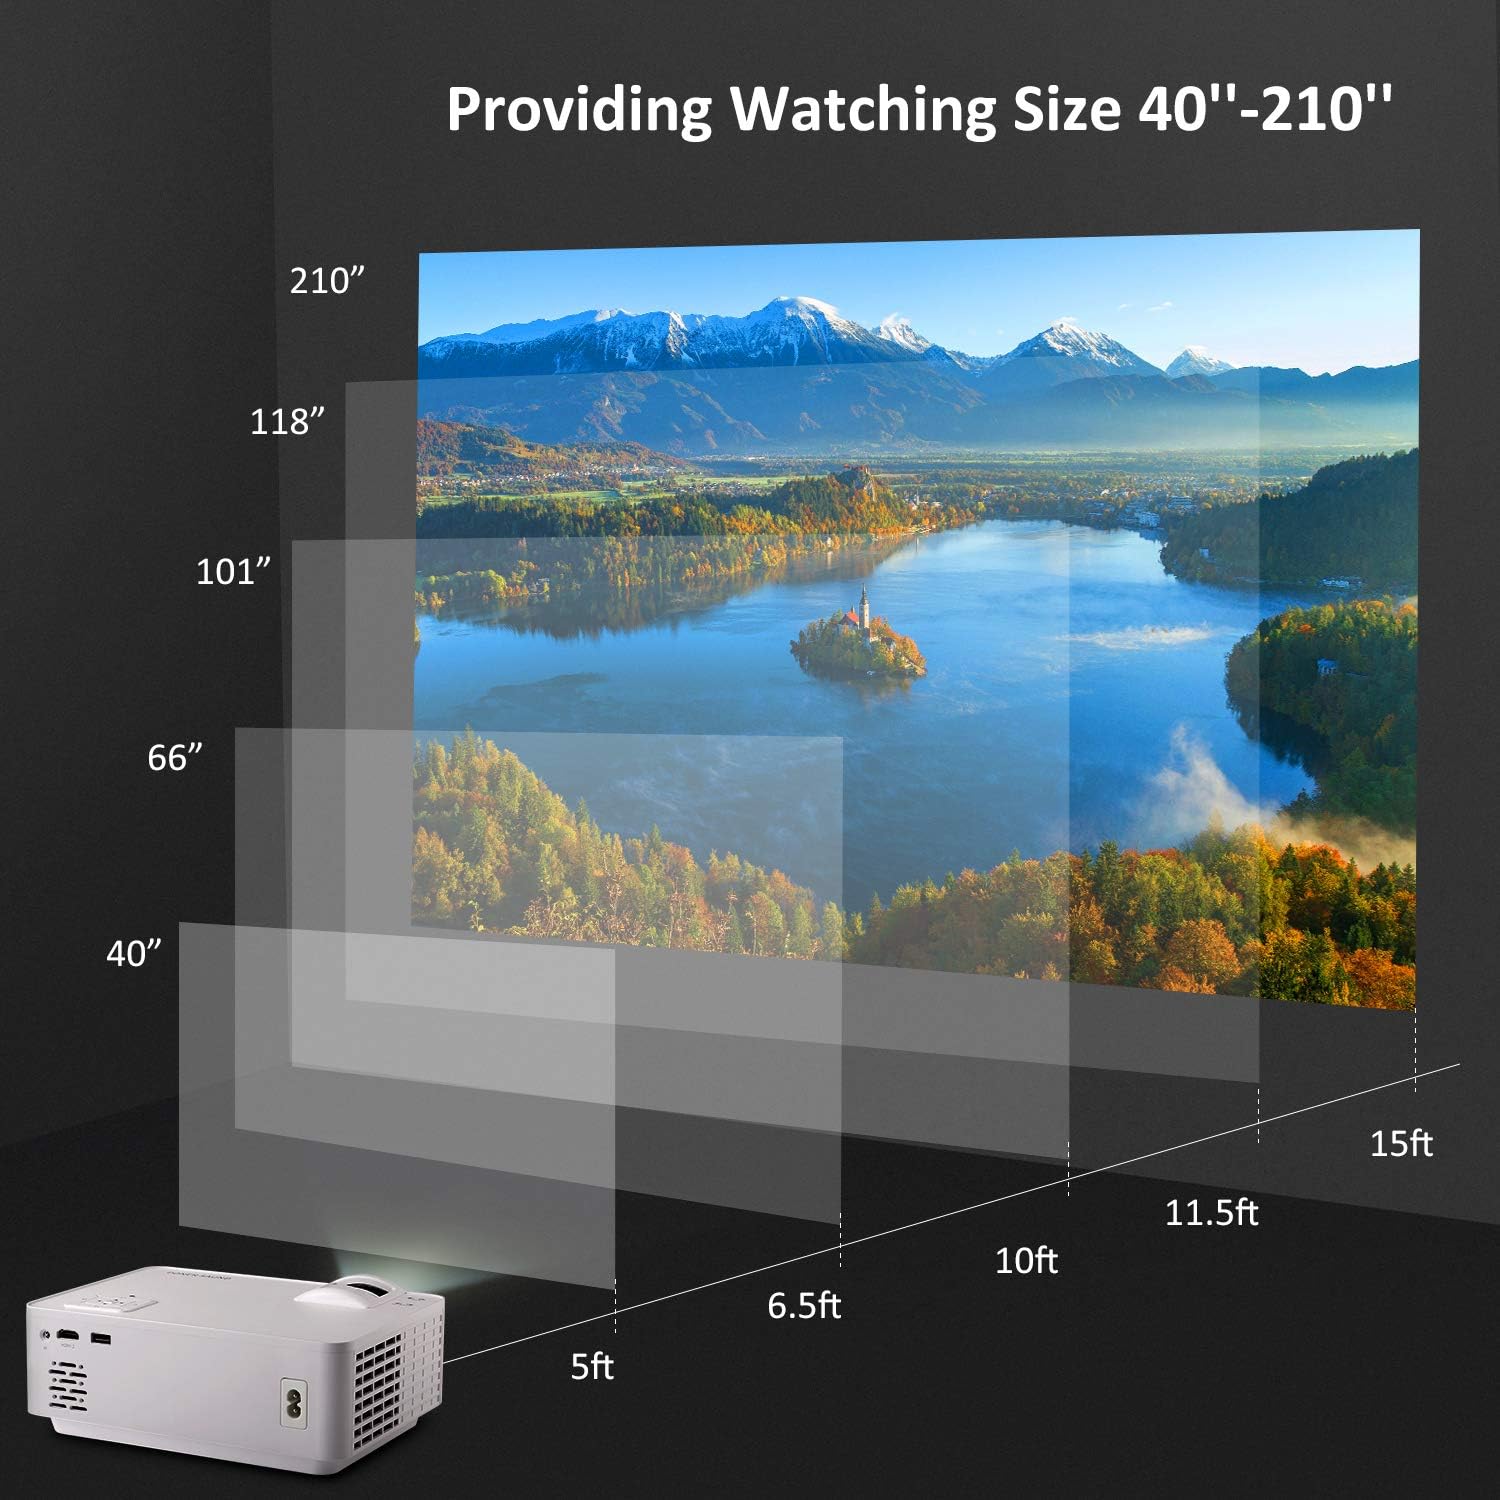
Figure 4.1: Projection distance and screen size guide.
4.2. Power Connection
Connect the provided power cord to the projector's power input and then to a power outlet.
4.3. Connecting Devices
Connect your desired input device (e.g., laptop, gaming console, USB drive) to the corresponding port on the projector using the appropriate cable (HDMI, VGA, AV, USB). For connecting smartphones or tablets, an additional adapter/converter (not included) is required.

Figure 4.2: Connecting a smartphone/tablet via HDMI adapter.
4.4. Focus and Keystone Correction
After powering on, adjust the Focus Ring (No. 7 button on some models) until the image is clear. If the image appears trapezoidal, use the Keystone Correction (No. 8 button on some models) to square the image. These adjustments are typically made manually on the projector body.
5. Operating Instructions
5.1. Power On/Off
Press the power button on the projector or the remote control to turn the unit on or off. Allow a few seconds for the projector to warm up or cool down.
5.2. Input Source Selection
Use the "Source" button on the remote or projector to cycle through available input sources (HDMI1, HDMI2, USB, AV, VGA, SD). Select the input corresponding to your connected device.
5.3. Menu Navigation
Use the arrow keys and "OK" button on the remote or projector to navigate the on-screen menu. Adjust settings such as Picture Mode, Color Temperature, Aspect Ratio, and Zoom. The zoom function allows you to adjust the image size without moving the projector.
5.4. Audio Output
The projector has a built-in speaker. For enhanced audio, connect external speakers or headphones to the headphone jack.

Figure 5.1: Versatile usage of the projector for different activities.
6. Maintenance
6.1. Cleaning
- Lens: Use a soft, lint-free cloth specifically designed for optical lenses. Do not use abrasive cleaners.
- Projector Body: Wipe with a soft, dry cloth. Avoid using liquid cleaners directly on the surface.
6.2. Ventilation
Ensure that the projector's ventilation vents are not blocked during operation to prevent overheating. The dual fan cooling system helps maintain optimal temperature.
6.3. Lamp Life
The LED light source has a long lifespan of approximately 52,000 hours, reducing the need for frequent lamp replacements.
7. Troubleshooting
This section addresses common issues you might encounter and their solutions.
| Problem | Possible Cause / Solution |
|---|---|
| "No device" message when connecting phone/laptop/PC via USB. | Ensure you are using a standard HDMI cable for connection. Alternatively, ensure both devices are on the same Wi-Fi network if wireless connection is attempted. USB port is primarily for media playback from storage devices. |
| Projector not going into full-screen mode. | Ensure the input signal source is AV, HDMI, or PC-RGB. Use the appropriate button (e.g., No.2 button on some remote models) to adjust the display mode. |
| Cannot read SD card. | Verify that the SD card is inserted correctly into the 15-port connector and in the correct direction. |
| Image is unclear or focus abruptly fails. | Adjust the Lens Focusing (No. 7 button) and Keystone Correction (No. 8 button) on the projector. Ensure the projector is placed at an optimal distance from the screen. |
| Projector not bright enough / Low lumens. | Ensure the viewing environment is sufficiently dark for optimal brightness. The projector provides 5500 Lumens, which is suitable for most home environments. |
| Limited projection angle. | Adjust the physical angle of the projector using a stand or by placing an item underneath to tilt it. Use keystone correction to square the image if tilted. |
| Words unreadable during PowerPoint presentation. | Ensure a successful connection. Adjust Lens Focusing (No. 7 button) and Keystone Correction (No. 8 button) for clarity. For text-heavy presentations, a higher native resolution projector might be required for very small fonts. |
8. Specifications
| Feature | Detail |
|---|---|
| Brand | PONER SAUND |
| Model Number | T6 |
| Native Display Resolution | 1280 x 720 |
| Supported Resolution | 1080P |
| Brightness | 5500 Lumens (upgraded to 9000lux) |
| Contrast Ratio | 3000:1 |
| Projection Size | 40" to 210" |
| Projection Distance | 5ft to 15ft (Recommended: 6.5ft) |
| Lamp Life | 52,000 hours |
| Connectivity Technology | HDMI, USB, AV, VGA |
| Speaker Type | Built-In |
| Item Weight | 3.9 pounds |
| Product Dimensions | 8.66 x 6.54 x 3.71 inches |
| Color | White |
9. Warranty and Support
PONER SAUND is committed to 100% customer satisfaction. If you have any questions, concerns, or require assistance with your projector, please do not hesitate to contact us. We aim to respond to all inquiries within 24 hours.
Please refer to the contact information provided with your purchase or visit the official PONER SAUND website for support details.