
Renogy Voyager 10A
Renogy Voyager 10A Solar Charge Controller User Manual
Model: Voyager 10A
Brand: Renogy
Introduction
The Renogy Voyager 10A is a 10-amp charge controller designed for outdoor use, featuring an IP67 rating for water, rain, and condensation resistance. It incorporates advanced PWM technology and supports both 12V and 24V off-grid solar applications. This controller is compatible with four different battery types, including AGM, Gel, Flooded, and Lithium Iron Phosphate, and includes a Lithium Awakening feature. The Voyager 10A also provides multiple protection features for the solar panel, battery, and the controller itself, ensuring system longevity.

Key Features
- 12V / 24V Battery Compatibility: Automatic recognition of system voltage.
- Smart 4-Stage PWM Charging: Includes Bulk, Absorption, Float, and Equalization stages for efficient battery charging and extended battery life.
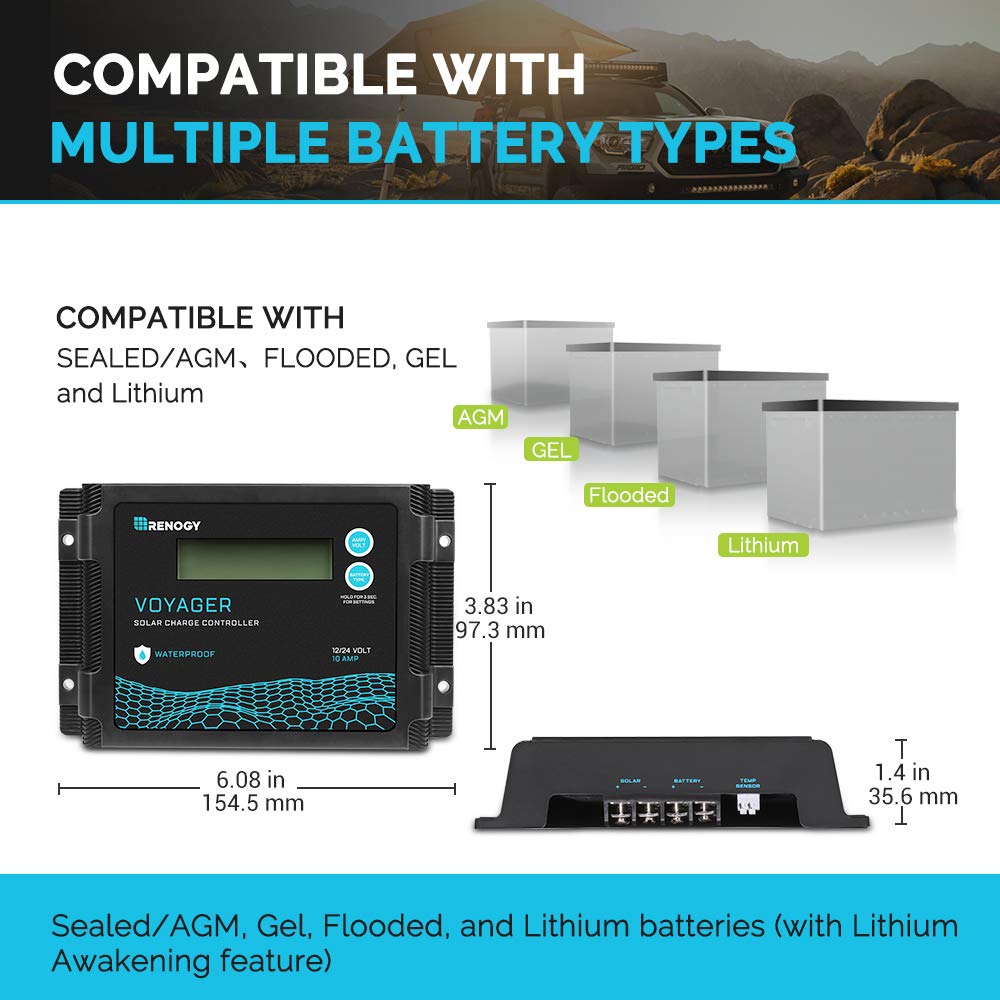
- 4 Battery Type Compatibility: Supports Sealed/AGM, Gel, Flooded, and Lithium batteries, with a specific Lithium Awakening feature.
- Watertight Design: IP67 rated for outdoor use, resistant to water spray, rain, and condensation.
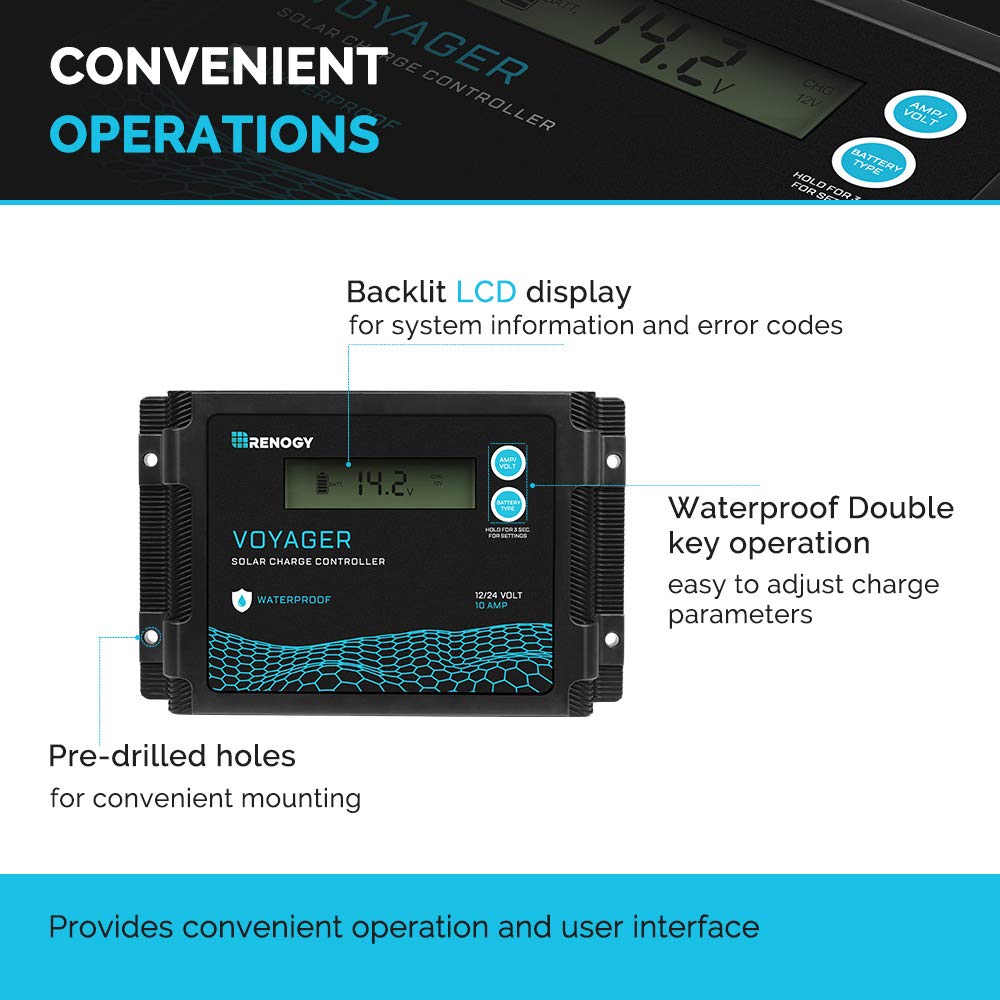
- Backlit LCD Display: Provides clear system information and error codes.
- Multiple Protection Features: Safeguards the battery, controller, and solar panels, including reverse polarity protection.


What's in the Box
- Voyager 10A Solar Charge Controller
Note: Additional cables and accessories may be required for a complete solar setup and are sold separately.
Setup
1. Wiring Connections
Ensure all connections are secure and correct polarity is observed. Connect the components in the following order:
- Connect the battery to the charge controller.
- Connect the solar panel(s) to the charge controller.
- (Optional) Connect an inverter or load to the battery.
Important: Always connect the battery first to allow the controller to recognize the system voltage. Disconnect in reverse order.

2. Battery Type Selection
The Voyager 10A is compatible with Sealed/AGM, Gel, Flooded, and Lithium batteries. It is crucial to select the correct battery type on the controller to ensure proper charging and battery longevity. Refer to the operating section for instructions on how to adjust this setting.
Note: For Lithium batteries, you may need to manually set the voltage. The controller also features a Lithium Awakening function.
Operating
LCD Display and Buttons
The backlit LCD display provides real-time system information and error codes. The controller features a waterproof double key operation for easy adjustment of charge parameters.
Charging Stages
The controller utilizes a Smart 4-Stage PWM charging algorithm to optimize battery charging:
- Bulk Charge: Charges the battery at maximum current until voltage rises to the Absorption voltage.
- Absorption Charge: Charges the battery at a constant voltage and reduced current to ensure full charge.
- Float Charge: Maintains the battery at a constant voltage, providing a trickle charge to compensate for self-discharge.
- Equalization Charge: (For Flooded batteries only) Periodically overcharges the battery to balance cell voltages and remove sulfation.
Maintenance
Regular maintenance ensures optimal performance and longevity of your solar charge controller and system.
- Inspect Connections: Periodically check all wiring connections for tightness and corrosion. Loose connections can cause voltage drops and overheating.
- Clean Controller: Keep the controller's exterior clean and free of dust or debris. Use a soft, dry cloth. Do not use harsh chemicals or abrasives.
- Check for Damage: Inspect the controller for any physical damage, cracks, or signs of water ingress, especially given its outdoor rating.
- Monitor Performance: Regularly check the LCD display for normal operation and any error codes. Ensure the battery is charging as expected.
Troubleshooting
This section provides solutions to common issues you might encounter with your Renogy Voyager 10A Solar Charge Controller.
| Problem | Possible Cause | Solution |
|---|---|---|
| No display/Controller not powering on | Battery not connected or low voltage; reversed polarity. | Ensure battery is connected first and has sufficient voltage (12V/24V). Check for correct polarity. |
| Battery not charging | Solar panel not connected; insufficient sunlight; incorrect battery type setting; faulty wiring. | Verify solar panel connection and ensure adequate sunlight. Check battery type setting on controller. Inspect all wiring for secure connections. |
| Error code displayed | Specific system fault (e.g., over-voltage, over-current, short circuit). | Refer to the full user manual (PDF) for specific error code definitions and troubleshooting steps. Disconnect and reconnect components in correct order. |
| Water ingress despite "waterproof" rating | Improper installation of rubber cover for terminals; extreme conditions beyond IP67 rating. | Ensure the rubber terminal cover is properly seated and sealed. While IP67, avoid prolonged submersion or high-pressure water jets. If damage occurred, contact support. |
Specifications
| Attribute | Value |
|---|---|
| Product Dimensions | 6.08 x 3.83 x 1.4 inches |
| Item Weight | 0.55 Pounds (8.8 ounces) |
| Item Model Number | Voyager 10A |
| Manufacturer | Renogy |
| Color | Blue/Black |
| Voltage | 12V / 24V Auto Recognition |
| Material | (Not specified, but compatible with Gel batteries) |
| Charge Current | 10A |
| Waterproof Rating | IP67 |
Warranty & Support
For detailed warranty information, technical support, or further inquiries, please refer to the official Renogy website or the comprehensive user manual.
Official User Manual (PDF): Download PDF
Visit the Renogy Store: Renogy Official Store on Amazon
Related documentsVoyager 10A


Ask a question about this manual
Ask about setup, troubleshooting, compatibility, parts, safety, or missing instructions. Manuals+ will review the question and use this page’s manual context to help answer it.