
1. Introduction
This manual provides essential information for the assembly, setup, operation, and maintenance of your Tamiya 19453 Mini 4WD Great Magnum R FM-A Chassis Model Assembly Kit. The Great Magnum R is a Fully Cowled Mini 4WD series car kit featuring the FM-A (Front Midship Aero) chassis, designed for optimal performance on undulating circuits. Please read these instructions carefully before beginning assembly.

Image 1: Fully assembled Tamiya 19453 Mini 4WD Great Magnum R model. This image shows the complete model from a front-side perspective, highlighting its blue, white, and red body with green wheels.
2. Safety Information
- Adult Supervision: This product is recommended for users aged 14 years and older. Adult supervision is advised during assembly and operation, especially for younger users.
- Small Parts: The kit contains small parts that may pose a choking hazard. Keep out of reach of small children.
- Sharp Edges: Exercise caution during assembly as some parts may have sharp edges.
- Batteries: Two AA batteries are required (sold separately). Always insert batteries with correct polarity (+/-). Do not mix old and new batteries, or different types of batteries. Remove batteries when the model is not in use for extended periods.
- Adhesives/Paints: If using adhesives or paints (not included), ensure proper ventilation and follow the manufacturer's safety guidelines.
3. Package Contents
Your Tamiya 19453 Mini 4WD Great Magnum R FM-A Chassis Model Assembly Kit includes the following components:
- FM-A Chassis parts (molded in Black)
- A Parts (Black low-friction POM)
- Body shell (molded in White)
- Metallic sticker sheet (blue and white theme)
- Fluorescent green A-spoke wheels
- Black low-profile tires
- Type 130 motor
- Gears (3.5:1 ratio)
- Front skid bar
- Four rollers (rear rollers are 8mm thick)
- Product Manual (detailed assembly instructions)
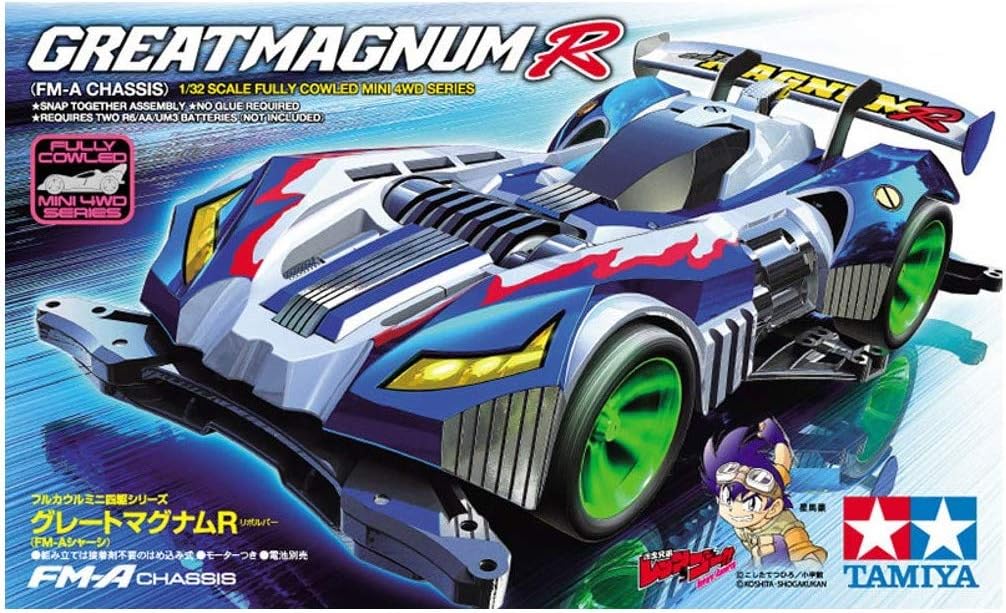
Image 2: Packaging box for the Tamiya 19453 Mini 4WD Great Magnum R. The box art displays the assembled model and key features.
4. Assembly Instructions
The Tamiya 19453 Mini 4WD Great Magnum R is a model assembly kit. Detailed, step-by-step instructions are provided in the included Product Manual. Please refer to that manual for specific assembly steps, diagrams, and part identification.
General Assembly Overview:
- Preparation: Unpack all components and organize them. Familiarize yourself with the parts and the assembly diagrams in the manual.
- Chassis Assembly: Begin by assembling the FM-A chassis components, including the motor mount, gear housing, and roller attachments.
- Motor Installation: Install the Type 130 motor into the chassis. Ensure proper alignment with the gears.
- Wheel and Tire Assembly: Attach the fluorescent green A-spoke wheels to the axles and mount the black low-profile tires.
- Body Shell Preparation: Apply the dedicated metallic stickers to the white body shell as indicated in the manual.
- Final Assembly: Secure the decorated body shell onto the assembled chassis.
No glue is required for assembly; parts snap together.

Image 3: Front view of the Tamiya 19453 Mini 4WD Great Magnum R, showcasing the aerodynamic design and front rollers.
5. Setup
Once assembly is complete, follow these steps to prepare your Mini 4WD for operation:
- Battery Installation: Open the battery compartment (typically located on the underside of the chassis). Insert two AA batteries, ensuring correct polarity. Close the compartment securely.
- Power Switch: Locate the power switch on the chassis. Ensure it is in the "OFF" position before placing the car on a track.

Image 4: Rear view of the Tamiya 19453 Mini 4WD Great Magnum R, showing the rear rollers and spoiler design.
6. Operating
The Tamiya Mini 4WD is designed for racing on dedicated Mini 4WD tracks.
- Track Placement: Carefully place your Mini 4WD car onto a Mini 4WD track.
- Power On: Flip the power switch to the "ON" position. The motor will engage, and the car will begin to move.
- Observation: Observe the car's performance on the track. The FM-A chassis, with its front-midship motor layout, is particularly stable on undulating sections.
- Power Off: When finished, switch the power to "OFF" and remove the car from the track.

Image 5: Side view of the Tamiya 19453 Mini 4WD Great Magnum R, illustrating the chassis profile and wheel design.
7. Maintenance
Regular maintenance ensures optimal performance and longevity of your Mini 4WD car.
- Cleaning: After use, gently clean the chassis, wheels, and body to remove dust and debris. Use a soft brush or cloth.
- Gear Inspection: Periodically check the gears for wear or damage. Replace worn gears to maintain smooth operation.
- Lubrication: Apply a small amount of Tamiya-recommended grease to moving parts, such as gears and axle bearings, to reduce friction.
- Roller Check: Ensure all rollers spin freely and are securely attached.
- Battery Removal: Always remove batteries if the model will not be used for an extended period to prevent leakage.
8. Troubleshooting
If you encounter issues with your Mini 4WD, consider the following common solutions:
- Car Not Moving:
- Check if batteries are inserted correctly and are not depleted.
- Ensure the power switch is in the "ON" position.
- Verify that the motor is properly connected and the gears are engaged.
- Slow Performance:
- Replace old batteries with fresh ones.
- Check for debris obstructing the wheels or gears.
- Ensure gears are lubricated and not excessively worn.
- Car Derails Frequently:
- Check that all rollers are securely attached and spinning freely.
- Ensure tires are clean and properly seated on the wheels.
- Inspect the chassis for any damage or misalignment.
9. Specifications
| Feature | Specification |
|---|---|
| Model Name | Great Magnum R |
| Model Number | 19453 |
| Chassis Type | FM-A (Front Midship Aero) |
| Motor | Type 130 (included) |
| Gear Ratio | 3.5:1 |
| Power Source | 2 x AA batteries (sold separately) |
| Material | Acrylonitrile Butadiene Styrene (ABS), Plastic |
| Color | White (body), Black (chassis), Fluorescent Green (wheels) |
| Assembly Required | Yes |
| Item Weight | 195 g |
| Item Dimensions (L x W x H) | 6 x 23 x 14 cm |
10. Warranty and Support
For specific warranty information or technical support, please refer to the documentation included with your product or contact Tamiya customer service directly. Keep your purchase receipt as proof of purchase.

