Introduction
Thank you for purchasing the Sami RS-1012 Digital Alarm Clock. This device combines a digital alarm clock with a radio, a projection feature for time and temperature, and an integrated lamp. Please read this manual carefully to ensure proper use and to fully understand its functions.
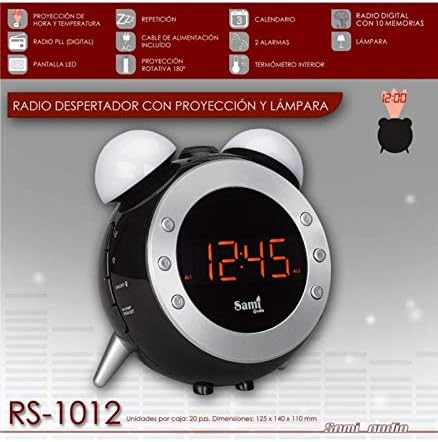
An image showing the Sami RS-1012 digital alarm clock from the front, displaying '12:45'. The image also highlights key features such as time and temperature projection, digital radio, LED display, snooze, power cable, 180° rotatable projection, calendar, two alarms, internal thermometer, 10 radio memories, and an integrated lamp.
Setup
1. Unpacking
Carefully remove all components from the packaging. Ensure all parts are present: the Sami RS-1012 unit and the power cable.
2. Power Connection
Connect the provided power cable to the DC input port on the back of the alarm clock. Plug the other end into a standard electrical outlet. The LED display will illuminate.
3. Initial Time and Date Setting
Upon first power-up, the clock may display a default time. Refer to the "Setting Time and Date" section under Operating for detailed instructions on how to set the current time and date.
Operating Instructions
1. Basic Controls
Familiarize yourself with the buttons on the device. Typically, these include buttons for setting time, alarm, radio, projection, and snooze/light.
2. Setting Time and Date (Calendar)
- Press the TIME SET button (or similar, refer to device markings).
- Use the UP/DOWN buttons to adjust the hour.
- Press TIME SET again to confirm the hour and move to minutes.
- Adjust minutes with UP/DOWN.
- Repeat for year, month, and day settings.
- Press TIME SET one last time to exit setting mode.
3. Setting Alarms (Dual Alarms)
The device supports two independent alarms.
- Press the ALARM 1 SET button.
- Use UP/DOWN to set the desired alarm hour.
- Press ALARM 1 SET to confirm and set minutes.
- Adjust minutes with UP/DOWN.
- Press ALARM 1 SET to select alarm sound (buzzer or radio).
- Press ALARM 1 SET to exit.
- Repeat for ALARM 2 SET if a second alarm is needed.
- To activate/deactivate an alarm, press the corresponding ALARM ON/OFF button.
4. Snooze Function
When an alarm sounds, press the SNOOZE button (often a large button on top) to temporarily silence the alarm. The alarm will sound again after approximately 9 minutes.
5. Radio Operation (PLL Digital Radio with 10 Memories)
- Press the RADIO ON/OFF button to turn on the radio.
- Use the TUNE +/- buttons to manually adjust the frequency.
- To auto-scan and save stations, press and hold the SCAN button. The radio will automatically search for and store up to 10 stations in memory.
- To recall a saved station, press the MEMORY button repeatedly to cycle through the stored frequencies.
- Adjust volume using the VOLUME +/- buttons.
6. Projection Function (Time and Temperature, 180° Rotatable)
The projector can display the current time and indoor temperature onto a wall or ceiling.
- Press the PROJECTOR ON/OFF button to activate the projection.
- Rotate the projector lens (located on the side or back) up to 180 degrees to adjust the projection angle.
- Use the FOCUS wheel (if available) to sharpen the projected image.
- Press the MODE button on the projector to switch between time display, temperature display, or alternating display.
7. Lamp Function
The integrated lamp provides ambient lighting.
- Press the LAMP button to turn the lamp on or off.
- Some models may offer adjustable brightness; refer to specific button markings for this feature.
8. Temperature Display (Interior Thermometer)
The device features an internal thermometer that displays the room temperature on the LED screen. This is often displayed alongside the time or can be toggled using a MODE button.
Maintenance
1. Cleaning
To clean the device, use a soft, dry cloth. Do not use abrasive cleaners, waxes, or solvents as these may damage the surface. Ensure the device is unplugged before cleaning.
2. Battery Replacement (Backup)
The unit may contain a small backup battery (e.g., CR2032 coin cell) to retain time and alarm settings during a power outage. If the settings are lost after a power interruption, the backup battery may need replacement. Consult a qualified technician or the manufacturer's support for battery replacement instructions, as improper handling can damage the device.
Troubleshooting
- No Display/Power: Ensure the power cable is securely plugged into both the device and the electrical outlet. Check if the outlet is functional.
- Alarm Not Sounding: Verify that the alarm is activated (alarm icon visible on display) and the volume is not set to minimum. Check alarm time settings.
- Radio Static/Poor Reception: Extend the FM antenna fully. Try repositioning the unit to improve reception.
- Projection Unclear: Adjust the focus wheel on the projector lens. Ensure the projection surface is within the optimal range.
- Time/Settings Lost After Power Outage: The backup battery may be depleted. Refer to the Maintenance section for information on backup battery.
Specifications
| Model | RS-1012 |
| Brand | Sami |
| Display Type | Digital LED |
| Power Source | Electric (AC power adapter included) |
| Features | Time & Temperature Projection, 180° Rotatable Projector, PLL Digital FM Radio (10 presets), Dual Alarms, Snooze, Calendar, Indoor Thermometer, Integrated Lamp |
| Dimensions (Approx.) | 125 x 140 x 110 mm |
Warranty and Support
For warranty information and technical support, please refer to the warranty card included with your product or visit the official Sami website. Keep your purchase receipt as proof of purchase.
Manufacturer: Sami
ASIN: B07YQBD816


