1. Product Overview
The Western Digital WD Blue SN550 NVMe Internal SSD is designed to boost your system's performance with next-generation NVMe technology. It offers significantly faster speeds compared to traditional SATA SSDs, making it ideal for tasks such as content creation, casual gaming, and processing large amounts of data. This drive comes in a compact M.2 2280 form factor.
Key Features:
- Boosts system performance with NVMe SSD technology.
- Offers over 4 times faster read speeds than SATA SSDs.
- Features a Western Digital designed controller and firmware for optimized performance.
- Compatible with the Western Digital SSD Dashboard for health monitoring.
- Utilizes an M.2 2280 form factor.

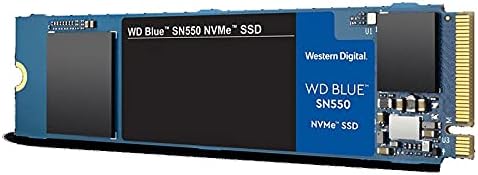
This image displays the physical appearance of the Western Digital WD Blue SN550 NVMe SSD, highlighting its compact M.2 form factor.
2. Understanding NVMe SSD Technology
NVMe (Non-Volatile Memory Express) is a communication interface and protocol developed specifically for SSDs to take advantage of the high-speed data transfer capabilities of PCIe (Peripheral Component Interconnect Express). Unlike older SATA interfaces, NVMe allows SSDs to communicate directly with the system's CPU, significantly reducing latency and increasing throughput.
The WD Blue SN550 uses the M.2 2280 form factor, which is a small, rectangular card designed to plug directly into a compatible slot on your motherboard. The '2280' refers to its dimensions: 22mm wide and 80mm long.

This image provides an angled perspective of the SSD, illustrating its slim profile and connector pins.
Official Product Video:
This video provides an overview of the Western Digital WD Blue SN550 NVMe SSD, showcasing its features and benefits.
3. Installation Guide
Proper installation is crucial for optimal performance. Please follow these steps carefully.
3.1. Pre-installation Checklist
- Compatibility: Ensure your motherboard has an available M.2 slot that supports NVMe PCIe Gen3 x4 SSDs. Refer to your motherboard's manual.
- Tools: You will typically need a Phillips head screwdriver.
- Safety: Always power off your computer and disconnect it from the power source before opening the case. Ground yourself to prevent electrostatic discharge (ESD).
- Mounting Screw: M.2 SSDs require a small screw to secure them to the motherboard. This screw is usually provided with your motherboard, not the SSD itself.
3.2. Physical Installation
- Open Computer Case: Carefully open your computer's case to access the motherboard.
- Locate M.2 Slot: Identify the M.2 slot on your motherboard. It is typically a horizontal slot with a small screw hole at the end.
- Insert SSD: Gently insert the WD Blue SN550 NVMe SSD into the M.2 slot at a slight angle (approximately 30 degrees). Push it in until it is fully seated.
- Secure SSD: Once seated, push the SSD down so it lies flat against the motherboard. Secure it with the M.2 mounting screw (not included with the SSD).
- Close Case: Close your computer case and reconnect all cables.

This image shows the SSD securely fitted into the M.2 slot on a motherboard, ready for operation.
Installation Video Guides:
Video 2: How to replace an M.2 SSD. This user-generated video demonstrates the process of replacing an M.2 SSD, which includes steps relevant to installing the WD Blue SN550.
Video 3: Western Digital Blue SN550 - How to Fit & Review & Demo. This user-generated video provides a guide on fitting the Western Digital Blue SN550, along with a review and demonstration.
4. Operating Your WD Blue SN550 NVMe SSD
After physical installation, the SSD needs to be prepared for use within your operating system.
4.1. Initializing and Formatting the Drive
- Boot System: Power on your computer.
- Access Disk Management: In Windows, right-click the Start button and select 'Disk Management'. In other operating systems, use the equivalent disk utility.
- Initialize Disk: Locate the newly installed SSD (it may appear as 'Unallocated Space'). Right-click on it and select 'Initialize Disk'. Choose GPT (GUID Partition Table) for modern systems.
- Create New Simple Volume: Right-click the unallocated space on the SSD and select 'New Simple Volume'. Follow the wizard to assign a drive letter and format the drive (NTFS for Windows).
4.2. Operating System Migration (Optional)
If you intend to use the WD Blue SN550 as your primary boot drive, you may want to migrate your existing operating system to it. Western Digital often provides or recommends cloning software (e.g., Acronis True Image WD Edition) for this purpose. Refer to the software's instructions for detailed steps.
4.3. WD SSD Dashboard
Download and install the Western Digital SSD Dashboard software from the official Western Digital website. This utility allows you to monitor the health, temperature, and performance of your SSD, as well as update firmware.
This image illustrates the SSD as part of a functional computer setup, ready for data operations.
Software Setup and Performance Demonstration:
This user-generated video demonstrates the installation, disk management setup, and performance benchmarks of the WD Blue SN550 NVMe SSD.
5. Maintenance and Care
To ensure the longevity and optimal performance of your WD Blue SN550 NVMe SSD, consider the following maintenance tips:
- Firmware Updates: Regularly check for and install firmware updates using the WD SSD Dashboard. Firmware updates can improve performance, stability, and compatibility.
- TRIM Command: Ensure the TRIM command is enabled in your operating system. TRIM helps the SSD manage its stored data more efficiently, preventing performance degradation over time. Modern operating systems typically enable this by default.
- Temperature Monitoring: Use the WD SSD Dashboard to monitor the drive's temperature. While SSDs are generally robust, excessive heat can impact performance and lifespan. Ensure adequate airflow within your computer case.
- Avoid Full Capacity: Try to avoid filling the SSD to its absolute maximum capacity. Leaving some free space allows the drive's wear-leveling algorithms to function more effectively.
6. Troubleshooting Common Issues
Here are solutions for common problems you might encounter with your NVMe SSD.
6.1. SSD Not Detected
- Check Physical Connection: Ensure the SSD is correctly seated in the M.2 slot and the mounting screw is secure.
- BIOS/UEFI Settings: Enter your system's BIOS/UEFI settings. Verify that the M.2 slot is enabled and configured for NVMe (PCIe) mode, not SATA mode, if applicable.
- Drivers: Ensure your operating system has the necessary NVMe drivers. Windows 10/11 typically include them, but older OS versions or specific motherboards might require manual installation.
- Motherboard Compatibility: Double-check your motherboard manual for M.2 slot compatibility. Some slots might share bandwidth with SATA ports, disabling them when an M.2 drive is used.
6.2. Slow Performance
- Thermal Throttling: NVMe SSDs can generate heat. If the drive gets too hot, it may reduce performance to prevent damage (thermal throttling). Ensure good airflow in your case, and consider adding an M.2 heatsink if your motherboard supports it or if you experience consistent high temperatures.
- PCIe Lane Allocation: Confirm that your M.2 slot is operating at its full PCIe Gen3 x4 speed. Check your motherboard's BIOS/UEFI settings and manual.
- TRIM Status: Verify that TRIM is enabled for your SSD.
- Driver Updates: Ensure your NVMe drivers and chipset drivers are up to date.
7. Specifications
| Feature | Detail |
|---|---|
| Model Number | WDS500G2B0C |
| Digital Storage Capacity | 500 GB |
| Hard Disk Interface | NVMe (PCIe Gen3 x4) |
| Form Factor | M.2 2280 |
| NAND Type | 3D NAND |
| Sequential Read Speed (Up to) | 2,400 MB/s |
| Sequential Write Speed (Up to) | 1,750 MB/s (for 500GB model) |
| Hardware Platform | Linux, Mac, PC |
| Item Dimensions (LxWxH) | 3.15 x 0.87 x 0.09 inches |
| Item Weight | 0.247 ounces |
| Color | Blue |
8. Warranty Information
The Western Digital WD Blue SN550 NVMe Internal SSD (WDS500G2B0C) comes with a 5-year limited warranty. Please retain your proof of purchase for warranty claims. For full terms and conditions, refer to the official Western Digital warranty documentation available on their website.
9. Support
For further assistance, technical support, or to download the latest drivers and firmware, please visit the official Western Digital support website:
You can also find additional resources and community forums on their website.


