
Puig 3179H
Puig 3179H Touring Screen Adjustable User Manual
Model: 3179H | Brand: Puig
Introduction
This manual provides comprehensive instructions for the installation, operation, and maintenance of your Puig 3179H Touring Screen. This adjustable windshield is designed to enhance riding comfort and aerodynamics for BMW F850GS (2018-2021) and F850GS Adventure (2019) motorcycles. Please read this manual thoroughly before proceeding with installation or use to ensure proper function and safety.
Safety Information
- Always wear appropriate safety gear, including eye protection, during installation.
- Ensure the motorcycle is stable and securely parked on its center stand or a paddock stand before beginning installation.
- Do not overtighten fasteners, as this may damage components. Refer to your motorcycle's service manual for specific torque values if available.
- If you are unsure about any step of the installation process, consult a qualified motorcycle mechanic.
- Regularly inspect the windshield and mounting hardware for any signs of wear, damage, or looseness.
Package Contents
Verify that all components are present before beginning installation:
- Puig Touring Screen (Main Windshield)
- Adjustable Mechanism / Mounting Brackets
- Hardware Kit (screws, washers, nuts, spacers)
- Installation Instructions (this manual)
Note: Specific hardware components may vary slightly. Refer to the included parts diagram if available.
Setup and Installation
Follow these steps carefully to install your Puig Touring Screen. It is recommended to have basic mechanical tools available.
- Preparation: Park your BMW F850GS on a level surface. Ensure the engine is off and cool. Remove the original windshield by unscrewing its mounting bolts. Keep the original bolts and any spacers in a safe place, as some may be reused or serve as reference.
- Assemble Adjustable Mechanism: If the adjustable mechanism is not pre-assembled, follow the specific instructions provided with the hardware kit to attach it to the main windshield. Ensure all pivot points move freely but without excessive play.
- Mounting the Screen: Align the Puig Touring Screen with the original mounting points on your motorcycle. Use the provided new hardware (or specified original hardware) to secure the screen. Start all bolts by hand to prevent cross-threading before tightening them.
- Initial Tightening: Gradually tighten all mounting bolts in a crisscross pattern to ensure even pressure. Do not fully tighten yet.
- Adjust for Fit: Before final tightening, gently adjust the screen to ensure it sits correctly and does not interfere with any other motorcycle components (e.g., handlebars at full lock).
- Final Tightening: Once satisfied with the fit, fully tighten all mounting bolts. Refer to your motorcycle's service manual for recommended torque specifications for windshield bolts, if available. Otherwise, tighten securely but do not overtighten.
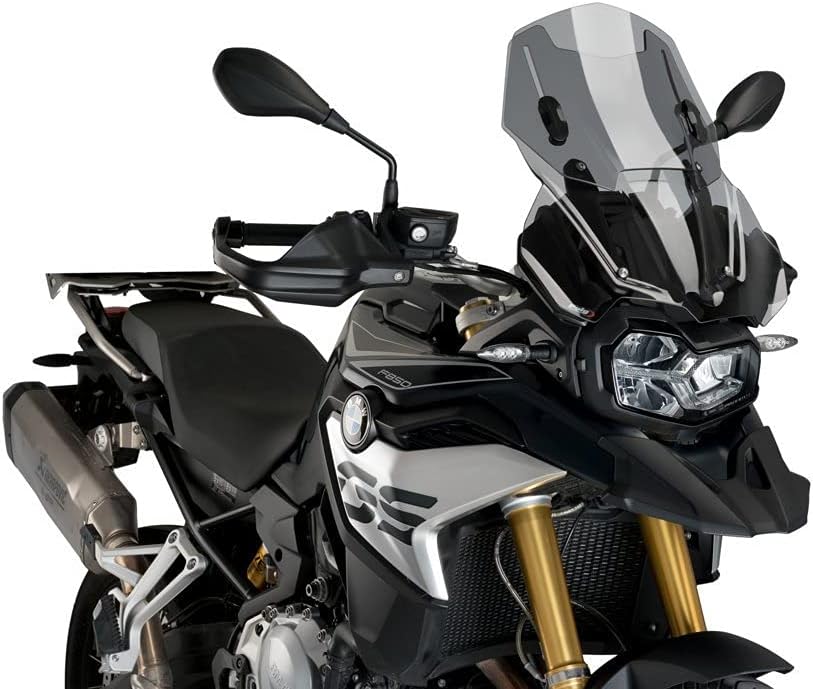
Figure 1: Puig Touring Screen installed on a black BMW F850GS. This image shows the screen's integration with the motorcycle's front fairing and mirrors, highlighting its smoke tint and adjustable design.
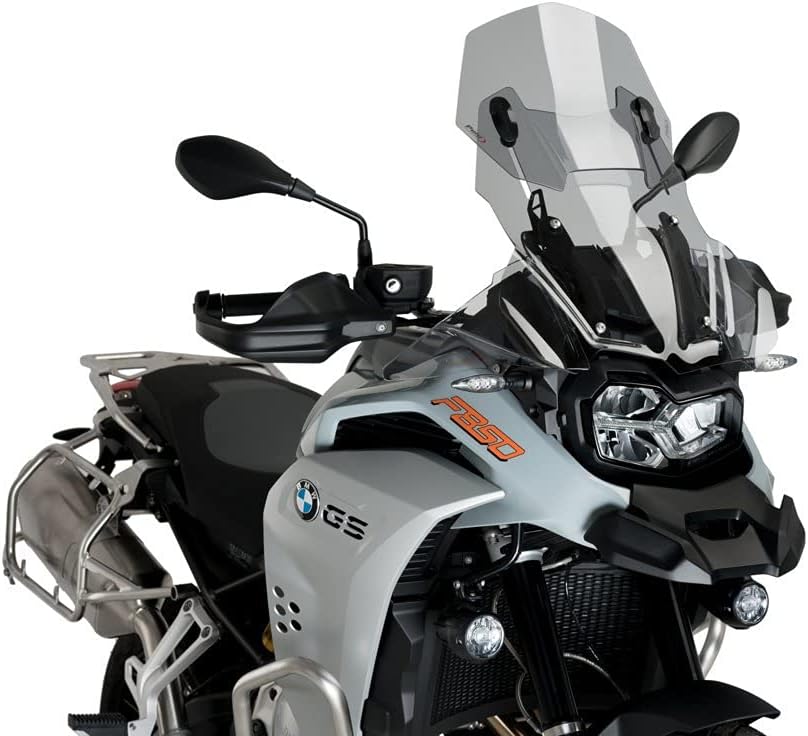
Figure 2: Puig Touring Screen installed on a light-colored BMW F850GS. This perspective emphasizes the screen's profile and how it complements the motorcycle's design, providing a clear view of its adjustable upper section.
Operating the Adjustable Screen
The Puig Touring Screen features an adjustable mechanism to customize airflow and wind protection based on rider preference and riding conditions.
- Adjustment: The screen's height and angle can be adjusted. Typically, this involves loosening specific fasteners on the adjustable mechanism, sliding the screen to the desired position, and then re-tightening the fasteners securely.
- Safety Note: Always adjust the screen while the motorcycle is stationary and the engine is off. Never attempt to adjust the screen while riding.
- Testing: After adjustment, take a short, low-speed ride to assess the new position. Make further adjustments as needed until optimal comfort and wind protection are achieved.
Note: Some adjustable mechanisms may require tools for adjustment, while others might feature quick-release levers. Refer to the specific mechanism design for your model.
Maintenance
- Cleaning: Clean the windshield regularly with a soft cloth and mild soap and water. Avoid abrasive cleaners, solvents, or harsh chemicals, as these can damage the screen's surface. Rinse thoroughly with clean water and dry with a soft, lint-free cloth.
- Inspection: Periodically inspect all mounting hardware for tightness. Vibrations from riding can cause bolts to loosen over time. Check the screen for cracks, scratches, or other damage that could impair visibility or structural integrity.
- Adjustable Mechanism: Keep the adjustable mechanism clean and free of debris. If it becomes stiff, a small amount of silicone-based lubricant can be applied to the sliding parts, avoiding contact with the screen surface.
Troubleshooting
| Problem | Possible Cause | Solution |
|---|---|---|
| Excessive vibration or noise from screen | Loose mounting bolts; improper installation; screen not fully secured in adjustable position. | Check and tighten all mounting bolts. Ensure the screen is correctly seated and secured in its adjustable position. Re-read installation instructions. |
| Wind buffeting or inadequate wind protection | Screen not adjusted to optimal height/angle for rider; incorrect screen size for rider height. | Experiment with different adjustable screen positions. Ensure the screen is fully extended if maximum protection is desired. |
| Difficulty adjusting screen | Mechanism dirty or stiff; fasteners overtightened. | Clean the adjustable mechanism. Apply a small amount of silicone lubricant if necessary. Loosen adjustment fasteners slightly before attempting to move. |
Specifications
| Feature | Detail |
|---|---|
| Model Number | 3179H |
| Brand | Puig |
| Color | SMOKE |
| Compatibility | BMW F850GS (18-21), F850GS Adventure (19) |
| Material | High-quality acrylic/polycarbonate (typical for Puig screens) |
| Dimensions (Product) | Approximately 21.85 x 3.54 x 18.11 inches (55.5 x 9 x 46 cm) |
| Item Weight | Approximately 2.89 pounds (1.31 kg) |
| Installation Type | In-Channel (referring to mounting style) |
Note: Specifications are approximate and subject to change without notice.
Warranty and Support
For warranty information and technical support regarding your Puig product, please refer to the official Puig website or contact your authorized dealer where the product was purchased. Keep your proof of purchase for warranty claims.
Puig Official Website: www.puig.tv
Note: Warranty terms and conditions may vary by region and product type.
Ask a question about this manual
Ask about setup, troubleshooting, compatibility, parts, safety, or missing instructions. Manuals+ will review the question and use this page’s manual context to help answer it.