
1. Introduction
This manual provides detailed instructions for the setup, operation, and maintenance of your WallarGe Westminster Chime Wall Clock. Designed with a cherry tone wood finish and a classic pendulum, this clock offers both aesthetic appeal and precise timekeeping with a silent quartz movement and hourly chimes.

2. Product Features
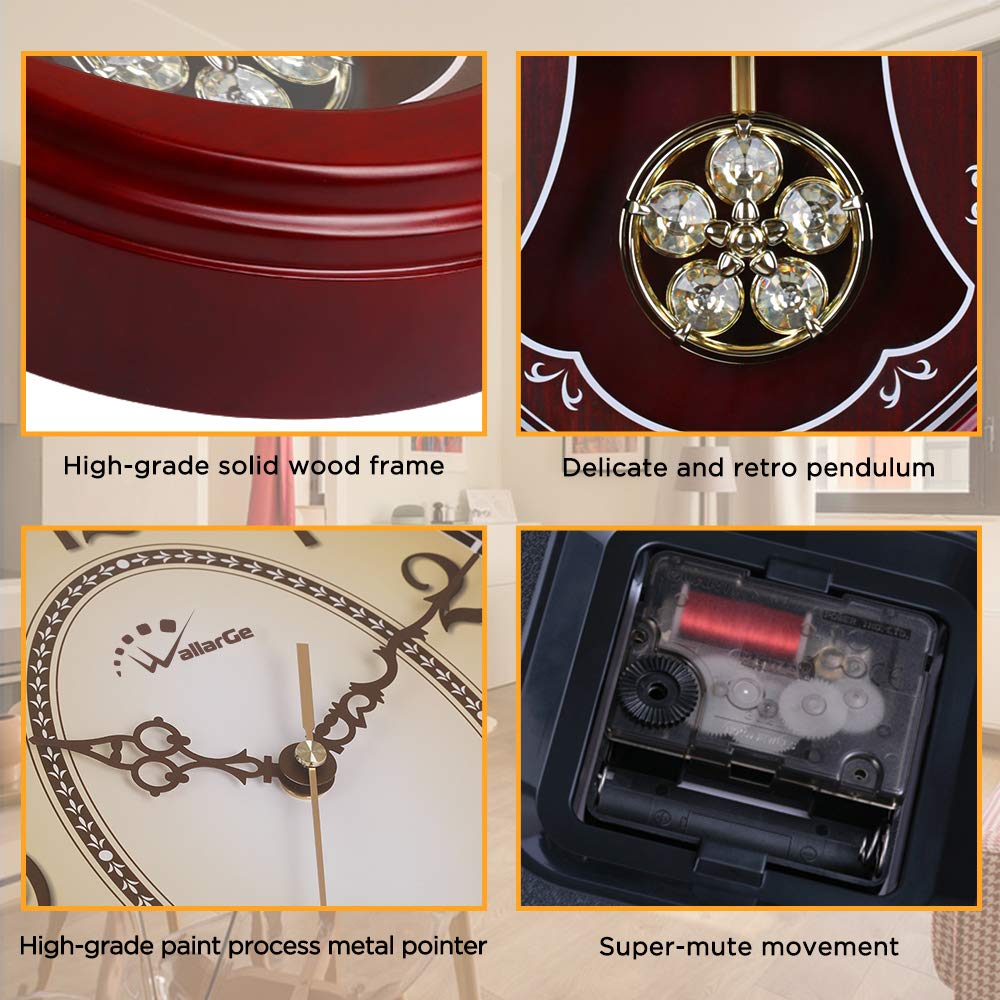
- Pendulum Wall Clock: Features an extra-large display with a swinging pendulum and five crystal adornments.
- Chime Options: Offers 3-way chiming with BIMBAM or Westminster melodies every hour, and 4x4 Westminster sound every quarter.
- Silent Quartz Movement: High-precision mechanism ensures accurate timekeeping without ticking noise.
- Battery Operated: Requires 2 C-size batteries for the clock and chime, and 1 AA battery for pendulum movement (batteries included).
- Cherry Tone Wood Frame: Constructed with a high-end solid wood frame and clear anti-fog glass for durability and clear visibility.
- Night Mute Feature: Chime sound can be muted automatically between 11:00 PM and 6:00 AM to avoid disturbance.
- Adjustable Chime: Option to completely disable chime sounds if preferred.
3. Package Contents
Please verify that all items are present in the package:
- WallarGe Westminster Chime Wall Clock
- 2 x LR14 C CELL Batteries
- 1 x AA Battery
- Mounting Nails
- User Manual (this document)
4. Setup
4.1 Battery Installation
Locate the battery compartments on the back of the clock. Insert 2 C-size batteries into the designated slots for the quartz clock movement and chiming function. Insert 1 AA battery into the separate slot for the pendulum swinging mechanism. Ensure correct polarity (+/-) as indicated.
4.2 Time Setting
After installing batteries, locate the 'Time Set Wheel' on the back of the clock. Gently rotate this wheel to set the correct time. It is recommended to set the time by moving the minute hand clockwise.
4.3 Mounting the Clock
Choose a suitable wall location. Use the provided mounting nails and the 'Hanging Hole' on the back of the clock to securely mount it. Ensure the clock is level for optimal pendulum operation.


5. Operating Instructions
5.1 Chime Settings
Your WallarGe clock offers multiple chime options. Controls for selecting the chime melody (BIMBAM or Westminster) and chime frequency (hourly or 4x4 Westminster every quarter) are located on the back of the clock, typically near the battery compartments or speaker. Refer to the specific markings on your clock for precise adjustments.
5.2 Night Mute Feature
The clock is equipped with a 'Sleep Model' feature that automatically mutes the chime sounds between 11:00 PM and 6:00 AM to ensure undisturbed sleep. This feature is typically activated via a switch or setting on the back of the clock.
5.3 Disabling Chimes
If you prefer no chiming at all, there is an option to completely disable the chime sounds. This setting is usually found on the back panel of the clock, often a switch labeled 'Chime On/Off' or similar.
6. Maintenance
6.1 Cleaning
To clean the clock, gently wipe the wood frame and glass screen with a soft, dry, lint-free cloth. Avoid using abrasive cleaners or chemical sprays, as these may damage the finish or internal components.
6.2 Battery Replacement
Replace batteries annually or when the clock's performance (timekeeping accuracy, chime volume, pendulum swing) diminishes. Always replace all batteries at once with new ones of the specified type (2 C-size, 1 AA). Dispose of old batteries responsibly.
7. Troubleshooting
| Problem | Possible Cause | Solution |
|---|---|---|
| Clock not running | Dead or incorrectly installed C-size batteries. | Check battery polarity. Replace C-size batteries. |
| Chime not sounding | Chime feature is off, night mute is active, or C-size batteries are low. | Check chime settings on the back. Verify time is outside night mute hours. Replace C-size batteries. |
| Pendulum not swinging | Dead or incorrectly installed AA battery. | Check battery polarity. Replace AA battery. |
| Incorrect time display | Time not set correctly. | Adjust time using the 'Time Set Wheel' on the back. |
8. Specifications
| Feature | Detail |
|---|---|
| Brand | WallarGe |
| Display Type | Analog |
| Style | Pendulum |
| Special Features | Silent Clock, Timer, Chime with Night Mute |
| Power Source | Battery Powered (2 C-size, 1 AA) |
| Room Type | Hotel, Office, Home |
| Shape | Oval |
| Material | Wood |
| Theme | Vintage |
| Frame Material | Glass, Plastic, Wood |
| Batteries Included | Yes |
| Mounting Type | Wall Mount |
| Alarm Clock | No |
| Operation Mode | Mechanical |
| Manufacturer | quartz |
| UPC | 700355110774 |
| ASIN | B07Y65PWM7 |
| Item Weight | 2 kg 70 g |
| Dimensions (H x W x D) | 22" x 14.5" x 3" |
9. Warranty and Support
For warranty information and customer support, please refer to the documentation provided at the time of purchase or contact your retailer. You may also visit the official WallarGe website for further assistance.