
FLYLINKTECH V6-1
FLYLINKTECH V6 Battery Replacement User Manual
Model: V6-1
Brand: FLYLINKTECH
Introduction
This user manual provides detailed instructions for the installation, operation, and maintenance of your FLYLINKTECH V6 Battery Replacement. This 6.0Ah, 21.6V Lithium-Ion battery is designed to provide extended power and reliable performance for your compatible V6 series cordless handheld vacuum cleaner.
Safety Information
The FLYLINKTECH V6 Replacement Battery is equipped with an ECP Intelligent Multiprotection system to ensure safe operation. This includes:
- Over-charging Protection: Prevents the battery from being overcharged, extending its lifespan.
- Short-circuit Protection: Automatically cuts off power in case of a short circuit.
- High-temperature Protection: Monitors and regulates battery temperature to prevent overheating.
- Over-current Protection: Protects against excessive current draw.
- Fire-resistant Construction: Designed with materials that resist fire.
Always use the original V6 battery charger or a compatible charger. Do not disassemble, puncture, or expose the battery to extreme temperatures or fire.

Image: Illustration of the battery's built-in safety features, including overheating, overcurrent, overvoltage, overcharge, over discharge, short circuit, over temperature, and overload protection.
Package Contents
Your package should contain the following items:
- 1 x FLYLINKTECH V6 Battery Replacement (6.0Ah, 21.6V)
- 2 x Replacement Filters
- 1 x Cleaning Brush
- 2 x Screws (for installation)
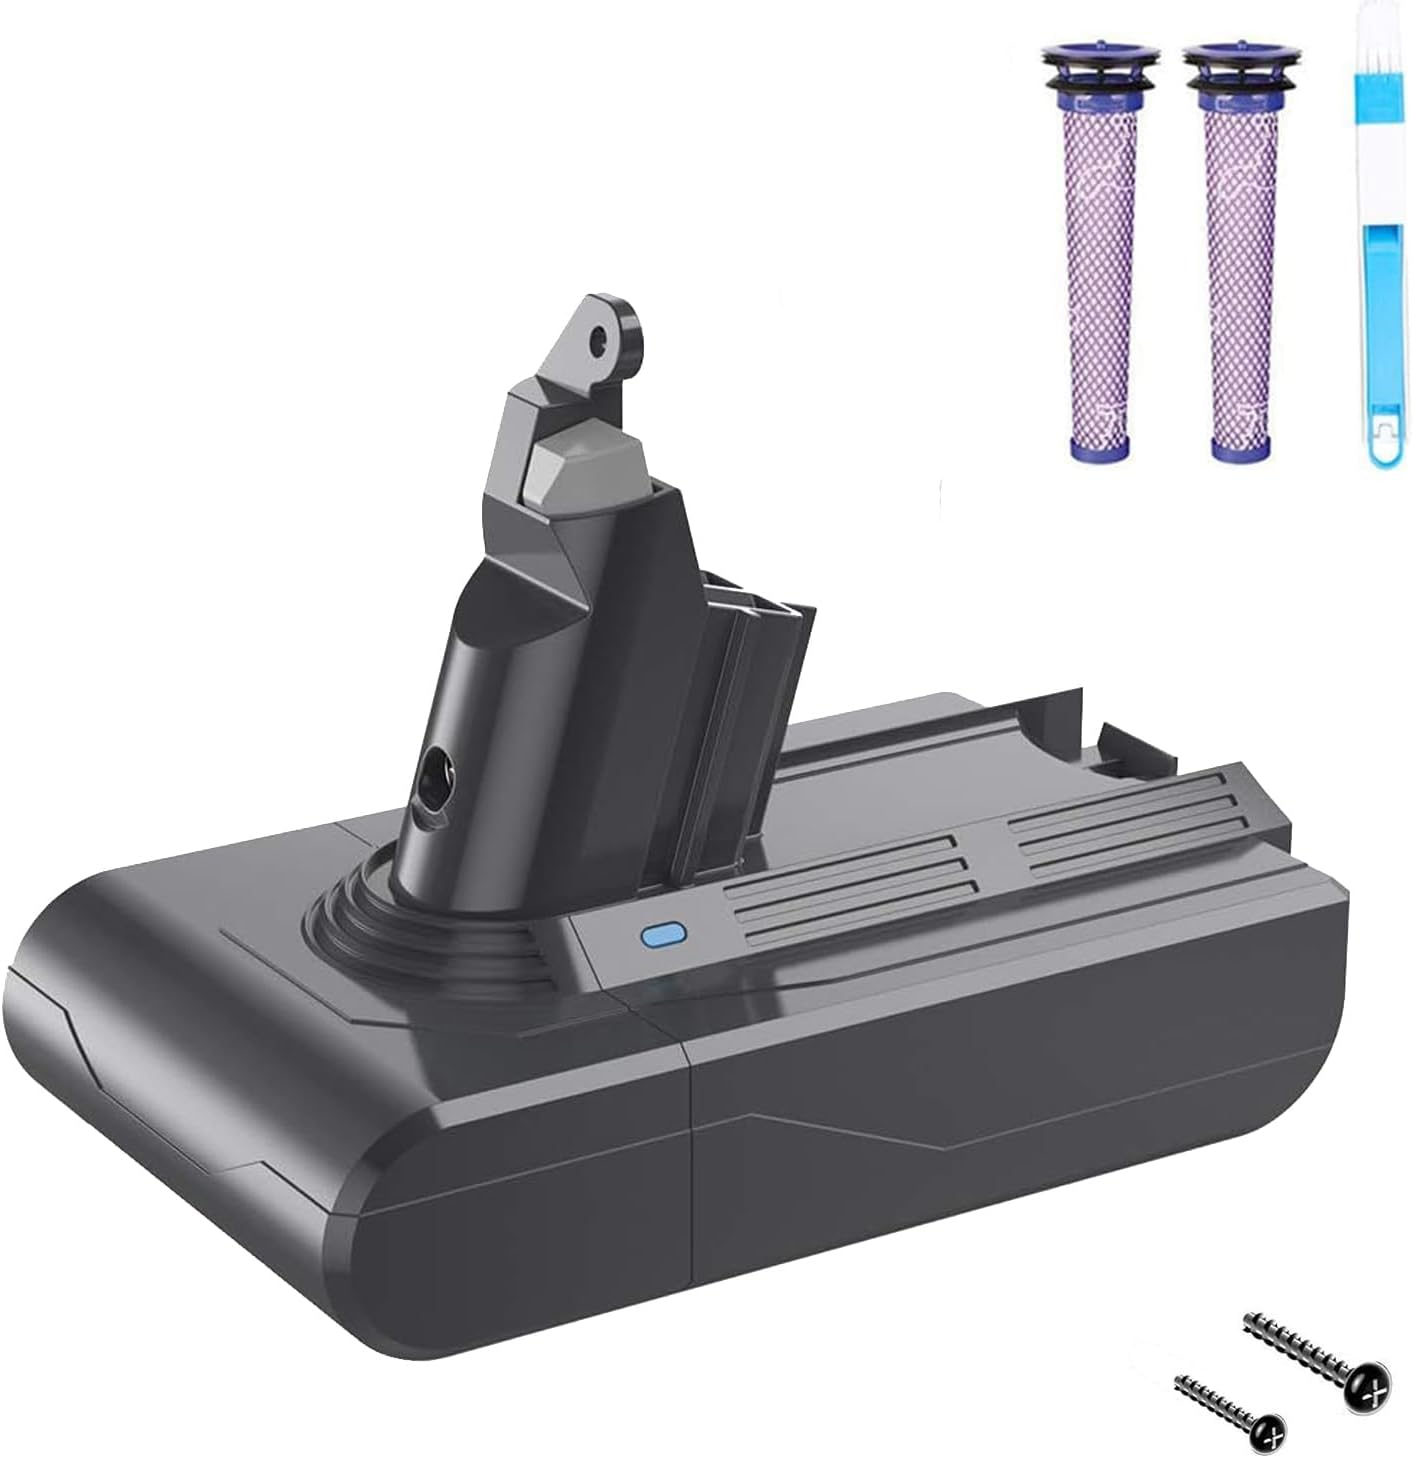
Image: The complete package contents, including the battery, two purple filters, a blue cleaning brush, and two small screws.
Compatibility
This FLYLINKTECH V6 Battery Replacement is fully compatible with the following Dyson V6 series cordless handheld vacuum cleaners and original V6 battery chargers:
- V6 SV03, SV04, SV05, SV06, SV07, SV09
- DC58, DC59, DC61, DC62, DC72, DC74
- V6 Animal, V6 Total Clean, V6 Absolute, V6 Slim, V6 Trigger, V6 Fluffy, V6 Motorhead
- Models 595, 650

Image: Visual representation of various Dyson V6 vacuum models, such as V6 Car+Boat, V6 Baby+Child, V6 Mattress, V6 Top Dog, V6 Animal, V6 Cord-Free, V6 Motorhead, and V6 Trigger, indicating broad compatibility.

Image: A graphic illustrating the battery's compatibility with specific Dyson V6 series models, including SV03, SV04, SV06, SV07, DC58, DC59, DC62, and DC74.
Installation Guide
Follow these steps to replace the battery in your Dyson V6 vacuum cleaner:
- Step 1: Remove Dust Bin. First, pull up the dust box (clear bin) so that the lower cover is open and the bin can be detached from the main vacuum body.
- Step 2: Remove Screws. Locate and remove three screws using a Phillips screwdriver. Two screws are at the bottom of the vacuum body, and one is on the handle.
- Step 3: Release Old Battery. Gently release the old battery from its housing.
- Step 4: Install New Battery. Locate the new battery into the handle, ensuring it clicks into place securely.
- Step 5: Tighten Screws. Secure the new battery in place with the three existing screws.
- Step 6: Reattach Dust Bin. Reinstall the dust bin onto the vacuum body.
Note: The new battery has only a small amount of remaining power. Please fully charge it before the first use.
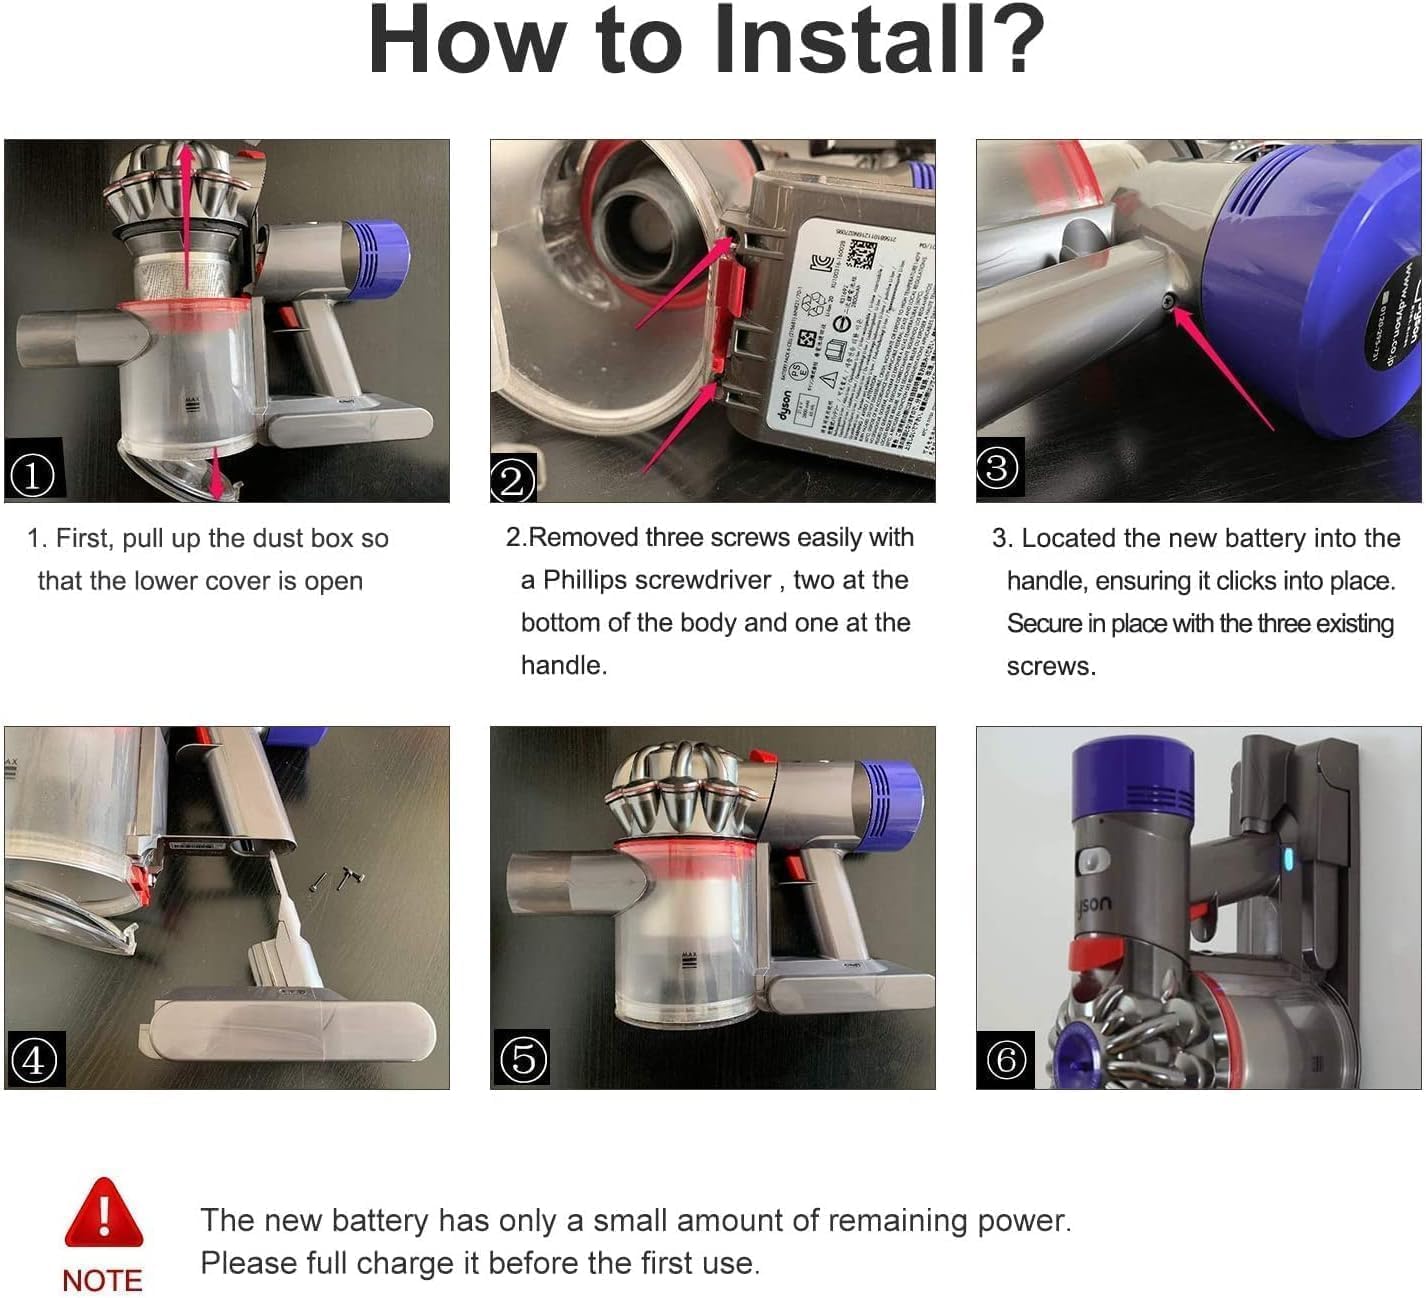
Image: A six-panel visual guide demonstrating the battery replacement process, from removing the dust bin and screws to installing the new battery and reassembling the vacuum.
Video: An official product video demonstrating the installation process of the V6 replacement battery, showing how to remove the old battery and install the new one.
Operating Instructions
Charging the Battery
The battery can be charged using your original V6 charger. The charging indicator light provides status updates:
- Steady Blue Light: Indicates the battery is currently charging or in use.
- Light Off: Indicates charging is complete.
- Yellow Flashing Light: The battery temperature is too low or too high. It needs to be recharged after cooling down or warming up.
- Red Light: Indicates a battery fault. Please contact customer service if this persists.
There is no memory effect, so the battery can be charged or discharged as needed without loss of capacity. After the battery runs out, allow it to cool down for 10-20 minutes before charging, especially if used in MAX mode, as the battery may be hot.
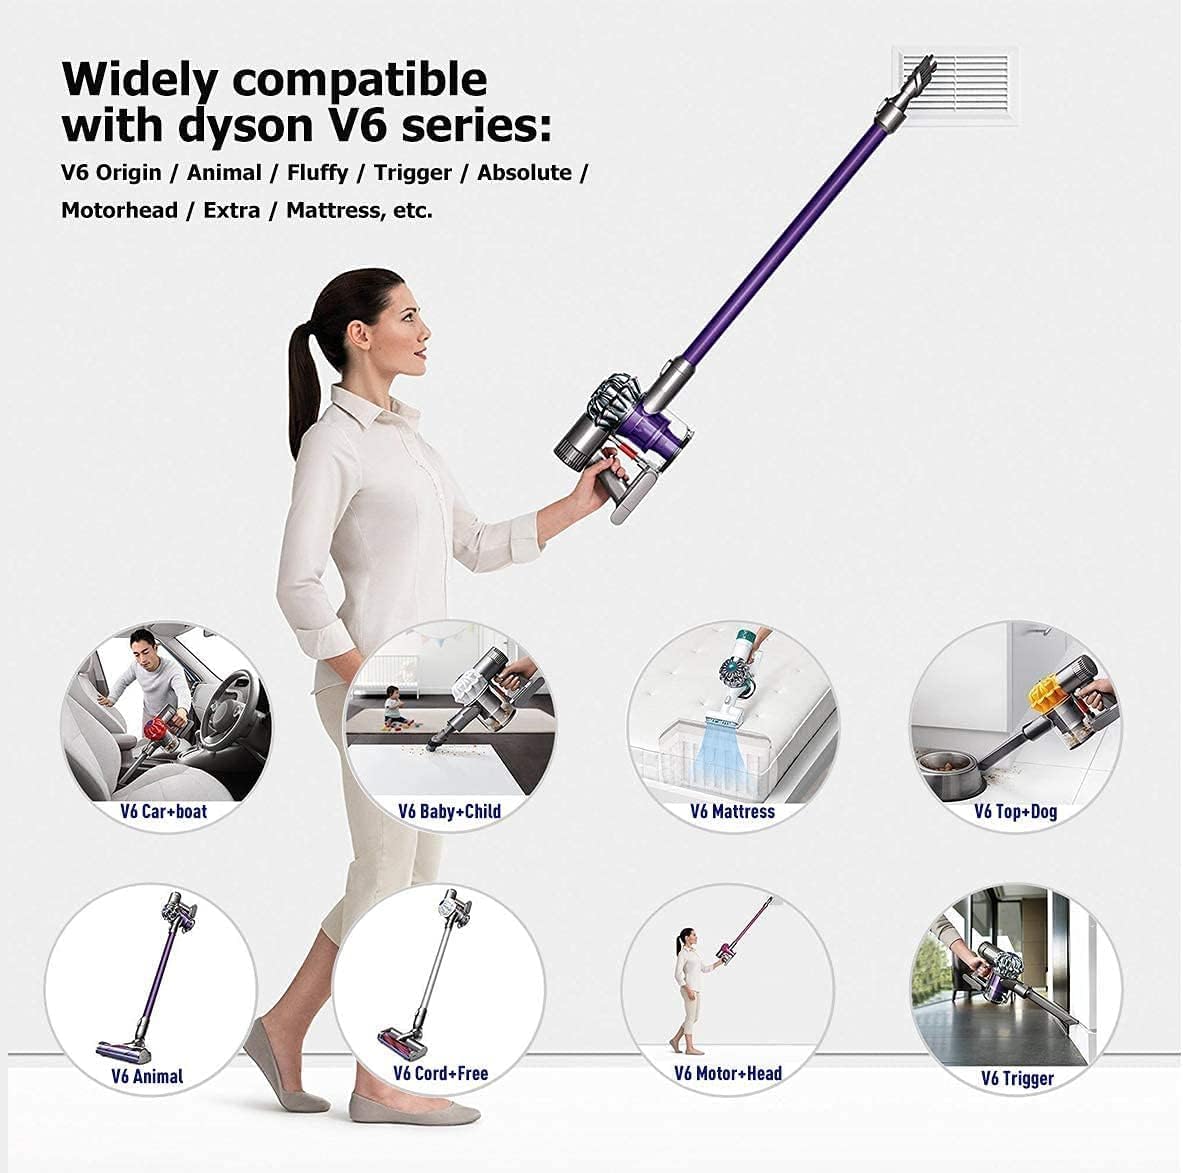
Image: A graphic detailing the meaning of the battery indicator lights during charging and usage, including blue for charging/working, light off for full charge, yellow flashing for temperature issues, and red for battery fault.
Usage Tips
- Ensure the battery is fully charged before initial use for optimal performance.
- For prolonged battery life, avoid completely draining the battery frequently.
- If the vacuum stops due to low battery, allow it to cool before recharging.
Maintenance
Battery Care
- Store the battery in a cool, dry place away from direct sunlight and extreme temperatures.
- If storing for extended periods, charge the battery to about 50% capacity.
- Do not expose the battery to water or moisture.
Filter Maintenance
The included replacement filters are washable and reusable. Regular cleaning of your vacuum's filters is essential for maintaining optimal suction and battery performance.
- Remove the filter from your vacuum.
- Wash the filter under cold running water until the water runs clear.
- Allow the filter to air dry completely for at least 24 hours before reinserting it into the vacuum. Do not use a dryer or heat source.

Image: Two purple filters shown with water splashes, indicating they are washable and reusable, alongside small images of a vacuum head and handheld vacuum.
Troubleshooting
| Problem | Indicator Light | Solution |
|---|---|---|
| Battery not charging / Vacuum not turning on | Red light | Indicates a battery fault. Reinstall the battery and check DC head contacts. If the issue persists, contact customer service. |
| Battery not charging / Vacuum not working | Yellow flashing light | Battery temperature is too low or too high. Wait for the battery to cool down or warm up, then try again. |
| Reduced run time / No power | Blue light reduction / Light off | Battery needs to be recharged. Ensure the charger is properly connected. |
Specifications
| Feature | Detail |
|---|---|
| Brand | FLYLINKTECH |
| Model Number | V6 |
| Battery Type | Lithium Ion |
| Voltage | 21.6V |
| Capacity | 6000mAh (6.0Ah) |
| Energy | 129.6Wh |
| Product Dimensions | 6.89 x 3.54 x 0.35 inches |
| Item Weight | 1.12 pounds |
| Safety Certifications | CE, FCC, RoHS compliant |
Warranty and Customer Support
FLYLINKTECH is committed to providing high-quality products and excellent customer service. If you encounter any problems during use, please do not hesitate to contact us via Amazon message. We are always available to assist you.
While specific warranty details are not provided in the product description, customer reviews indicate a commitment to support and replacement for issues within a reasonable timeframe. Please refer to your purchase platform for the most accurate warranty information.
Ask a question about this manual
Ask about setup, troubleshooting, compatibility, parts, safety, or missing instructions. Manuals+ will review the question and use this page’s manual context to help answer it.