
1. Introduction
Thank you for choosing the Igloo Automatic Self-Cleaning Portable Electric Countertop Ice Maker. This compact and stylish appliance is designed to provide fresh ice quickly and conveniently. With the ability to produce up to 26 pounds of ice per day and 9 ice cubes in as little as 7 minutes, it ensures you always have ice on hand for your beverages. This manual provides essential information for safe and efficient operation, maintenance, and troubleshooting.
2. Key Features
- Designed for Convenience: Compact size suitable for countertops, providing ice whenever needed.
- Large Ice-Making Capacity: Produces up to 26 pounds of ice in a 24-hour period with a 2-quart water tank.
- Carry Handle: Integrated handle for easy portability.
- Self-Cleaning Function: Automatic five-cycle cleaning for easy maintenance and clean ice.
- Ice Basket Capacity: Stores up to 1.25 pounds of ice at a time.
- Quick-Freezing Ice: Makes 9 small or large cylinder-shaped ice cubes in as little as 7 minutes.
- Control Panel: LED-lighted electronic control panel indicates when to add water, when the ice basket is full, and allows ice cube size selection.
- Transparent Lid: Large clear lid for easy viewing of ice cube capacity.
- Removable Ice Basket: Easily removable for transferring ice cubes.
- Drain Plug: For easy water drainage when not in use.
3. What's in the Box
- Ice Maker Unit
- Ice Basket
- Ice Scoop
4. Specifications
| Product Dimensions | 12.2"D x 9.06"W x 12.8"H |
| Item Model Number | ICEB26HNWH |
| Weight | 16.55 Pounds |
| Manufacturer | Nostalgia Products |
| Capacity | 26 Pounds (per 24 hours) |
| Voltage | 120 Volts |
5. Setup
- Unpack: Carefully remove all packaging materials and inspect the ice maker for any damage.
- Placement: Place the ice maker on a stable, level surface away from direct sunlight and heat sources. Ensure adequate ventilation around the unit.
- Clean Before First Use: Before using for the first time, clean the interior of the ice maker. Refer to the 'Maintenance' section for detailed cleaning instructions.
- Power Connection: Plug the ice maker into a grounded electrical outlet.
6. Operating Instructions
- Add Water: Open the lid and pour potable water into the water reservoir up to the 'MAX' fill line. Do not overfill.
- Insert Ice Basket: Place the removable ice basket back into its position.
- Power On: Press the 'ON/OFF' button on the control panel. The 'POWER' indicator light will illuminate.
- Select Ice Size: Use the 'SELECT' button to choose between small (S) or large (L) ice cube sizes. The corresponding indicator light will illuminate.
- Ice Production: The ice maker will begin the ice-making cycle. The first batch of ice may take slightly longer (around 7-15 minutes). Subsequent batches will be faster.
- Ice Full Indicator: When the ice basket is full, the 'ICE FULL' indicator light will illuminate, and the unit will pause ice production. Remove ice from the basket to resume production.
- Add Water Indicator: If the water level is low, the 'ADD WATER' indicator light will illuminate. Add more water to the reservoir to continue ice production.
- Serving Ice: Use the provided ice scoop to retrieve ice from the basket.
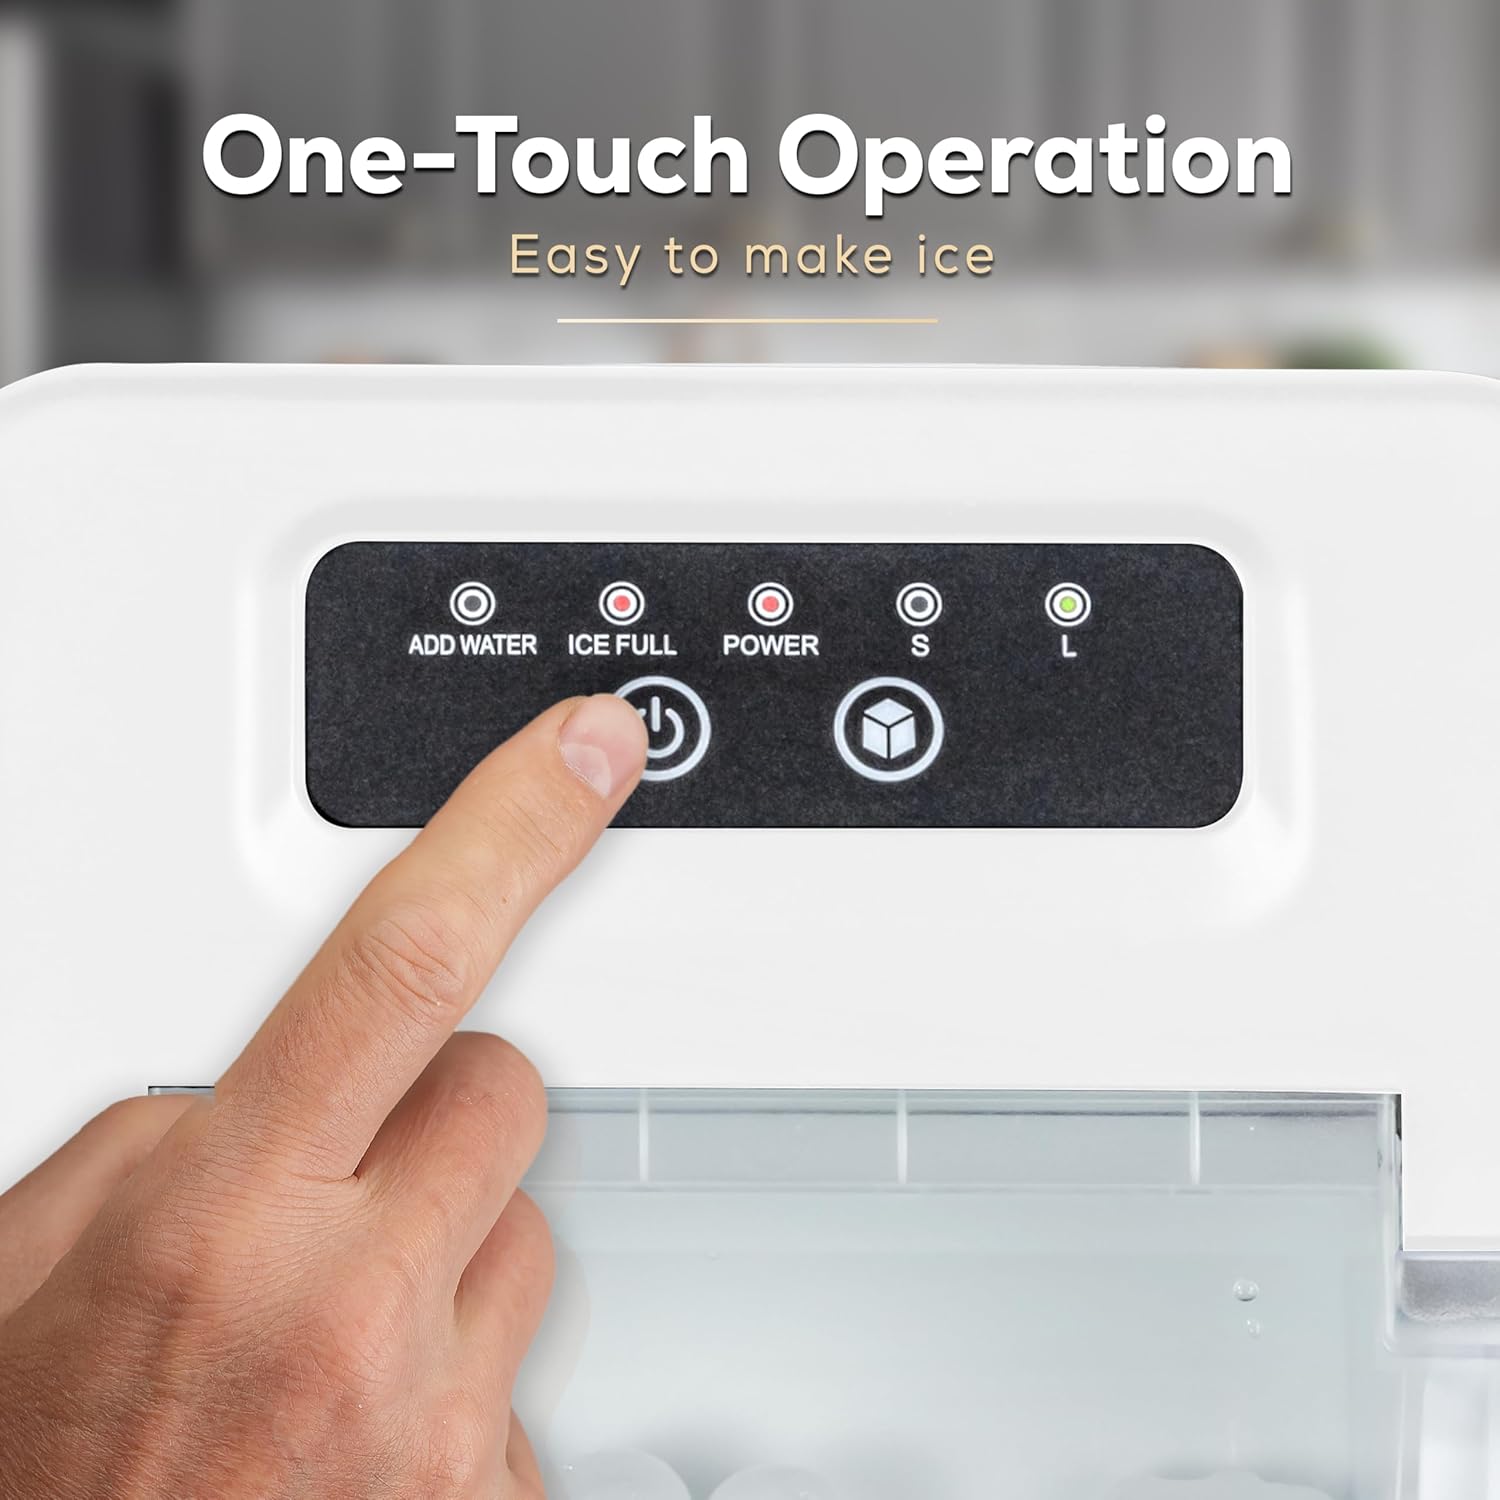
Figure 1: Control panel showing power, ice full, add water, and ice size selection options.

Figure 2: View of the ice-making process, forming bullet-shaped ice.
7. Self-Cleaning Function
The ice maker features an automatic five-cycle self-cleaning function to ensure clean ice and prevent mineral buildup.
- Initiate Cleaning: With water in the reservoir, press and hold the 'ON/OFF' button for approximately 5 seconds. The unit will enter self-cleaning mode.
- Cleaning Cycle: The cleaning process will run for about 30 minutes, circulating water through the system.
- Drain Water: Once the cleaning cycle is complete, unplug the unit and remove the drain plug located at the bottom to empty the water.
- Rinse: Rinse the reservoir with fresh water and drain again to remove any cleaning residue.

Figure 3: Visual representation of the self-cleaning process.
8. Maintenance
- Regular Cleaning: Perform the self-cleaning function regularly, especially if the ice maker is not used frequently or if you notice any mineral buildup.
- Exterior Cleaning: Wipe the exterior with a soft, damp cloth. Do not use harsh chemicals or abrasive cleaners.
- Interior Drying: After draining, ensure the interior is completely dry before storing the unit.
- Storage: If storing for an extended period, drain all water, clean the unit, and store it in a cool, dry place.
9. Troubleshooting
| Problem | Possible Cause | Solution |
|---|---|---|
| Ice maker not producing ice. | No water in reservoir; 'ADD WATER' light on. | Add water to the reservoir up to the 'MAX' line. |
| Ice maker stopped producing ice; 'ICE FULL' light on. | Ice basket is full. | Remove ice from the basket. Production will resume automatically. |
| Ice cubes are too small or cloudy. | Water temperature too high; mineral buildup. | Use colder water. Perform self-cleaning cycle. |
| Unit is noisy. | Normal operation sounds (compressor, water pump). | Ensure unit is on a stable, level surface. If excessive, contact support. |
10. Official Product Video
Video 1: Official product overview of the Igloo ICEB26HNWH Automatic Self-Cleaning Portable Electric Countertop Ice Maker, White. This video demonstrates the key features and functionality of the ice maker.
11. Warranty and Support
For warranty information or technical support, please refer to the documentation included with your product or visit the official Igloo website. Keep your purchase receipt for warranty claims.


