1. Introduction
This manual provides instructions for the Philips Outdoor Digital Stake Timer (Model SPC1236AT/27). This device is designed to automate outdoor lighting and electrical devices, offering features such as light-sensing technology, custom ON/OFF settings, and multiple grounded outlets. It is suitable for use with LED, CFL, incandescent, and halogen bulbs.
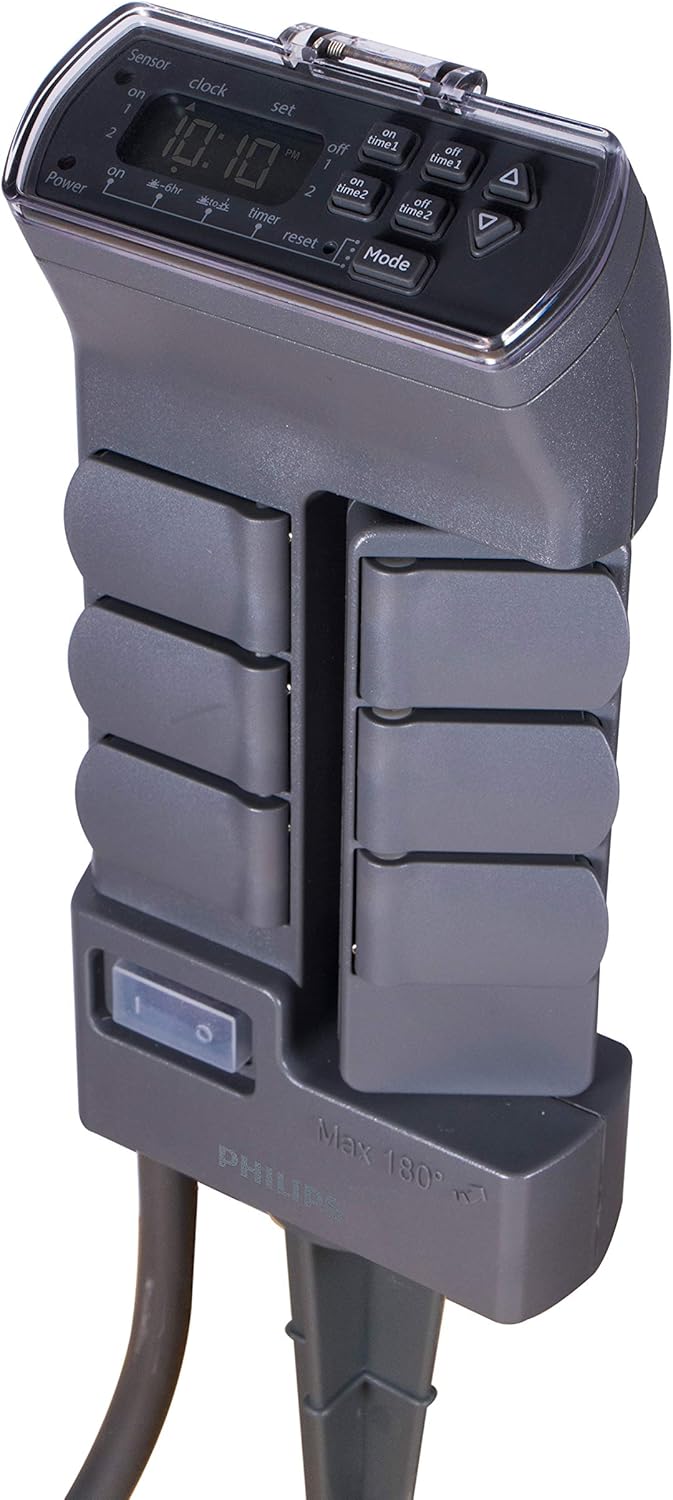
Figure 1: Philips Outdoor Digital Stake Timer, showing the digital display and the stake design.
2. Safety Information
- Outdoor Use Only: This timer is designed for temporary outdoor installation and use, not to exceed 90 consecutive days.
- GFCI Protection: Always plug the timer into a Ground Fault Circuit Interrupter (GFCI) protected outdoor outlet.
- Electrical Ratings: Do not exceed the maximum electrical ratings: 125VAC, 60Hz, 15A, 1875W.
- Water Exposure: Ensure all outlet covers are closed when not in use. The unit is weather-resistant but not submersible.
- Cord Safety: Do not run the power cord through standing water or bury it. Inspect the cord for damage before each use.
- Children and Pets: Keep the device out of reach of children and pets.
- Maintenance: Do not attempt to open or repair the unit. Refer all servicing to qualified personnel.
3. Product Features
The Philips Outdoor Digital Stake Timer offers several features for convenient outdoor power management:
- Rotating Power Outlets: Features 6 grounded outlets, with 3 outlets capable of rotating 180 degrees for flexible plug-in access, accommodating various plug sizes and orientations.
- Heavy-Duty Construction: Built with weather-resistant materials and a durable two-piece stake for reliable outdoor use in various conditions.
- Personalized Scheduling: Provides simple preset options and two customizable ON/OFF settings to suit diverse scheduling needs for outdoor lighting and decorations.
- Light-Sensing Technology: Automatically turns on at dusk and can be set to run all night or shut off after 6 hours, based on ambient light conditions.
- Wide Compatibility: Compatible with LED, CFL, incandescent, and halogen bulbs.
- Master Shutoff Switch: A convenient switch to cut power to all outlets.

Figure 2: Labeled diagram highlighting key features including GFCI plug, self-closing rain cover, grounded outlets, swivel outlets, master shutoff switch, heavy-duty cord, and yard stake.
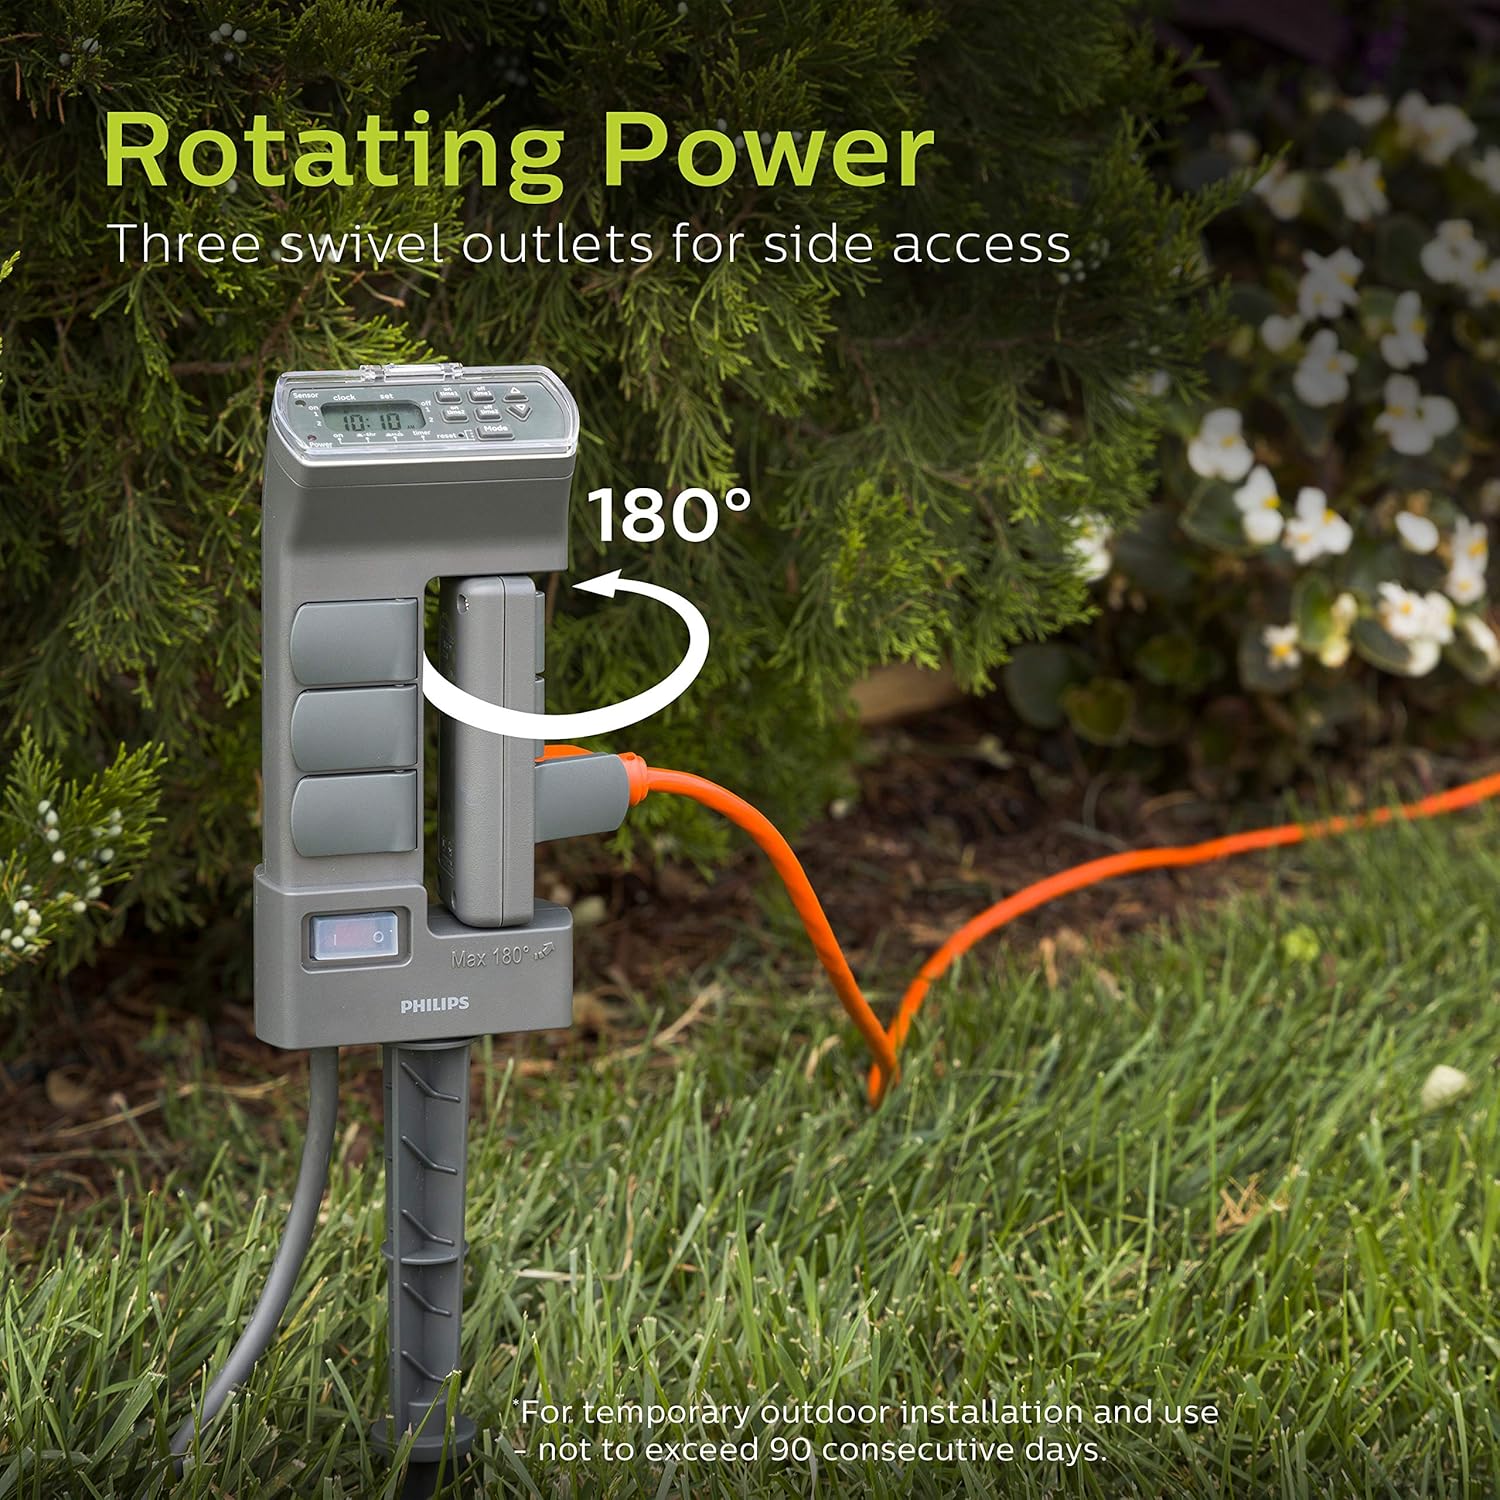
Figure 3: The rotating power feature, showing three outlets swiveling 180 degrees for side access, ideal for temporary outdoor installations.
4. Setup
- Unpack: Carefully remove the timer from its packaging.
- Placement: Select a suitable outdoor location for the timer. For optimal performance of the light-sensing technology, ensure the sensor (located on the top of the unit) has direct access to sunlight and is not obstructed by foliage or shadows.
- Install Stake: Attach the two-piece stake to the bottom of the timer unit. Firmly push the stake into the ground until the timer is stable and secure.
- Connect Power: Plug the timer's power cord into a GFCI-protected 125VAC outdoor electrical outlet.
- Initial Power On: Flip the master shutoff switch (located on the side of the unit) to the "ON" position. The digital display should illuminate.
- Connect Devices: Plug your outdoor lights or devices into the grounded outlets. Ensure unused outlets have their self-closing rain covers securely shut.
5. Operating Instructions
5.1 Setting the Current Time
- Press the CLOCK button. The time display will flash.
- Use the UP (▲) and DOWN (▼) buttons to adjust the hour. Pay attention to AM/PM indicators.
- Press CLOCK again to set the minutes. Use the UP and DOWN buttons to adjust.
- Press CLOCK one more time to confirm and exit time setting.
5.2 Programming Modes
The timer offers several operating modes, selectable by pressing the MODE button.
- ON: All connected devices remain continuously ON.
- OFF: All connected devices remain continuously OFF.
- DUSK-DAWN: Devices turn ON automatically at dusk and remain ON until dawn. This mode utilizes the light sensor.
- DUSK-6HR: Devices turn ON automatically at dusk and remain ON for 6 hours, then turn OFF. This mode utilizes the light sensor.
- TIMER 1: Activates the first custom ON/OFF program.
- TIMER 2: Activates the second custom ON/OFF program.

Figure 4: Example of light-sensing technology in use, where the timer activates outdoor lights at dusk.
5.3 Setting Custom ON/OFF Times (TIMER 1 & TIMER 2)
You can set two independent custom programs. Each program has one ON time and one OFF time.
- Press the SET button once to enter TIMER 1 programming. The display will show "ON TIME 1".
- Use the UP (▲) and DOWN (▼) buttons to set the desired ON hour for TIMER 1.
- Press SET again to set the ON minutes for TIMER 1.
- Press SET again. The display will show "OFF TIME 1".
- Use the UP and DOWN buttons to set the desired OFF hour for TIMER 1.
- Press SET again to set the OFF minutes for TIMER 1.
- To program TIMER 2, press SET again and repeat steps 2-6 for "ON TIME 2" and "OFF TIME 2".
- Press SET one more time to confirm and exit programming.
- To activate a custom program, press the MODE button until "TIMER 1" or "TIMER 2" is displayed.

Figure 5: Visual examples of setting two custom ON/OFF programs (Program 1 and Program 2) on the digital display.
6. Maintenance
- Cleaning: Disconnect the timer from the power source before cleaning. Wipe the unit with a damp cloth. Do not use abrasive cleaners or immerse the unit in water.
- Outlet Covers: Ensure all self-closing rain covers are functioning correctly and remain closed when outlets are not in use to protect against moisture and debris.
- Cord Inspection: Periodically inspect the power cord and connected device cords for any signs of damage, fraying, or wear. Replace damaged cords immediately.
- Storage: If storing the timer for an extended period, clean it thoroughly and store it in a dry, protected location away from extreme temperatures.

Figure 6: The self-closing rain cover feature, demonstrating the weather-resistant construction for reliable outdoor use.
7. Troubleshooting
| Problem | Possible Cause | Solution |
|---|---|---|
| Timer display is blank. | No power to the unit. |
|
| Devices not turning ON/OFF at programmed times. |
|
|
| Devices are always ON or always OFF. | "ON" or "OFF" mode is selected. | Press the MODE button to cycle through modes until the desired program (e.g., TIMER 1, DUSK-DAWN) is displayed. |
| Rotating outlets are stiff. | Debris or lack of lubrication. | Ensure no debris is obstructing the rotation mechanism. Do not force rotation. |
8. Specifications
| Model Number | SPC1236AT/27 |
| Brand | PHILIPS |
| Color | Green |
| Material | Plastic |
| Product Dimensions | 3.75"D x 4.75"W x 10.9"H |
| Item Weight | 0.5 Pounds (8 ounces) |
| Number of Settings | 2 (Custom ON/OFF programs) |
| Power Source | AC |
| Voltage | 125 Volts |
| Amperage Capacity | 15 Amps |
| Wattage Capacity | 1875 Watts |
| Frequency | 60Hz |
| Mounting Type | Plug-In Mount (with stake) |
| Certification | cUL Listed |
| Batteries Required | No |
| UPC | 030878449113 |
9. Warranty and Support
For warranty information or technical support, please refer to the documentation included with your purchase or visit the official PHILIPS website. You may also contact PHILIPS customer service directly for assistance with product operation, troubleshooting, or warranty claims.
Manufacturer: Jasco Products Company, LLC


