
1. Safety Information
WARNING: Always wear appropriate safety gear, including eye protection and gloves, when operating this string trimmer. Be aware of potential flying debris and keep bystanders at a safe distance. Be cautious of entangled grass and weeds, which can cause the trimmer head to rotate in reverse and potentially cause injury. Always follow the manufacturer's instructions for safe operation.
- Read and understand all instructions before operating the tool.
- Keep hands and feet away from the cutting line at all times.
- Do not operate the trimmer in wet conditions or in the rain.
- Ensure the battery is securely installed before use and removed during maintenance or storage.
- Use only genuine Makita batteries and chargers.
- Maintain a firm grip on the tool with both hands during operation.
- Inspect the cutting line and trimmer head for damage before each use.

Image: Warning against using non-genuine Makita batteries. Using unauthorized batteries can lead to malfunctions or safety hazards.
2. Product Overview
The Makita XRU15Z is an 18V X2 (36V) LXT Brushless Cordless String Trimmer designed for efficient landscaping. It offers a cordless alternative to gas-powered equipment with reduced emissions, lower noise, and less maintenance. Powered by two 18V LXT batteries (sold separately), it features electronic controls for optimized power and speed, and a Makita-built Outer Rotor BL Brushless Motor for high power and increased torque. The trimmer also incorporates Makita Extreme Protection Technology (XPT) for improved operation in harsh conditions.
Key Features:
- Up to 1.5 hours of run time with 18V LXT 5.0Ah batteries (batteries not included).
- Makita-built Outer Rotor BL Brushless Motor direct-drive system for high power and increased torque.
- Automatic Torque Drive Technology mode automatically shifts from 3,500-6,500 RPM for extended run time or added power.
- 3 speed options (Low: 3,500 RPM, Medium: 5,300 RPM, High: 6,500 RPM) for power management.
- 15" cutting swath for increased productivity.
- String trimmer rotates in the same counter-clockwise direction as professional-grade trimmers.
- Uses industry standard spindles (M10x1.25 LH).
- Makita Extreme Protection Technology (XPT) for improved dust and water resistance.
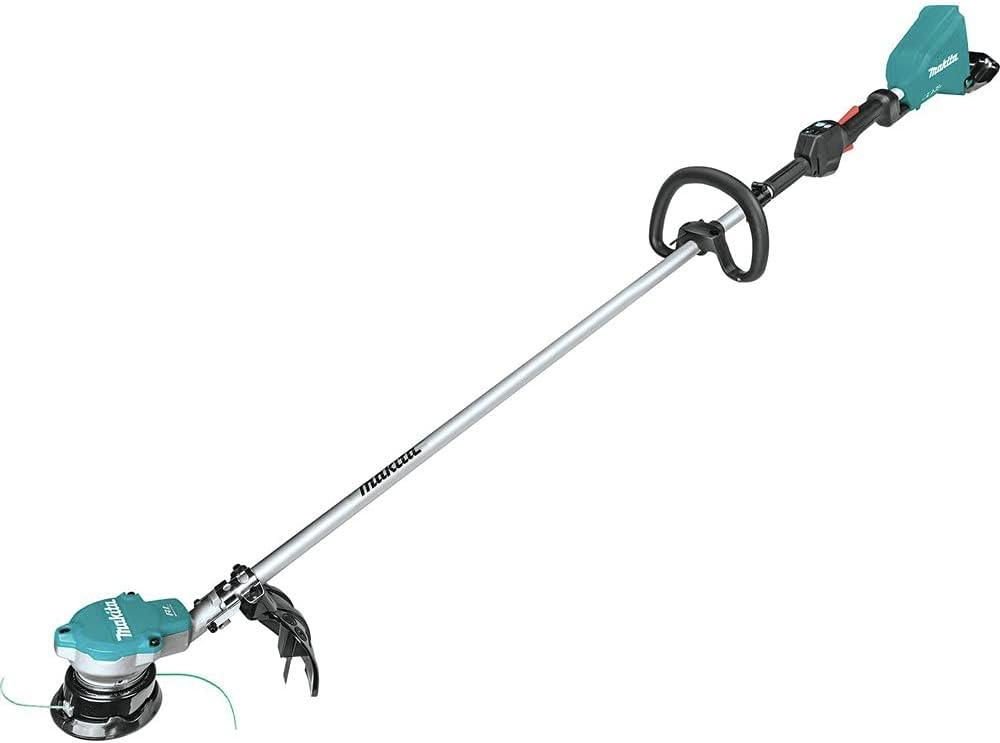
Image: The Makita XRU15Z 36V (18V X2) LXT Brushless String Trimmer, shown as a tool-only unit without batteries or charger.
3. What's in the Box (Tool Only)
The Makita XRU15Z is sold as a "Tool Only" unit. The package typically includes the following components:
- Makita XRU15Z 36V (18V X2) LXT Brushless String Trimmer (main unit)
- Bump & Feed Trimmer Head
- Shoulder Harness
- Handle Assembly
- Debris Shield
- Hex Wrench (for assembly)
- Instruction Manual
Note: Batteries and charger are not included with the "Tool Only" model and must be purchased separately.
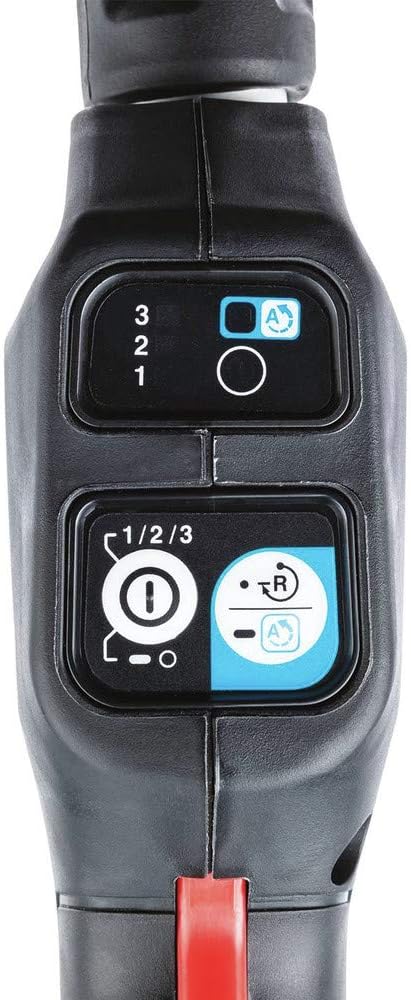
Image: The Makita XRU15Z string trimmer, illustrating the main unit and its primary components.
4. Setup and Assembly
Follow these steps to assemble your Makita XRU15Z String Trimmer:
- Attach the Handle: Secure the handle assembly to the shaft using the provided hardware. Ensure it is positioned comfortably for your height and operating style.
- Install the Debris Shield: Fasten the debris shield to the trimmer head assembly using the two screws. This shield protects you from flying debris during operation.
- Attach the Trimmer Head: The bump & feed trimmer head comes pre-installed with a starter line. If not, refer to the "Loading Trimmer Line" section.
- Connect the Shoulder Harness: Attach the shoulder harness to the designated attachment point on the trimmer shaft. Adjust the harness for a comfortable and balanced fit to reduce fatigue during extended use.
- Insert Batteries: Insert two charged 18V LXT batteries into the battery slots on the power unit. Ensure they click securely into place.

Image: Close-up of the trimmer head and debris shield, showing the attachment points for assembly.

Image: The control panel of the Makita XRU15Z, featuring power and speed settings.
5. Operating Instructions
Before operating, ensure all safety precautions are followed and the trimmer is properly assembled.
- Power On: Press the power button on the control panel to turn on the trimmer.
- Select Speed: Use the speed selection button to choose between three settings: Low (3,500 RPM), Medium (5,300 RPM), or High (6,500 RPM). The Automatic Torque Drive Technology can also be engaged for automatic speed adjustment based on load.
- Start Trimming: Squeeze the trigger to start the cutting line rotation. Maintain a steady, sweeping motion to cut grass and weeds.
- Feeding Line: To advance the cutting line, gently tap the trimmer head on the ground while the motor is running. This is the "bump & feed" mechanism.
- Reverse Function: If the trimmer line becomes tangled with dense grass or weeds, press the reverse button on the control panel. This will temporarily reverse the rotation of the trimmer head to help untangle the line without manual intervention.
- Power Off: Release the trigger to stop the cutting line. Press the power button again to completely turn off the trimmer.

Image: A user demonstrating the operation of the Makita XRU15Z string trimmer in a grassy area.

Image: A user trimming grass around the base of a tree, highlighting the trimmer's maneuverability.
6. Maintenance
Regular maintenance ensures optimal performance and extends the life of your trimmer.
- Cleaning: After each use, remove any grass, dirt, or debris from the trimmer head, shield, and motor housing. Use a dry cloth or soft brush. Do not use water or harsh chemicals.
- Trimmer Line Replacement: When the cutting line runs out, replace it with new line. The XRU15Z uses industry standard spindles (M10x1.25 LH). To load new line, align the arrows on the bump head, feed the line through, and twist the head to wind it.
- Battery Care: Store batteries in a cool, dry place away from direct sunlight. Do not store fully discharged batteries for extended periods. Charge batteries fully before storage and periodically during long storage periods.
- Inspection: Periodically check all screws, nuts, and bolts for tightness. Inspect the cutting line and trimmer head for wear or damage. Replace worn or damaged parts immediately.
Image: The Makita XRU15Z string trimmer, illustrating the overall tool for general maintenance reference.
7. Troubleshooting
| Problem | Possible Cause | Solution |
|---|---|---|
| Trimmer does not start. | Batteries not inserted correctly or discharged. | Ensure batteries are fully charged and properly inserted. |
| Cutting line does not feed. | Line is tangled, too short, or spool is empty. | Use the reverse function to untangle. Replace or reload trimmer line. |
| Reduced cutting performance. | Dull or worn cutting line. | Replace the trimmer line. |
| Trimmer stops during operation. | Overload protection activated (e.g., cutting very dense material). | Reduce load, allow motor to cool, then restart. Check for tangled line. |
8. Specifications
- Brand: Makita
- Model Number: XRU15Z
- Power Source: Battery Powered (18V X2 LXT - 36V)
- Item Weight: 11 Pounds
- Cutting Width: 15 Inches
- Speed: 3,500 RPM (Low), 5,300 RPM (Medium), 6,500 RPM (High)
- Item Dimensions (L x W): 72.84"L x 7.09"W
- Included Components: Bump & Feed Trimmer Head, Tool only (battery and charger not included)
- UPC: 088381884297
9. Warranty and Support
The Makita XRU15Z 36V (18V X2) LXT Brushless String Trimmer comes with a 3-year limited warranty from the manufacturer.
For service, warranty claims, or technical support, please contact Makita U.S.A., Inc. directly. Refer to the warranty information included in your product packaging for specific terms and conditions.
- Manufacturer: Makita U.S.A., Inc.
- Website: www.makitatools.com
- Customer Service: Refer to your product manual for the most current contact information or visit the manufacturer's website.