
AIRXWILLS WZ-Q01
AIRXWILLS Tire Inflator Air Compressor Pump User Manual
Model: WZ-Q01
1. Product Overview
The AIRXWILLS Tire Inflator Air Compressor Pump is a portable, cordless device designed for inflating various items such as vehicle tires, bicycle tires, and other inflatables. It features a digital gauge for accurate pressure readings and an auto-stop function for precise inflation.

Image 1: The AIRXWILLS Tire Inflator Air Compressor Pump shown with its main unit, rechargeable battery, air hose, USB charging cable, 12V car power adapter, and various nozzle adaptors.
2. Package Contents
Please check the package contents upon unboxing to ensure all items are present:
- 1 × Tire Inflator Unit
- 1 × Lithium Battery Base (2000mAh Rechargeable Battery)
- 1 × Cigarette Lighter Plug Base (12V Car Power Adapter)
- 1 × Air Hose
- 1 × User Manual (this document)
- 1 × USB Charging Cable
- 4 × Nozzle Adaptors

Image 2: Close-up view of the 2000mAh battery pack, USB charging cable, and 12V car power adapter, which are included with the inflator.
3. Product Features
- Multi-Function: Ideal for inflating tires and gauging pressure for cars, motorcycles, bicycles, lifebuoys, boats, and other inflatables.
- Presetting & Automatic-Stop: Allows users to preset a desired pressure value. The air compressor automatically shuts off once the set pressure is reached.
- Dual Power Options: Supports operation via a 12V-DC cigarette lighter socket or the included rechargeable Lithium-ion battery.
- Powerful Inflation & LED Light: Features an Electric-Supercharger design for faster inflation and includes a bright LED light for illuminating dark working spaces.
- Cordless and Portable: Compact size allows for use anywhere without an external power supply, making it suitable for driving, traveling, or home use.

Image 3: Detailed view of the inflator highlighting its key components: the digital pressure gauge, integrated LED light, ergonomic rubber handle, and the detachable rechargeable battery.
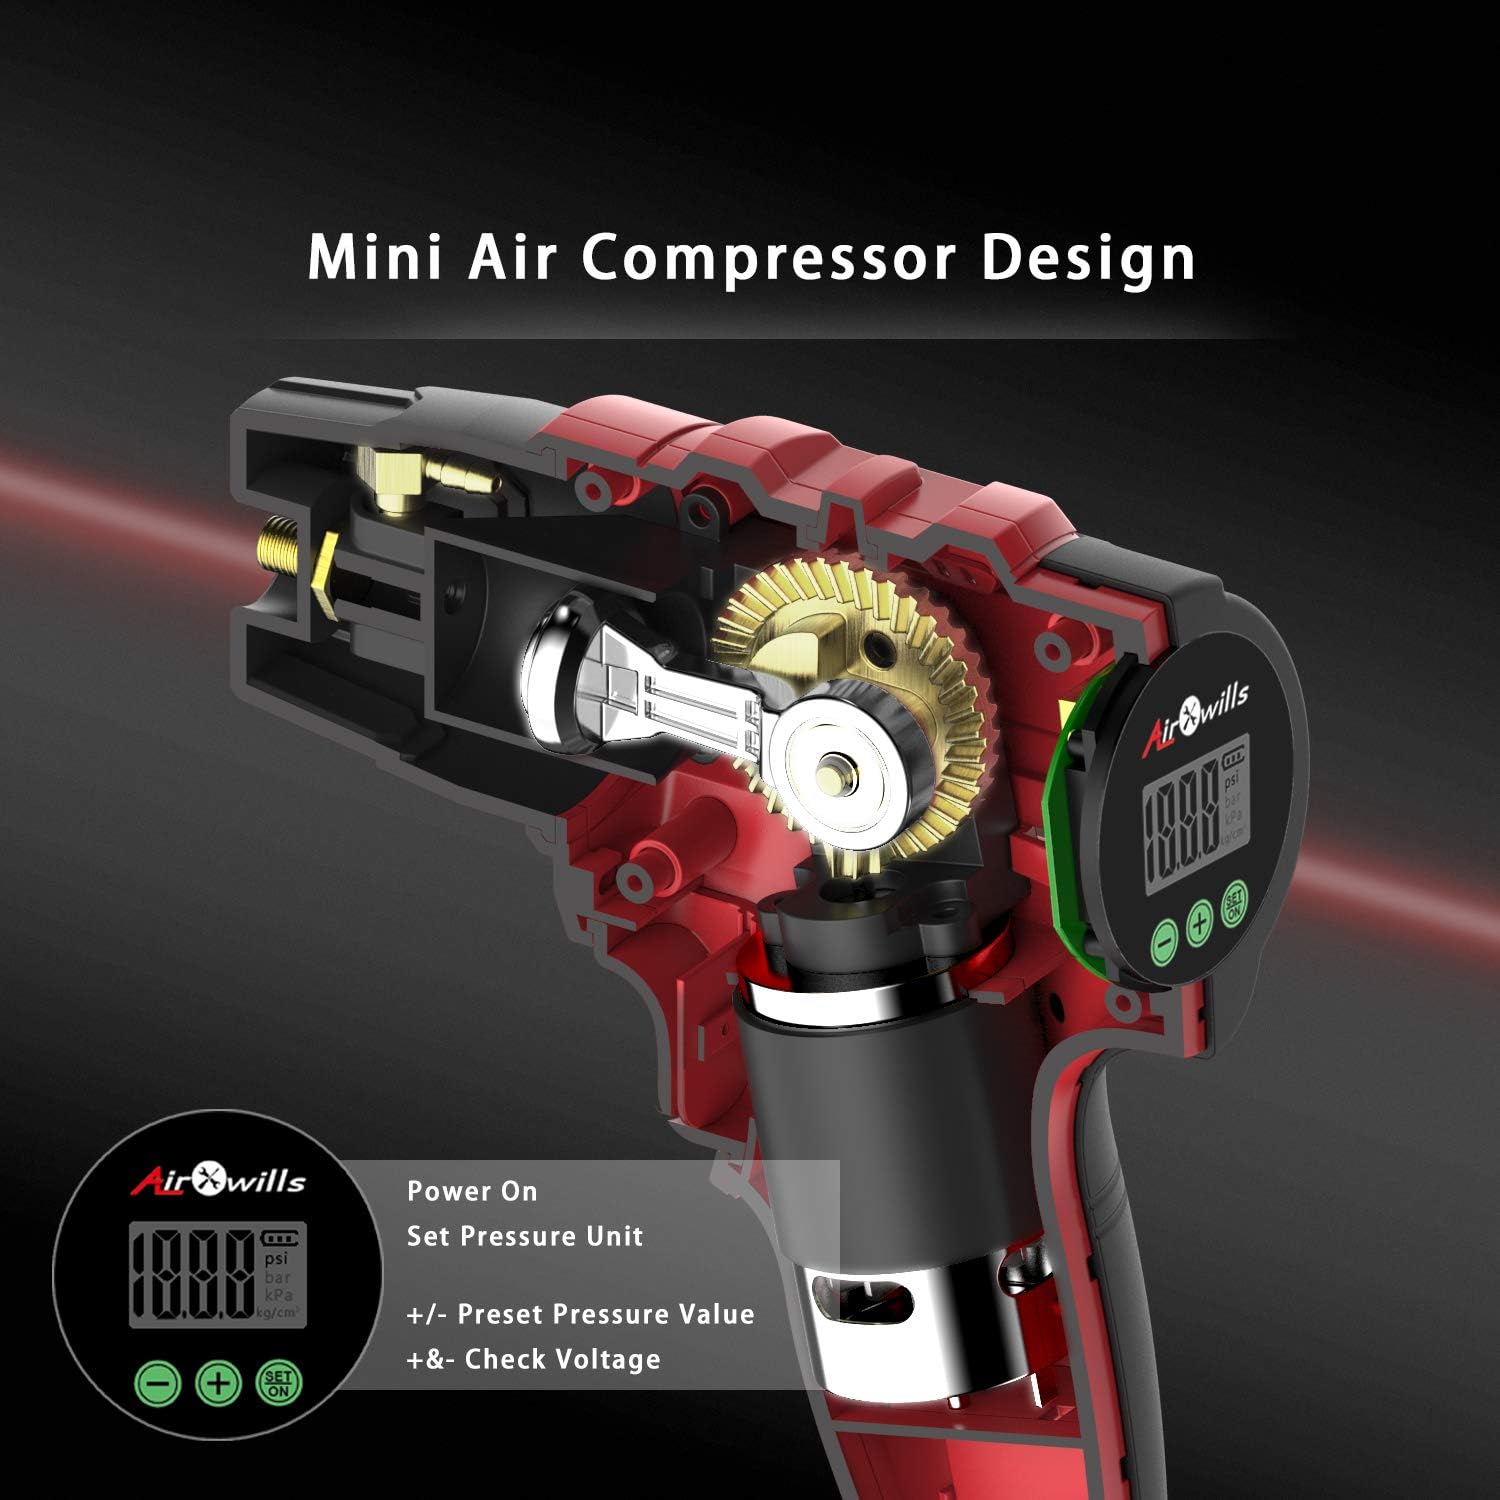
Image 4: An internal view illustrating the mini air compressor design, highlighting the digital display for power, pressure unit settings, and voltage check functions.
4. Setup
- Charge the Battery: Before first use, fully charge the Lithium Battery Base using the provided USB Charging Cable and a compatible USB power adapter (not included) or the 12V car power adapter. The full power status is indicated by 12.6V when checking the battery voltage (press and hold + and - buttons simultaneously).
- Attach Battery/Power Source: Securely attach the charged Lithium Battery Base to the inflator unit, or connect the 12V car power adapter to a vehicle's cigarette lighter socket.
- Select Nozzle: Choose the appropriate nozzle adaptor for the item you intend to inflate. The standard air hose is suitable for car tires.
- Connect Air Hose: Screw the air hose securely onto the inflator unit's air outlet.
5. Operation
- Power On: Press the "SET" button to turn on the device. The LED light will illuminate, and the digital display will activate.
- Select Pressure Unit: Press the "SET" button again to cycle through pressure units: PSI, BAR, kPa, or KG/CM².
- Preset Desired Pressure: Use the "+" and "-" buttons to set your desired target pressure.
- Connect to Item: Attach the air hose securely to the valve stem of the item you wish to inflate.
- Start Inflation: Press the power button (often the trigger-style button) to begin inflation. The pump will automatically shut off when the preset pressure is reached. Note: The pump may continue to run briefly after reaching the target pressure to stabilize the tire.
- Disconnect: Once inflation is complete and the pump has stopped, disconnect the air hose from the item.

Image 5: Visual guide demonstrating the four simple steps for operating the inflator: installing the air hose, powering on and setting the desired pressure, attaching the hose to the tire, and initiating inflation with automatic shut-off.

Image 6: An illustration showcasing the versatility of the inflator, suitable for various items such as car tires, motorcycle tires, bicycle tires, sports balls, and general inflatables like pool floats.
6. Maintenance
- Cleaning: Wipe the unit with a clean, dry cloth after each use. Do not use harsh chemicals or abrasive cleaners.
- Storage: Store the inflator and its accessories in a cool, dry place, away from direct sunlight and extreme temperatures.
- Battery Care: For optimal battery life, charge the battery regularly, even if not in frequent use. Avoid completely draining the battery before recharging.
- Hose and Nozzles: Ensure the air hose and nozzle adaptors are free from kinks or blockages.
7. Troubleshooting
| Problem | Possible Cause | Solution |
|---|---|---|
| Unit does not turn on. | Battery is not charged or not properly connected. 12V car adapter not properly connected. | Ensure battery is fully charged and securely attached. Check connection of 12V car adapter to vehicle socket. |
| Inflator runs but does not inflate. | Air hose or nozzle not securely connected. Leak in the hose or valve. Item valve is blocked. | Ensure all connections are tight. Check hose and valve for damage. Clear any obstructions from the item's valve. |
| Automatic stop not working. | Incorrect pressure preset. Sensor malfunction. | Verify the preset pressure is correct for the item. If problem persists, contact customer support. |
| Slow inflation. | Low battery charge. Air hose or nozzle partially blocked. | Recharge the battery. Check and clear any partial blockages. |
8. Specifications
| Parameter | Value |
|---|---|
| Brand | AIRXWILLS |
| Model Name | WZ-Q01 |
| Input Voltage | DC 12.6V/1000mA |
| Operating Voltage | DC 10.8V |
| Battery Capacity | 2000mAh (Lithium Ion) |
| Inflation Efficiency | 165/60R14 0—2.5kg/CM² within 4 minutes |
| LED Lumen | 8LM |
| Maximum Atmospheric Flow | 35L/min |
| Maximum Inflation Pressure | 120PSI |
| Pressure Units | PSI, BAR, kPa, KG/CM² |
| Length of External Pipe | 180mm ± 10mm |
| Length of Power Cord (12V) | 4m ± 10mm |
| Ambient Temperature | -20°C to 50°C (-4°F to 122°F) |
| Item Weight | 1.3 Kilograms (2.86 pounds) |
| Product Dimensions | 10.6 x 2.8 x 7.4 inches |
| Noise Level | 92 dB |
9. Warranty and Support
For warranty information or technical support, please refer to the contact details provided with your product packaging or visit the official AIRXWILLS website. Keep your purchase receipt for warranty claims.
Ask a question about this manual
Ask about setup, troubleshooting, compatibility, parts, safety, or missing instructions. Manuals+ will review the question and use this page’s manual context to help answer it.