
Introduction
Thank you for choosing the Shinco Portable PA System. This device is designed to provide clear audio amplification for various settings, including parties, meetings, classrooms, and outdoor activities. It features a 6.5-inch coaxial speaker, 15W RMS audio power, wireless microphone connectivity, Bluetooth streaming, and multiple input options. Please read this manual carefully to ensure proper use and maintenance of your PA system.
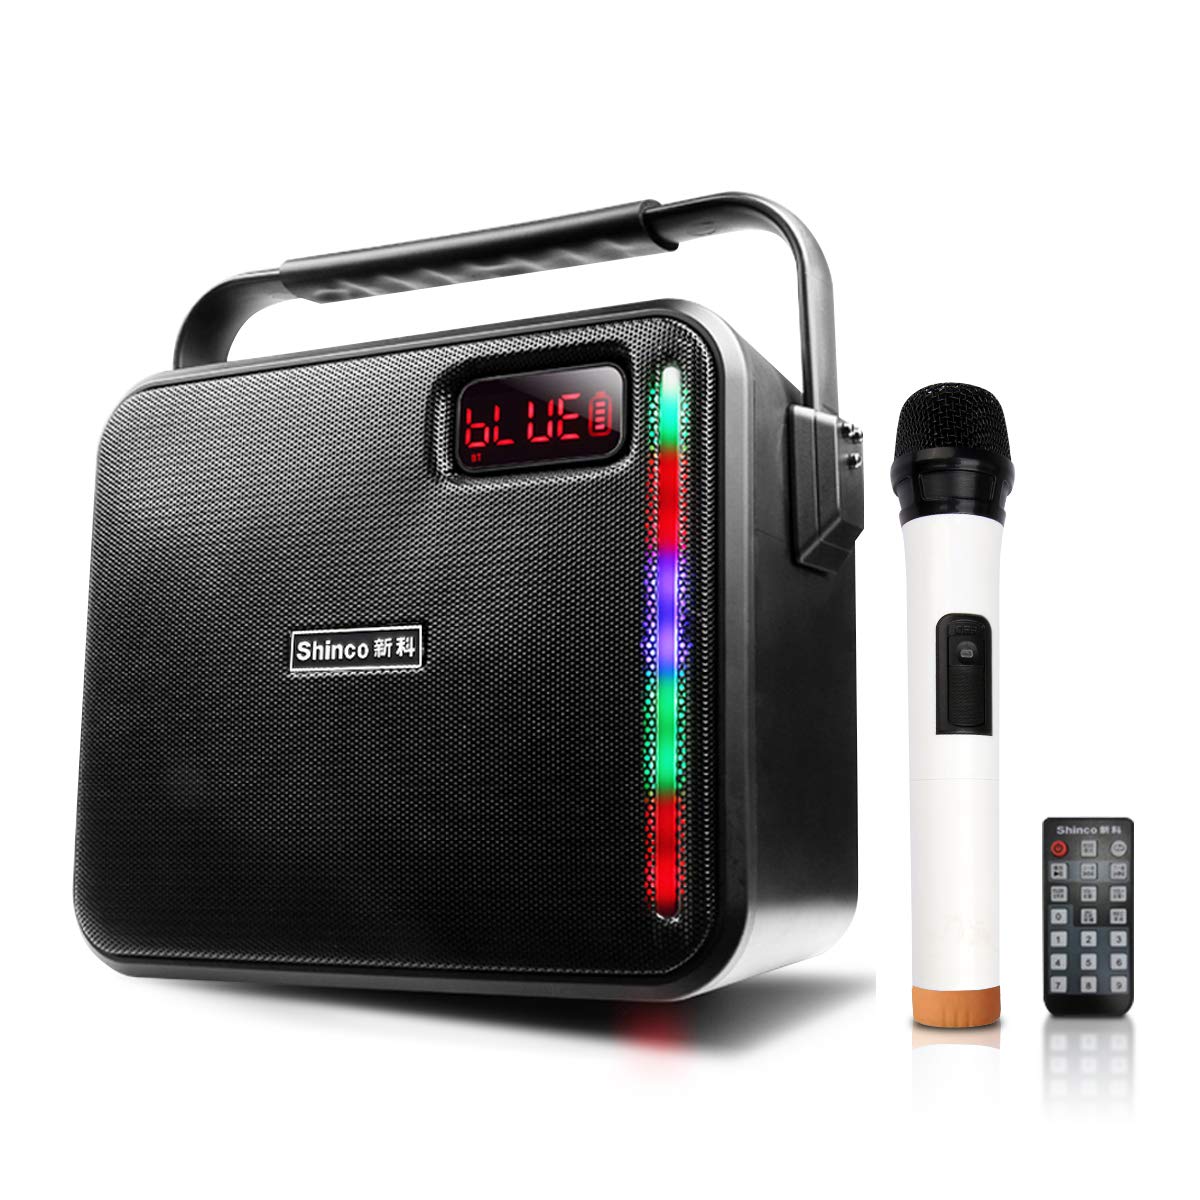
Figure 1: Front view of the Shinco Portable PA System, showcasing the speaker grille, LED display, and integrated handle.
Important Safety Information
- Do not expose the unit to rain or moisture to prevent fire or electric shock.
- Do not open the casing. There are no user-serviceable parts inside. Refer all servicing to qualified personnel.
- Keep the unit away from direct sunlight, heat sources, and excessive dust.
- Ensure proper ventilation. Do not block any ventilation openings.
- Use only the power adapter supplied with the unit.
- Avoid placing heavy objects on the unit.
- Clean only with a dry cloth.
Package Contents
Please check the package for the following items:
- Shinco Portable PA System Speaker
- Wireless Microphone
- Power Adapter
- Remote Control
- Audio Cable (AUX cable)
- Shoulder Strap
- User Manual
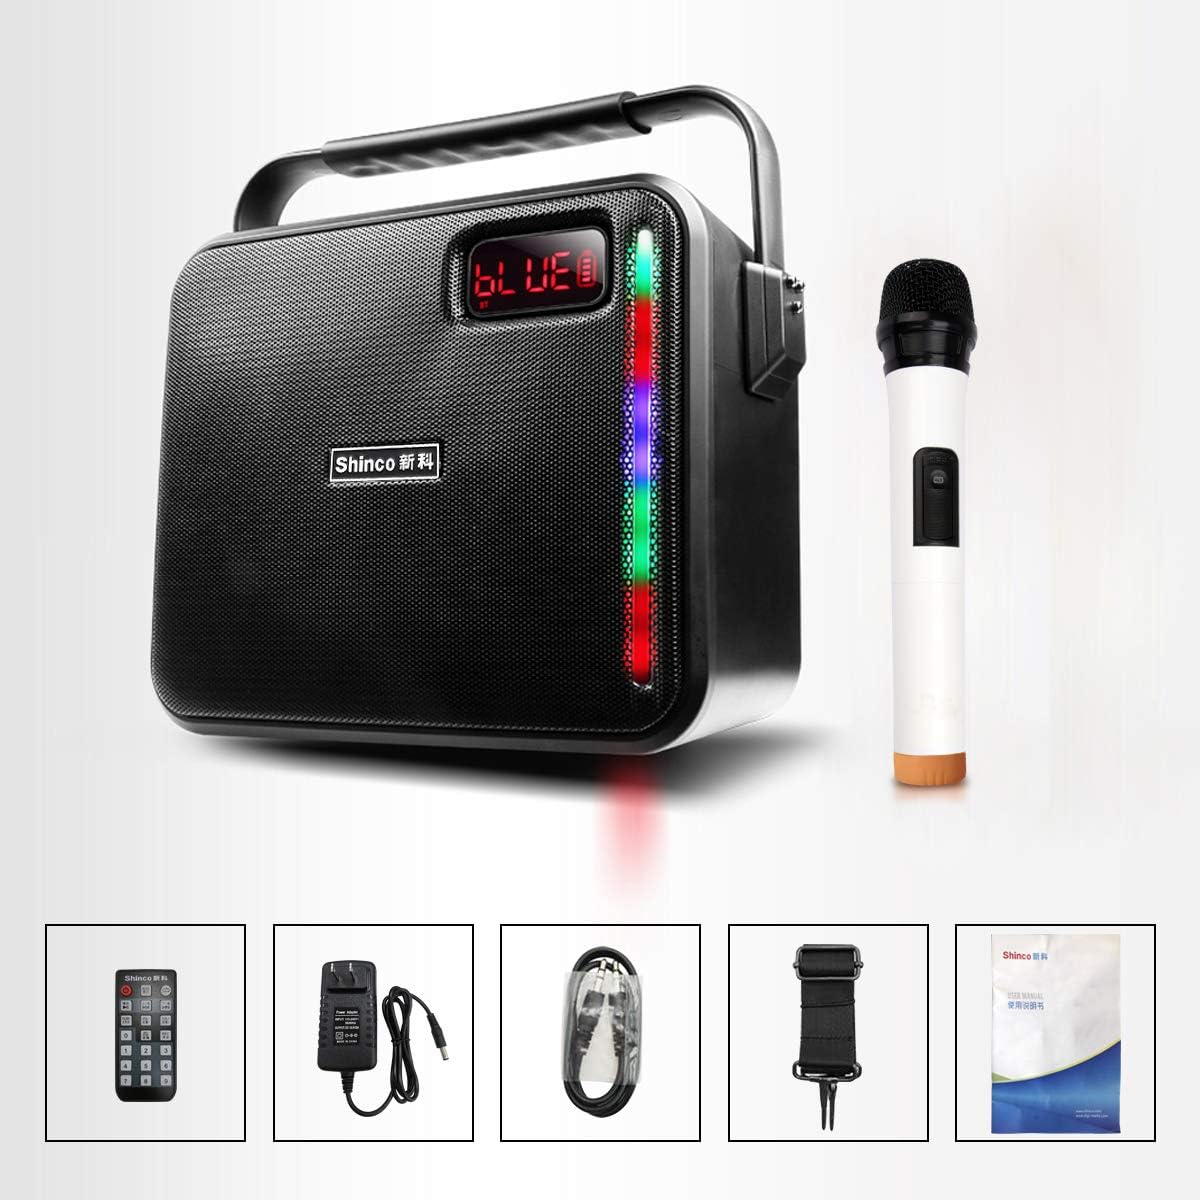
Figure 2: All items included in the Shinco Portable PA System package.
Product Overview
Control Panel

Figure 3: Top control panel of the PA system.
- MIC IN: 1/4 inch input for wired microphone.
- DC 9V 1.5A: Power input for charging.
- M-VOL: Microphone volume control.
- ECHO: Microphone echo effect control.
- BASS: Music bass level adjustment.
- TREBLE: Music treble level adjustment.
- VOLUME: Master music volume control.
- AUX IN: 3.5mm auxiliary input.
- USB/TF: USB port and TF card slot for media playback.
- MODE: Button to switch between input modes (Bluetooth, AUX, USB/TF).
- PREV: Previous track button.
- PLAY/PAUSE: Play/Pause button.
- NEXT: Next track button.
- REC: Record function button.
- FOLDER: Folder navigation button.
- LED: LED light control button.
Setup Guide
1. Charging the PA System
- Connect the supplied power adapter to the "DC 9V 1.5A" input port on the PA system.
- Plug the adapter into a standard wall outlet.
- The LED display will indicate charging status. A full charge typically takes several hours. The unit can be used while charging.
2. Powering On/Off
- To power on the unit, locate the power switch (usually a toggle switch near the power input) and switch it to the "ON" position.
- To power off, switch it to the "OFF" position.
3. Connecting the Wireless Microphone
The wireless microphone and speaker are designed for automatic connection. No manual pairing is required.
- Ensure the PA system is powered on.
- Insert batteries into the wireless microphone (if not already installed).
- Power on the wireless microphone. It should automatically connect to the PA system within a few seconds.
- Adjust the "M-VOL" knob on the PA system to control the microphone volume.
- Adjust the "ECHO" knob for desired echo effect.
Operating Instructions
1. Bluetooth Mode
- Power on the PA system. It will typically default to Bluetooth mode, indicated by "BLUE" on the LED display. If not, press the "MODE" button until "BLUE" appears.
- On your smartphone, tablet, or laptop, enable Bluetooth and search for available devices.
- Select "Shinco" (or similar device name) from the list to pair. A confirmation sound will indicate successful pairing.
- Start playing audio on your connected device.
- Adjust the "VOLUME" knob on the PA system and the volume on your device for desired sound level. Use "BASS" and "TREBLE" for tone adjustment.
2. AUX Input Mode
- Connect one end of the 3.5mm audio cable (AUX cable) to the "AUX IN" port on the PA system.
- Connect the other end to the audio output jack of your external device (e.g., MP3 player, computer).
- Press the "MODE" button on the PA system until "AUX" is displayed.
- Play audio from your external device.
- Adjust volume and tone using the respective knobs on the PA system.
3. USB/TF Card Playback
- Insert a USB flash drive or TF (MicroSD) card containing MP3 audio files into the respective slot.
- The system should automatically switch to USB/TF mode and begin playback. If not, press the "MODE" button until "USB" or "TF" is displayed.
- Use the "PREV", "PLAY/PAUSE", and "NEXT" buttons to control playback.
- Adjust volume and tone using the respective knobs.
4. Recording Function
To record microphone input to a USB drive or TF card:
- Ensure a USB drive or TF card is inserted.
- Press the "REC" button to start recording.
- Speak into the microphone.
- Press "REC" again to stop recording. The recording will be saved as an audio file on the inserted storage device.
Maintenance
Cleaning
- Always power off and unplug the unit before cleaning.
- Use a soft, dry cloth to wipe the exterior surfaces.
- Do not use liquid cleaners, aerosols, or solvents, as these may damage the finish or internal components.
Storage
- When not in use for extended periods, store the PA system in a cool, dry place, away from direct sunlight and extreme temperatures.
- It is recommended to fully charge the battery every 3-6 months to maintain battery health.
Troubleshooting
| Problem | Possible Cause | Solution |
|---|---|---|
| No power | Battery is depleted; Power switch is off; Power adapter not connected properly. | Charge the unit; Turn on the power switch; Ensure power adapter is securely connected. |
| No sound from speaker | Volume is too low; Incorrect input mode selected; Audio cable not connected; Bluetooth not paired. | Increase master volume; Select correct input mode (Bluetooth, AUX, USB/TF); Check audio cable connections; Re-pair Bluetooth device. |
| Wireless microphone not working | Microphone batteries are low or dead; Microphone is off; Microphone volume (M-VOL) is too low. | Replace microphone batteries; Turn on the microphone; Increase M-VOL knob. |
| Bluetooth connection issues | Device is too far; Interference; PA system not in Bluetooth mode. | Move device closer to PA system; Avoid obstacles; Ensure PA system is in Bluetooth mode ("BLUE" on display). |
| Sound distortion | Volume is too high; Input source is distorted. | Reduce master volume; Check volume on the input device; Adjust BASS/TREBLE settings. |
Specifications
| Brand | Shinco |
| Model | B07X1WP6Z9 |
| Connectivity Technology | Bluetooth |
| Compatible Devices | Laptop, Smartphone |
| Mounting Type | Tabletop |
| Power Source | Battery Powered |
| Connector Type | Aux |
| Number of Channels | 1 |
| Audio Input | AUX, USB/TF card, 1/4 inch Mic input |
| Output Wattage | 15 watts |
| Speaker Size | 6.5 inches (Coaxial) |
| Dimensions (Approx.) | 10.86 x 5.19 x 8.26 inches (W x D x H) |

Figure 4: Approximate dimensions of the PA system.
Warranty and Support
Shinco products are manufactured to high-quality standards. For information regarding warranty coverage, please refer to the warranty card included with your purchase or contact Shinco customer support. Keep your purchase receipt as proof of purchase.
For technical support or service inquiries, please visit the official Shinco website or contact their customer service department. Contact details are typically provided on the product packaging or the official website.