
1. Safety Information
Before operating the Altas Strength M810 Smith Machine Home Gym, please read and understand all instructions in this manual. Failure to follow these instructions may result in serious injury or equipment damage.
- Consult a Professional: Always consult with a qualified fitness expert or medical professional before starting any new exercise program, especially when using new equipment.
- Proper Assembly: Ensure all components are correctly assembled and securely fastened according to the assembly instructions. Regularly check all bolts and connections for tightness.
- Weight Limits: Do not exceed the maximum weight recommendation of 453.59 kg (1000 lbs) for the frame. Adhere to the weight limits for individual components as specified.
- Clearance: Maintain adequate clearance around the machine during use to prevent accidents.
- Children and Pets: Keep children and pets away from the equipment during operation.
- Inspect Before Use: Before each workout, inspect the machine for any signs of wear, damage, or loose parts. Do not use the equipment if any issues are found.
- Use Safety Catches: Always utilize the adjustable safety catches on the Smith machine for all exercises, especially when lifting heavy weights or training alone.
- Stable Surface: Place the machine on a flat, stable, and non-slip surface.
2. Product Overview
The Altas Strength M810 is a robust, commercial-grade Smith Machine Home Gym designed for comprehensive strength training. It integrates multiple workout stations into a single unit, offering versatility for a wide range of exercises.
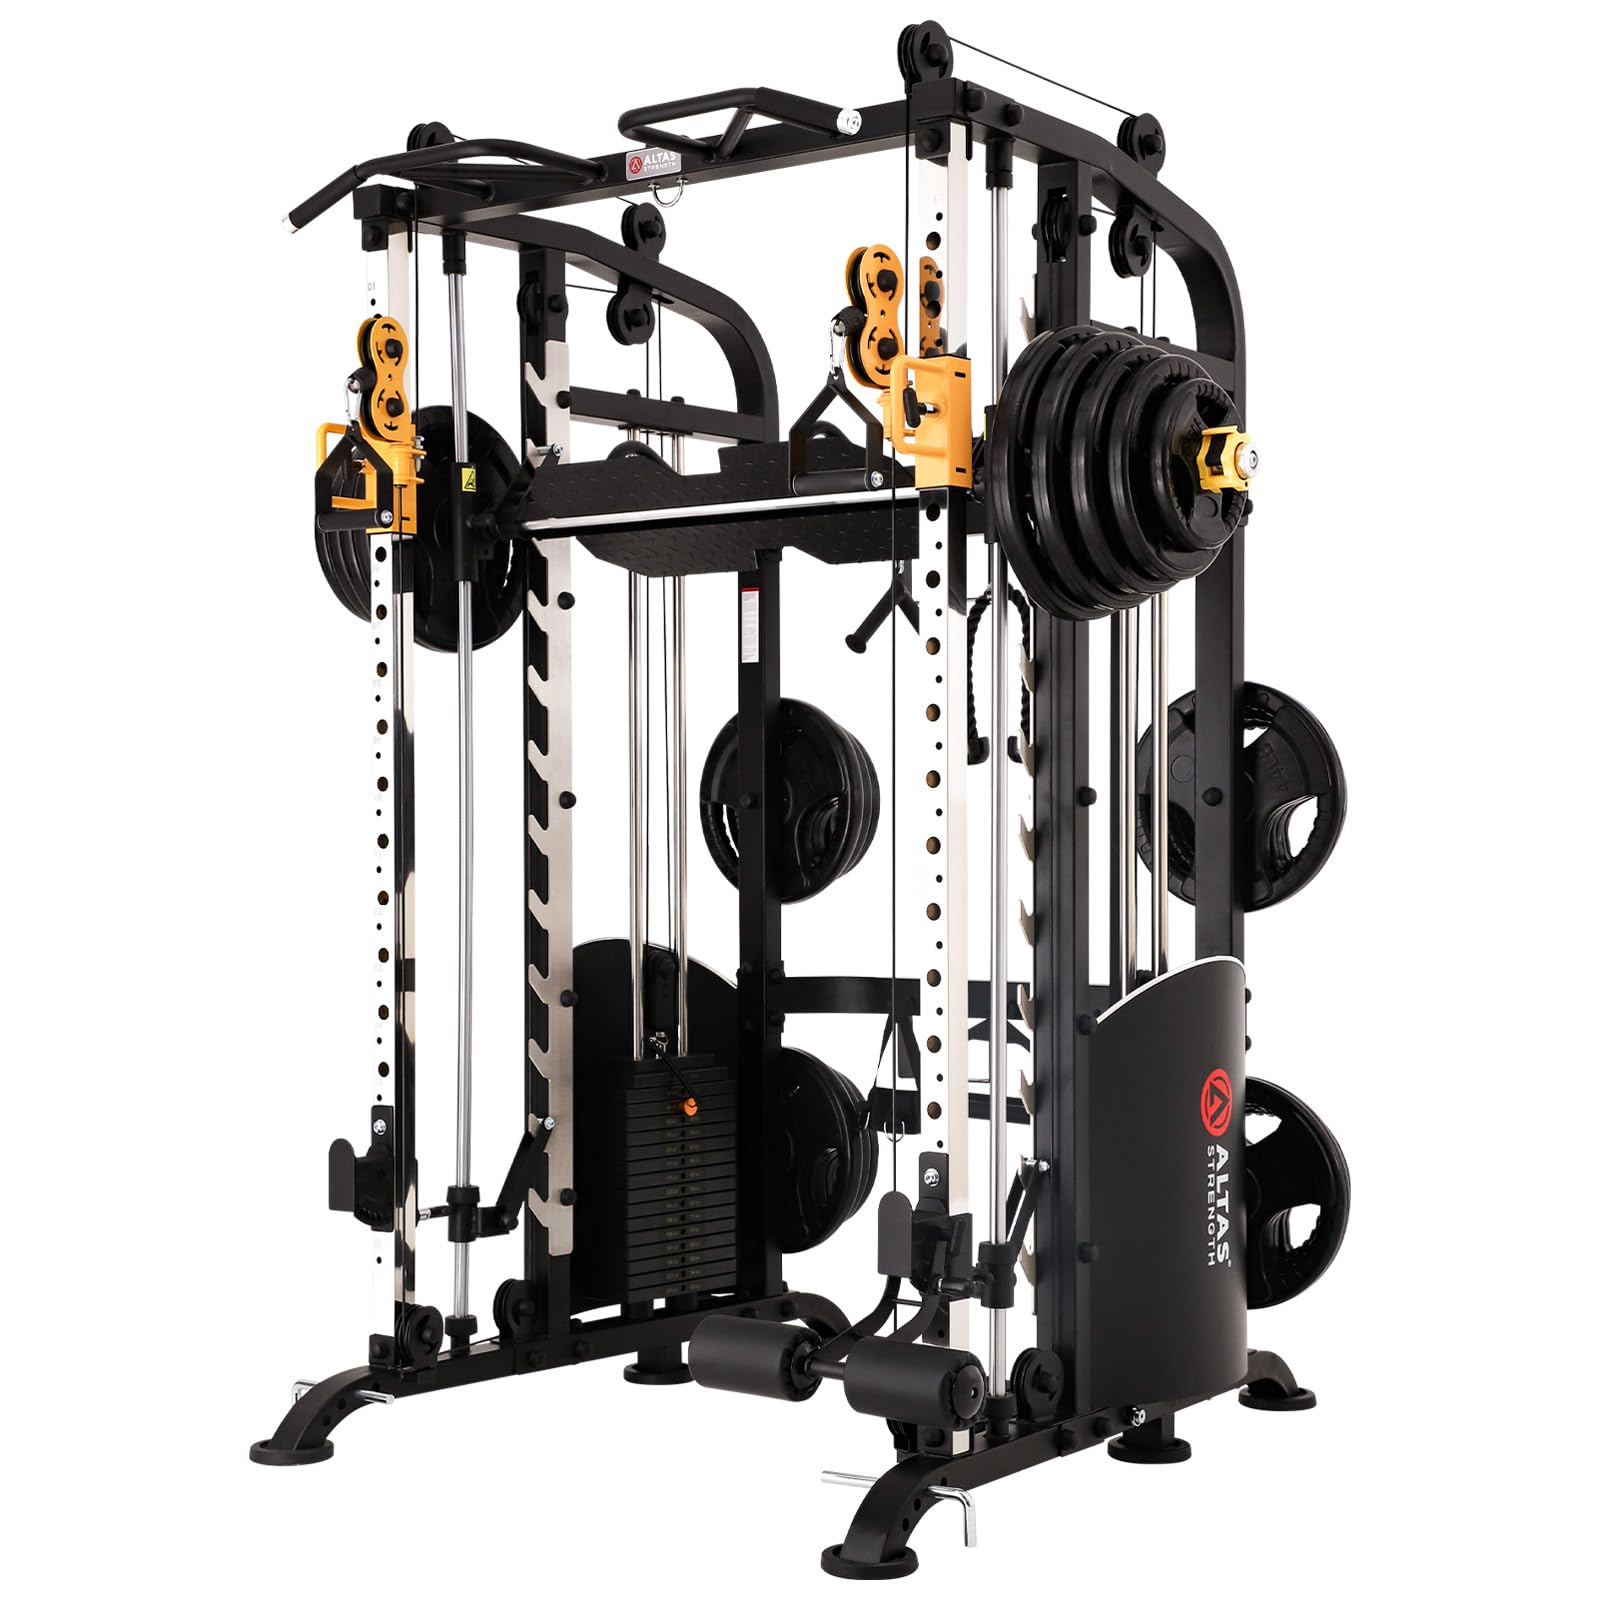
Figure 2.1: The Altas Strength M810 Smith Machine Home Gym, showcasing its multi-functional design with integrated weight stacks and Smith bar.
Key Features:
- Hybrid Weight System: Features dual 220lb (100kg) integrated weight stacks for cable exercises and a plate-loaded Smith bar for compound lifts.
- True 2:1 Pulley Ratio: Provides smooth resistance for cable movements, where 100 lbs pinned resistance translates to 50 lbs of felt resistance, allowing for extended cable travel.
- 11-Gauge Steel Frame: Constructed from 2.5mm steel, boasting a 1,000-pound capacity for exceptional stability and durability.
- Guided Smith Bar: Linear bearing bar path with adjustable safety catches for secure solo lifting.
- Integrated Storage: Built-in rear storage pegs for Olympic plates.
- Compact Design: Dimensions of 68"D x 78"W x 85"H (172.72D x 198.12W x 215.9H cm) designed to fit under 8-foot ceilings.
3. Setup & Assembly
The Altas Strength M810 ships in reinforced wooden crates to ensure safe delivery. Assembly requires careful attention to detail and is best performed with two individuals due to the size and weight of components.
3.1 Unpacking and Preparation
- Uncrating: Use appropriate tools to safely open the wooden crates. Be aware of the weight of the components.
- Inventory: Verify all parts against the included parts list. Report any missing or damaged parts immediately to customer support.
- Sorting: Organize all hardware and components. Some parts may be marked with blue tape (left side) or green tape (right side) for easier identification during assembly.
- Workspace: Ensure you have a clear, spacious, and level area for assembly.
3.2 Assembly Steps
Follow the detailed instructions provided in the separate assembly manual. Pay close attention to diagrams and ensure all bolts are tightened securely. Two ratchets are recommended for efficient tightening.

Figure 3.1: General view of the Altas Strength M810, illustrating the overall structure to guide assembly.
- Frame Assembly: Begin by assembling the main frame components. Ensure the orientation of the frame is correct before proceeding.
- Cable System Installation: This step requires careful attention. To thread the cables, you may need to remove small balls from the cable ends temporarily. Reattach them securely once threaded. Refer to the diagrams for the correct routing of each cable through the pulleys.
- Weight Stack Installation: Install the dual 220lb weight stacks. Ensure the selector pin operates smoothly.
- Smith Bar and Safety Catches: Install the linear bearing Smith bar and adjustable safety catches. Test their functionality to ensure the bar locks securely.
- Accessory Installation: Attach all included accessories such as pull-up bars, dip handles, and storage pegs.
Important Note on Cable Threading:
Some users have found cable threading challenging. Ensure you remove the small ball from the cable end before threading it through the system. Reattach it securely once threaded. If the plates are floating or not moving smoothly, adjust the tension by loosening the bolt going into the stack.
4. Operating Instructions
The Altas Strength M810 offers a variety of exercise options. Always warm up before exercising and cool down afterward.
4.1 Smith Machine Operation
The Smith machine provides a guided bar path for exercises like squats, bench presses, and overhead presses, enhancing safety, especially when training alone.

Figure 4.1: Demonstrating a squat exercise using the Smith machine for guided movement and safety.
- Loading Weights: Load Olympic plates onto the Smith bar. Ensure weights are evenly distributed and secured with collars.
- Adjusting Safety Catches: Set the adjustable safety catches to a height that prevents the bar from descending too low, providing a safety net if you fail a lift.
- Engaging/Disengaging Bar: To disengage the bar, rotate it slightly to unlock it from the hooks. To re-engage, lift the bar and rotate it back into the hooks.
- Spotter Arms: Utilize the independent spotter arms for additional safety during free weight exercises if using the power cage function.
4.2 Cable Pulley System Operation
The dual 220lb weight stacks and 2:1 pulley ratio allow for a wide range of cable exercises, including lat pulldowns, cable rows, tricep pushdowns, and cable crossovers.

Figure 4.2: Detail of the integrated weight stack, showing the selector pin for adjusting resistance.
- Selecting Weight: Insert the selector pin into the desired weight plate. Remember the 2:1 ratio: the actual resistance felt is half of the indicated weight.
- Attaching Accessories: Use the carabiners to attach various cable accessories (e.g., D-handles, rope attachments, lat bar) to the high, mid, or low pulleys.
- Smooth Movement: Ensure cables move freely through all pulleys. If resistance feels uneven or jerky, inspect the cable path for obstructions or wear.
4.3 Other Integrated Features
- Pull-up Bar: The multi-grip pull-up bar allows for various grip positions to target different back and arm muscles.
- Dip Handles: Attach the dip handles to the frame for bodyweight dips.
- Landmine Attachment: The landmine attachment allows for rotational exercises and T-bar rows. Ensure a larger, more secure washer is used if the included one feels insufficient to prevent detachment during heavy use.
- Optional Leg Press: An optional vertical leg press attachment can be purchased separately to expand lower body training.

Figure 4.3: Detail of the leg attachment, which can be used for various leg exercises.
5. Maintenance
Regular maintenance ensures the longevity and safe operation of your Altas Strength M810.
- Cleaning: Wipe down the machine with a damp cloth after each use to remove sweat and dust. Avoid abrasive cleaners.
- Lubrication: Periodically lubricate the linear bearings of the Smith bar and any moving parts of the cable system with a silicone-based lubricant to ensure smooth operation.
- Hardware Check: Every 1-3 months, inspect all nuts, bolts, and fasteners. Tighten any that have become loose.
- Cable Inspection: Regularly check cables for fraying, kinks, or other signs of wear. Replace damaged cables immediately.
- Pulley Inspection: Ensure all pulleys rotate freely and are not obstructed.
6. Troubleshooting
This section addresses common issues you might encounter with your Altas Strength M810.
| Problem | Possible Cause | Solution |
|---|---|---|
| Cables are not smooth or feel jerky. | Incorrect cable routing, lack of lubrication, or worn pulleys. | Review the assembly manual for correct cable routing. Lubricate cables and pulleys. Inspect pulleys for damage. Ensure the tension bolt for the weight stack is correctly adjusted. |
| Smith bar is not moving smoothly. | Linear bearings require lubrication or are dirty. | Clean and lubricate the linear bearings on the Smith bar. |
| Plastic covers do not fit properly. | Washers installed incorrectly (facing inward instead of outward). | Ensure washers are installed facing outwards to allow the plastic covers to fit correctly. This may require partial disassembly. |
| Landmine attachment feels insecure or detaches. | Included washer is too small for the attachment point. | Replace the included washer with a larger, wider washer to ensure a secure fit and prevent accidental detachment. This is a critical safety measure. |
7. Specifications
| Feature | Detail |
|---|---|
| Model Number | M810 |
| Brand | ALTAS STRENGTH |
| Product Dimensions (D x W x H) | 172.72 cm x 198.12 cm x 215.9 cm (68"D x 78"W x 85"H) |
| Item Weight | 462.66 kg (1018 lbs) |
| Material | Alloy Steel (2.5mm / 11-gauge) |
| Maximum Weight Recommendation (Frame) | 453.59 kg (1000 lbs) |
| Weight Stacks | Dual 220 lb (100 kg) integrated stacks |
| Pulley Ratio | 2:1 (100 lbs pinned = 50 lbs felt) |
| Cable Type | 6.2mm Aircraft Cable |
| Included Components | Various accessories (specific list not provided in source, but implied) |

Figure 7.1: Dimensional overview of the Altas Strength M810 Smith Machine.
8. Warranty & Support
Altas Strength Inc. provides a warranty for the M810 Smith Machine. For specific warranty details, please refer to your purchase documentation or contact customer support directly.
- Warranty Period: A one-year warranty typically covers this equipment.
- Customer Support: For assistance with assembly, missing parts, troubleshooting, or warranty claims, please contact Altas Strength Inc. customer service.
- Manufacturer Contact Information: Markham ON Canada L3R 8T8.
- Online Resources: Visit the official Altas Strength website for additional resources, FAQs, and product information.
Legal Disclaimer:
Altas Strength makes no representations about featured products & services specifications, configurations, prices, components, options, availability, results, suitability etc. and are all subject to change without notice. The equipment must be used, and fitness & wellness activities must be performed, under proper fitness expert's guidance. Altas Strength and its associates disclaim all warranties and conditions, either express or implied, including, but not limited to, implied warranties of merchantability, fitness for a particular purpose, title, and non-infringement, with regard to all products developed and marketed by us and mentioned on this site or affiliate sites and the provision of or failure to provide support services. To the maximum extent permitted by applicable law, in no event shall Altas Strength or its associates be liable for any special, incidental, indirect, or consequential damages whatsoever arising out of the use of or inability to use our products or the provision of or failure to provide support services, even if Altas Strength or its associates have been advised of the possibility of such damages.