
1. Introduction
This manual provides essential instructions for the safe operation, setup, maintenance, and troubleshooting of your RYOBI R18ST50-0 18V Cordless Stapler. This tool is part of the RYOBI ONE+ system and is designed for various DIY projects, including home decorating, upholstery, and carpet tacking. Please read this manual thoroughly before using the stapler to ensure proper and safe usage.
2. Safety Information
WARNING: Always wear eye protection when operating power tools. Failure to do so could result in serious personal injury.
- Keep the work area clean and well-lit. Cluttered or dark areas invite accidents.
- Do not operate power tools in explosive atmospheres, such as in the presence of flammable liquids, gases, or dust. Power tools create sparks which may ignite the dust or fumes.
- Keep children and bystanders away while operating a power tool. Distractions can cause you to lose control.
- Disconnect the battery pack from the tool before making any adjustments, changing accessories, or storing power tools. Such preventive safety measures reduce the risk of starting the power tool accidentally.
- Store idle power tools out of the reach of children and do not allow persons unfamiliar with the power tool or these instructions to operate the power tool.
- Maintain power tools and accessories. Check for misalignment or binding of moving parts, breakage of parts, and any other condition that may affect the power tool’s operation. If damaged, have the power tool repaired before use.
3. Product Overview
The RYOBI R18ST50-0 is an 18V cordless stapler designed for efficiency and ease of use. Key features include a compact and lightweight design, a tool-less depth of drive adjustment, and a material grip attachment.

Figure 1: RYOBI R18ST50-0 18V Cordless Stapler. This image shows the overall design of the stapler, highlighting its compact form factor and the RYOBI ONE+ battery interface.
Key Components:
- Staple Magazine: Holds the staples for firing.
- Trigger: Activates the stapling mechanism.
- Depth of Drive Adjustment: Allows for precise control over staple depth.
- Material Grip Attachment: Helps secure the workpiece during stapling.
- Battery Interface: Compatible with RYOBI ONE+ 18V batteries (battery not included).
4. Setup
4.1 Battery Installation
- Ensure the stapler is turned off.
- Align a fully charged RYOBI ONE+ 18V battery with the battery interface on the tool.
- Slide the battery into place until it clicks securely.
- To remove, press the release latches on the battery and slide it out.
4.2 Loading Staples
The stapler is designed to fire 10mm crown staples ranging from 6mm to 14mm in length. A starter pack of 160x 10mm crown staples is included.
- Ensure the battery is removed for safety.
- Locate the staple magazine release mechanism (typically at the rear or bottom of the magazine).
- Open the magazine.
- Insert a strip of 10mm crown staples into the magazine with the points facing forward.
- Close the magazine securely until it latches.
4.3 Depth of Drive Adjustment
The tool-less depth of drive adjustment feature allows you to control how deep the staples are driven, protecting the material surface and ensuring proper setting.
- Locate the depth adjustment dial or lever on the stapler.
- Turn the dial or move the lever to increase or decrease the staple driving depth. Test on a scrap piece of material to achieve the desired depth.
5. Operating Instructions
Before operating, ensure the battery is charged, staples are loaded, and safety glasses are worn.
- Prepare Workpiece: Ensure the material to be stapled is clean and stable.
- Position Stapler: Place the nose of the stapler firmly against the workpiece at the desired stapling location.
- Use Material Grip Attachment: If needed, attach the material grip to help hold the workpiece in place for easier stapling.
- Activate: Squeeze the trigger to drive a staple. Release the trigger to stop.
- Continuous Use: For multiple staples, reposition the stapler and repeat the activation process.

Figure 2: Application in upholstery. This image demonstrates the stapler being used for upholstery work, highlighting its suitability for fabric and soft materials.

Figure 3: Application in carpet tacking. This image shows the stapler in use for securing carpet, illustrating its effectiveness on flooring materials.
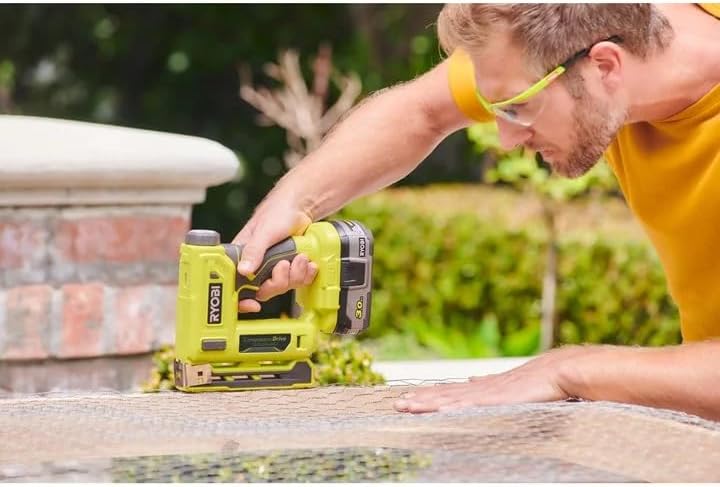
Figure 4: Application with wire mesh. This image depicts the stapler being used to attach wire mesh, showcasing its versatility for various materials and projects.
6. Maintenance
Regular maintenance ensures the longevity and optimal performance of your stapler.
- Cleaning: Keep the tool clean by wiping it with a soft, damp cloth. Do not use harsh chemicals or abrasive cleaners.
- Inspection: Periodically inspect the tool for any signs of damage, loose parts, or wear. Ensure the staple magazine operates smoothly.
- Storage: Store the stapler in a dry, secure location out of reach of children. Remove the battery before storage.

Figure 5: RYOBI R18ST50-0 stapler ready for use on a workbench. This image shows the stapler positioned on a wooden workbench, alongside a roll of wire mesh and other tools, illustrating a typical work environment.
7. Troubleshooting
If you encounter issues with your RYOBI R18ST50-0 stapler, refer to the following common problems and solutions:
| Problem | Possible Cause | Solution |
|---|---|---|
| Stapler does not fire. | Battery is not charged or improperly installed. | Ensure battery is fully charged and securely inserted. |
| Staples are jamming. | Incorrect staple size or type; debris in magazine. | Use correct 10mm crown staples (6-14mm). Remove battery, open magazine, and clear any jammed staples or debris. |
| Staples are not driven deep enough. | Depth of drive setting is too shallow. | Adjust the depth of drive setting to a deeper position. |
| Staples are driven too deep. | Depth of drive setting is too deep. | Adjust the depth of drive setting to a shallower position. |
8. Specifications
- Brand: RYOBI
- Model: R18ST50-0
- Voltage: 18 Volts
- Staple Type: 10mm Crown Staples
- Staple Length: 6mm to 14mm
- Item Weight: 3.61 pounds (approximately 1.64 kg)
- Material: Metal, Plastic
- Included Components: 160x 10mm crown staples, 1x Belt Clip, 1x Material Grip Attachment, 1x R18ST50-0 Stapler (Note: Battery and charger are sold separately as this is a 'bare' tool).
9. Warranty and Support
The RYOBI ONE+ range, including the R18ST50-0 stapler, typically comes with a 3-year warranty. Please retain your proof of purchase for warranty claims.
For further assistance, technical support, or to inquire about replacement parts, please contact RYOBI customer service or visit their official website. Contact information can usually be found on the product packaging or the RYOBI website.


