
Walfront XH-M609
Walfront XH-M609 Digital Low Voltage Disconnect Module User Manual
Model: XH-M609
Introduction
The Walfront XH-M609 is a digital low voltage disconnect module designed to protect batteries from over-discharge. It automatically disconnects the load when the battery voltage drops below a user-defined threshold and reconnects when the voltage recovers. This module is suitable for various 12-36V battery types, including lead-acid and lithium batteries.
Key Features:
- Digital voltage display for precise monitoring.
- Adjustable low voltage disconnect and recovery thresholds.
- Automatic load disconnection upon undervoltage.
- Automatic load reconnection upon voltage recovery.
- Wide operating voltage range: 12-36V.
- Compact design for easy integration.
Safety Information
Please read and understand all safety instructions before installing or operating the XH-M609 module. Failure to follow these instructions may result in electric shock, fire, or serious injury.
- Ensure the power source is disconnected before making any wiring connections.
- Verify correct polarity when connecting the battery and load to prevent damage to the module or connected devices.
- Do not exceed the specified input voltage range (12-36V).
- Keep the module away from moisture, dust, and extreme temperatures.
- This module is not waterproof.
- Handle with care; electronic components can be fragile.
Product Overview and Components
The XH-M609 module features clearly labeled terminals for input and output, a digital display for voltage readings, and control buttons for setting parameters.

Figure 1: Top view of the XH-M609 module, highlighting the main components.
Component Identification:
- VIN+ / VIN- Terminals: Power input from the battery (12-36V).
- VOUT+ / VOUT- Terminals: Power output to the load.
- Digital Display: Shows current voltage and setting parameters.
- Set Button (Left): Used to enter setting mode and adjust values.
- Up/Down Button (Right): Used to navigate settings and change values.
- Relay: Controls the connection/disconnection of the load.
- LED Indicator: Indicates module status (e.g., power, relay state).
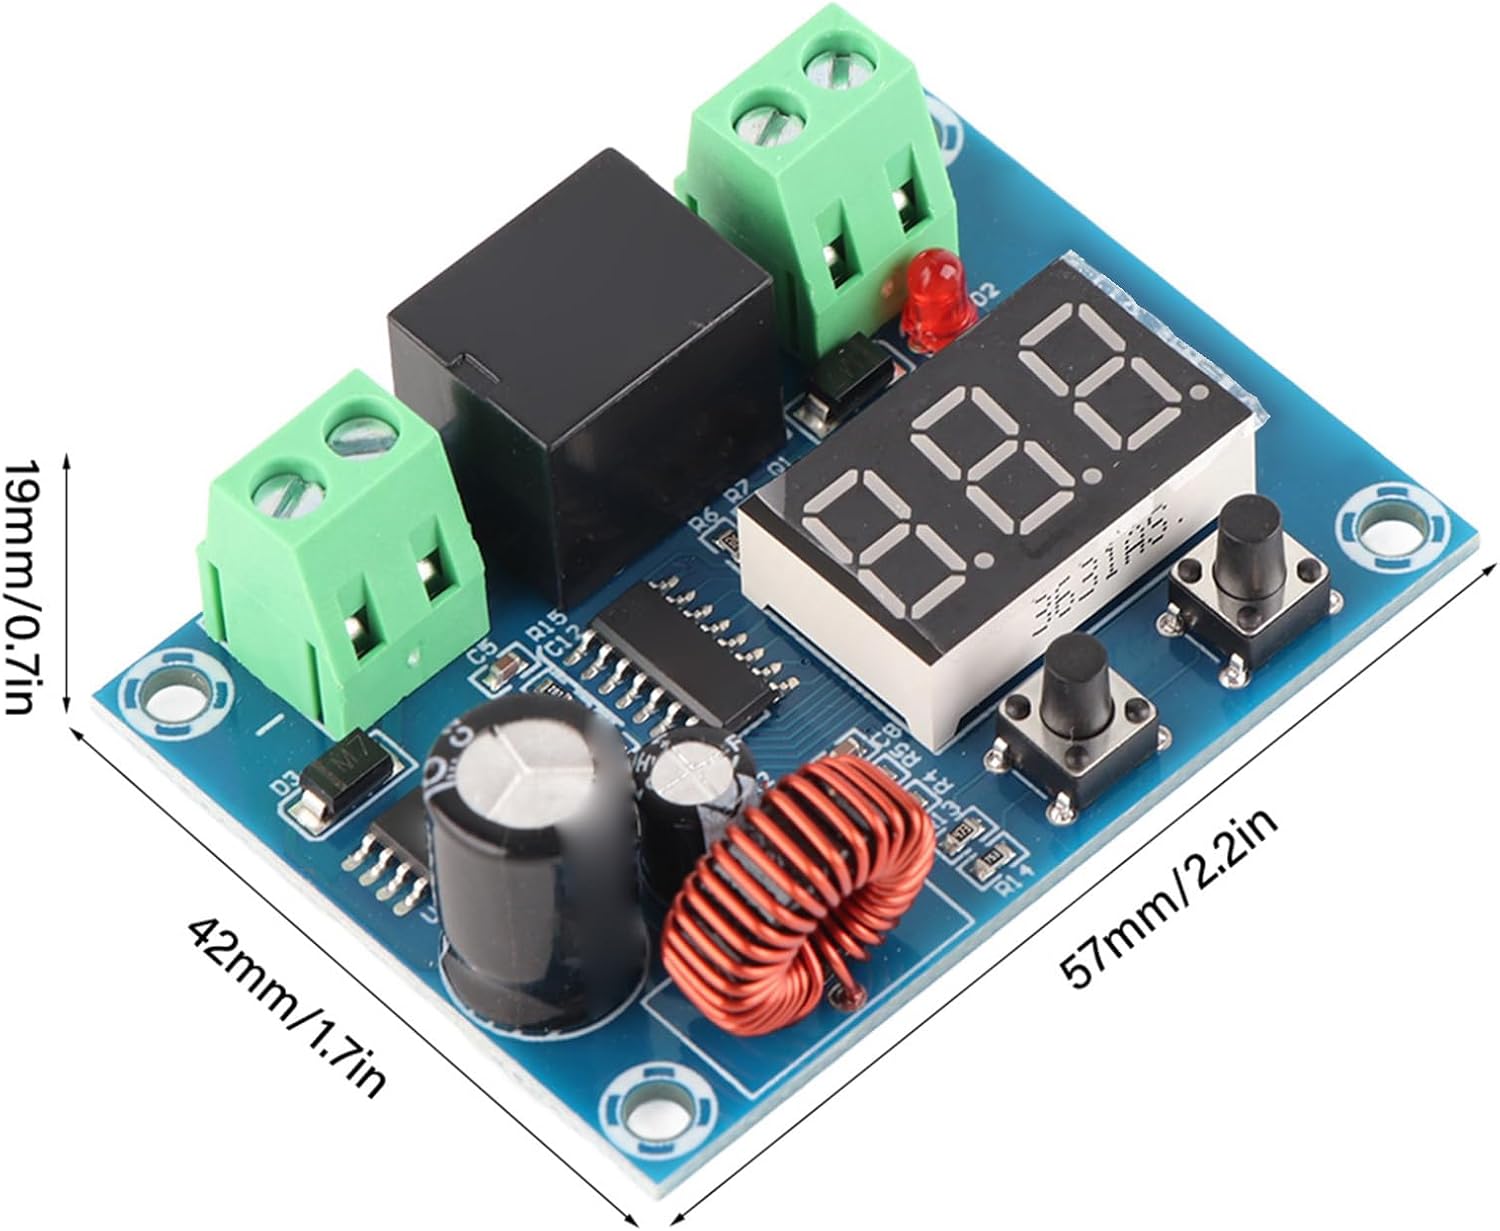
Figure 2: Dimensions of the XH-M609 module.
The module measures approximately 57mm x 42mm x 19mm (2.2 x 1.7 x 0.7 inches), making it suitable for integration into various projects.
Specifications
| Parameter | Value |
|---|---|
| Supply Voltage | 12-36V DC (Battery) |
| Output Voltage | Equal to Supply Voltage |
| Control Accuracy | 0.1V |
| Power Consumption | ≤1.5W |
| Product Dimensions | 57 x 42 x 19 mm (2.24 x 1.65 x 0.75 inches) |
| Item Weight | Approx. 28g (0.634 ounces) |
| Compatible Batteries | Various batteries, including lithium batteries |
Setup and Installation
Follow these steps to correctly install and connect your XH-M609 module:
- Prepare Wiring: Ensure all wires are appropriately sized for your application and have proper insulation.
- Connect Battery Input: Connect the positive terminal of your 12-36V battery to the VIN+ terminal and the negative terminal to the VIN- terminal of the module. Ensure correct polarity.
- Connect Load Output: Connect the positive terminal of your load (e.g., inverter, light, motor) to the VOUT+ terminal and the negative terminal to the VOUT- terminal of the module.
- Verify Connections: Double-check all wiring for secure connections and correct polarity before applying power.
- Apply Power: Once all connections are verified, connect the battery to power the module. The digital display should illuminate, showing the current battery voltage.

Figure 3: Example of module connections (conceptual).
Important: Always disconnect the battery before making or changing any wiring connections to prevent short circuits or damage.
Operating Instructions
Setting Voltage Thresholds:
The XH-M609 module allows you to set two critical voltage thresholds: the low voltage disconnect (LVD) point and the voltage recovery (VR) point.
- Enter Setting Mode: Press and hold the Set button (left button) for approximately 3 seconds until the digital display starts flashing. This indicates you are in setting mode.
- Set Low Voltage Disconnect (LVD) Point: While the display is flashing, press the Set button briefly. The display will show the current LVD value. Use the Up/Down button (right button) to adjust this value. This is the voltage at which the load will be disconnected.
- Set Voltage Recovery (VR) Point: After setting the LVD point, press the Set button again briefly. The display will show the current VR value. Use the Up/Down button to adjust this value. This is the voltage at which the load will be reconnected. The VR value must always be higher than the LVD value to prevent rapid cycling.
- Save Settings: After setting both values, wait for approximately 5 seconds without pressing any buttons. The display will stop flashing, and the new settings will be automatically saved. The module will then return to displaying the current battery voltage.

Figure 4: Module indicating automatic disconnection on low voltage.
Operation Logic:
- When the battery voltage drops below the set LVD point, the module will disconnect the load to prevent further discharge.
- When the battery voltage rises above the set VR point (e.g., after charging), the module will automatically reconnect the load.
Maintenance
The XH-M609 module requires minimal maintenance. Follow these guidelines to ensure its longevity:
- Keep Clean: Periodically clean the module with a soft, dry cloth to remove dust and debris. Do not use liquid cleaners.
- Inspect Connections: Regularly check all wiring connections to ensure they are secure and free from corrosion.
- Avoid Harsh Environments: Protect the module from direct sunlight, excessive heat, moisture, and corrosive substances.
Troubleshooting
| Problem | Possible Cause | Solution |
|---|---|---|
| Module does not power on / Display is off. |
|
|
| Load is not connected/disconnected as expected. |
|
|
| Module appears damaged or non-functional. |
|
|
Warranty and Support
For warranty information or technical support regarding your Walfront XH-M609 Digital Low Voltage Disconnect Module, please contact your retailer or the manufacturer directly. Keep your purchase receipt as proof of purchase.
You may visit the Walfront store for more products and information: Walfront Store on Amazon.
Ask a question about this manual
Ask about setup, troubleshooting, compatibility, parts, safety, or missing instructions. Manuals+ will review the question and use this page’s manual context to help answer it.