
Introduction
Thank you for choosing the Satel INTEGRA256PLUS Control Panel. This device is a Grade 3 security control panel designed for advanced alarm systems. This manual will guide you through the essential steps for proper installation, configuration, and daily operation to ensure optimal performance and security.
Please read this manual carefully before attempting any installation or operation. Keep it in a safe place for future reference.
1. Setup and Installation
1.1 Unpacking the Control Panel
Carefully remove the INTEGRA256PLUS control panel from its packaging. Verify that all components listed in the packing contents are present and undamaged. If any items are missing or damaged, contact your supplier immediately.
1.2 Mounting the Control Panel
The control panel should be mounted in a secure, dry, and easily accessible location, away from direct sunlight, heat sources, and excessive moisture. Ensure the mounting surface is stable and can support the weight of the unit.
- Open the control panel enclosure.
- Mark the drilling points on the wall using the mounting holes on the back of the enclosure as a template.
- Drill the necessary holes and insert appropriate wall plugs.
- Secure the control panel enclosure to the wall using screws.
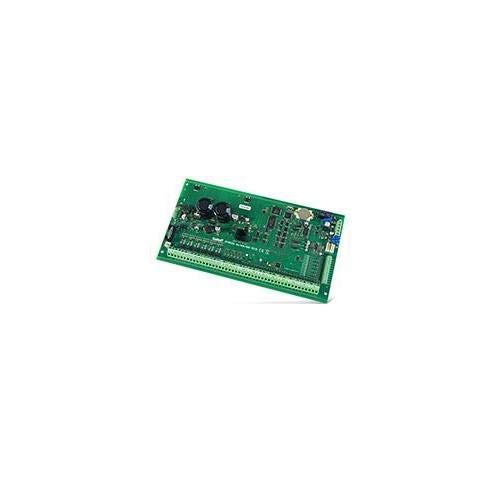
Image showing the Satel INTEGRA256PLUS control panel unit, typically mounted on a wall. This panel serves as the central hub for the security system.
1.3 Wiring Connections
All wiring should be performed by a qualified technician and in accordance with local electrical codes and regulations. Ensure the main power supply is disconnected before making any connections.
- Power Supply: Connect the main power supply to the designated terminals. The INTEGRA256PLUS requires a stable power source.
- Battery Connection: Connect the backup battery to the appropriate terminals. Ensure correct polarity. The battery provides power during mains failure.
- Zone Connections: Connect detectors (e.g., motion sensors, door contacts) to the designated zone inputs. Refer to the detailed wiring diagram in the separate installation manual for specific zone configurations.
- Output Connections: Connect sirens, communicators, and other output devices to the control panel's programmable outputs.
- Communication Modules: If using optional communication modules (e.g., GSM, Ethernet), connect them according to their respective manuals.
2. Operating Instructions
2.1 Powering On the System
Once all wiring is complete and verified, connect the main power supply. The control panel will initiate its startup sequence. Observe the system status indicators on the keypad.
2.2 Basic System Operation
The INTEGRA256PLUS system is typically operated via a connected keypad. Common operations include:
- Arming the System: Enter your user code followed by the arming command (e.g., ARM button). The system will indicate successful arming.
- Disarming the System: Enter your user code followed by the disarming command (e.g., DISARM button). The system will indicate successful disarming.
- Checking System Status: Use the status command (e.g., STATUS button) to view current zone status, faults, or alarms.
- Panic/Emergency Functions: Keypads often have dedicated buttons for panic, fire, or auxiliary emergencies. Consult your keypad's specific manual for details.
2.3 Programming User Codes and Settings
Initial programming of user codes, zone attributes, and system settings is typically performed by an installer. For advanced user programming, refer to the detailed programming manual provided with the system. Always ensure strong, unique user codes are used and changed regularly.
3. Maintenance
3.1 Regular System Checks
To ensure the continued reliability of your security system, perform the following checks periodically:
- Battery Test: Conduct a battery test at least once a year. The system may have an automatic test function, or it can be initiated manually via the keypad. Replace the battery every 3-5 years, or as recommended by the manufacturer.
- Sensor Test: Periodically test all connected detectors (e.g., motion sensors, door/window contacts) to ensure they are functioning correctly and communicating with the control panel.
- Siren Test: Briefly activate the siren to confirm it is operational.
3.2 Cleaning the Control Panel
The control panel and keypads should be cleaned with a soft, dry cloth. Do not use abrasive cleaners, solvents, or excessive moisture, as these can damage the electronic components.
4. Troubleshooting
This section provides solutions to common issues you might encounter. For more complex problems, contact technical support.
| Problem | Possible Cause | Solution |
|---|---|---|
| System will not arm | An open zone (door/window open, motion detected) | Check all zones for open circuits. Close doors/windows. Wait for motion detectors to clear. |
| Keypad displays 'Fault' | Low battery, communication error, or sensor tamper | Check system status for specific fault code. Replace battery if low. Inspect wiring. |
| Siren does not activate during alarm | Siren wiring issue, siren fault, or output programming error | Verify siren connections. Test siren directly if possible. Consult installer for output programming. |
| False alarms | Improper sensor placement, environmental factors, or faulty sensor | Review sensor placement. Eliminate sources of false triggers (e.g., pets, drafts). Test or replace faulty sensors. |
5. Technical Specifications
Below are the key technical specifications for the Satel INTEGRA256PLUS Control Panel:
| Feature | Value |
|---|---|
| Manufacturer | SATEL |
| Item Code | INTEGRA256PLUS |
| Product Dimensions | 29 x 14.5 x 5.5 cm |
| Item Model Number | INTEGRA256PLUS |
| Number of Items | 1 |
| Item Weight | 491 g |
6. Warranty Information
The Satel INTEGRA256PLUS Control Panel comes with a standard manufacturer's warranty. Please refer to the warranty card included with your product or contact your supplier for detailed terms and conditions. The warranty typically covers defects in materials and workmanship under normal use. Unauthorized modifications or improper installation may void the warranty.
7. Customer Support
For technical assistance, troubleshooting beyond this manual, or warranty claims, please contact your authorized Satel dealer or installer. They possess the specialized knowledge required to provide comprehensive support for your INTEGRA256PLUS system.
When contacting support, please have your product model number (INTEGRA256PLUS) and a detailed description of the issue ready.


