
1. Introduction
This manual provides essential information for the proper use and maintenance of your Zentality C-710 10-inch Dual SIM Tablet. Please read this guide thoroughly before operating the device to ensure optimal performance and longevity. Keep this manual for future reference.
2. Product Overview
The Zentality C-710 is a 10-inch Android tablet designed for communication and multimedia. It features dual SIM card support for cellular connectivity, a Quad-Core processor, 1GB RAM, and 16GB of internal storage. The device includes front and rear cameras, Bluetooth, and a vibrant IPS LCD display.
2.1 Device Components
Familiarize yourself with the tablet's physical features and controls.

Image 1: Front and back view of the Zentality C-710 Tablet, showing the screen, cameras, and rear casing.
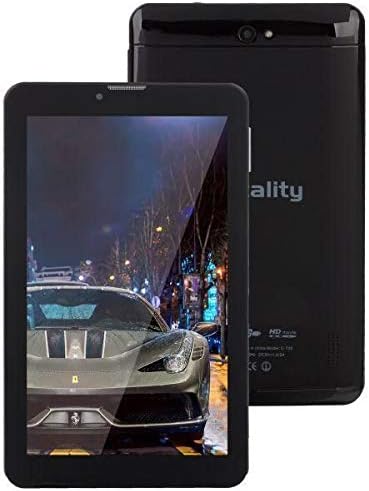
Image 2: Front view of the Zentality C-710 Tablet with the screen displaying an image, highlighting the display area.
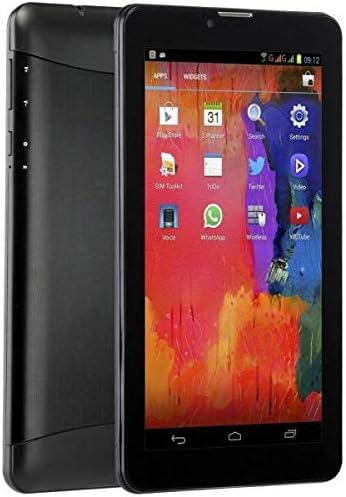
Image 3: Side view of the Zentality C-710 Tablet, illustrating the placement of physical buttons and ports.
3. Setup
3.1 Charging the Battery
Before first use, fully charge the tablet's battery. Connect the provided charger to the tablet's charging port and plug it into a power outlet. The battery indicator on the screen will show charging status. A full charge typically takes several hours.
3.2 Inserting SIM Cards
The Zentality C-710 supports dual SIM cards for cellular network access. Locate the SIM card slot(s) on the side or back of the tablet. Carefully insert your standard or micro SIM cards into the designated slots, ensuring they are correctly oriented as indicated by the diagram near the slot. Close the tray securely.
3.3 Inserting a MicroSD Card
To expand storage, insert a microSD card (up to 32GB, not included) into the dedicated slot. Ensure the card is oriented correctly before gently pushing it in until it clicks into place.
3.4 Powering On/Off
To power on, press and hold the Power button until the Zentality logo appears. To power off, press and hold the Power button until the power options menu appears, then select 'Power off'.
3.5 Initial Setup
Upon first power-on, follow the on-screen prompts to select your language, connect to a Wi-Fi network, set up your Google account, and configure other basic settings.
4. Operating
4.1 Touchscreen Gestures
Navigate your tablet using standard Android touchscreen gestures:
- Tap: Select an item or open an application.
- Tap and Hold: Access contextual menus or move icons.
- Swipe: Scroll through screens or lists.
- Pinch: Zoom in or out on images and web pages.
4.2 Connecting to Wi-Fi
Go to Settings > Network & internet > Wi-Fi. Turn Wi-Fi on, then select your desired network from the list and enter the password if required.
4.3 Connecting to Bluetooth Devices
Go to Settings > Connected devices > Bluetooth. Turn Bluetooth on, then select 'Pair new device' and choose your device from the list to connect.
4.4 Making Calls (3G)
With an active SIM card, you can make and receive calls. Open the 'Phone' application, dial the number, and press the call button.
4.5 Using the Camera
Open the 'Camera' application. Tap the shutter button to take photos. Switch between front and rear cameras using the camera toggle icon. Adjust settings like flash and mode as needed.
4.6 Managing Applications
Download new applications from the Google Play Store. To uninstall an app, tap and hold its icon on the home screen or app drawer, then drag it to the 'Uninstall' option.
5. Maintenance
5.1 Cleaning the Tablet
Use a soft, lint-free cloth to clean the screen and body of the tablet. Avoid using harsh chemicals or abrasive materials, which can damage the display or finish. For stubborn smudges, slightly dampen the cloth with water or a screen cleaner designed for electronics.
5.2 Battery Care
To prolong battery life, avoid extreme temperatures. Do not leave the tablet charging for extended periods after it's full. If storing the tablet for a long time, ensure the battery is charged to about 50%.
5.3 Software Updates
Regularly check for and install system updates to ensure your tablet has the latest features, security patches, and performance improvements. Go to Settings > System > System update.
6. Troubleshooting
6.1 Tablet Not Turning On
Ensure the battery is sufficiently charged. Connect the charger and wait a few minutes before attempting to power on again. If the issue persists, try a different charger or contact support.
6.2 Wi-Fi Connection Issues
Check if Wi-Fi is enabled in settings. Restart your tablet and your Wi-Fi router. Ensure you are entering the correct password. If the problem continues, try forgetting the network and reconnecting.
6.3 Slow Performance
Close unnecessary background applications. Clear cache data from apps in Settings > Apps & notifications > [App Name] > Storage & cache > Clear cache. Consider uninstalling unused apps or performing a factory reset as a last resort (back up your data first).
6.4 App Crashes
Ensure the app is updated to its latest version. Clear the app's cache and data (this will reset the app). If the issue persists, uninstall and reinstall the app.
7. Specifications
| Feature | Specification |
|---|---|
| Brand | Zentality |
| Model Name | C-710 |
| Display Screen Size | 10 inches |
| Display Type | IPS LCD |
| Operating System | Android |
| Processor | Quad-Core |
| Installed RAM Size | 1 GB |
| Memory Storage Capacity | 16 GB |
| Cellular Network Technology | 3G |
| Number of SIM Cards | Dual SIM |
| Connectivity Type | Cellular, Bluetooth |
| Rear Camera Resolution | 5 Megapixels |
| Front Webcam Resolution | 1.3 Megapixels |
| Battery Capacity | 4000 mAh |
| Color | Black |
| Item Weight | 940 grams |
| Package Dimensions | 27.4 x 27 x 3.8 cm |
| Date First Available | July 23, 2019 |
8. Warranty and Support
For warranty information and technical support, please refer to the documentation included with your purchase or visit the official Zentality website. Keep your proof of purchase for warranty claims.
