
Introduction
This instruction manual provides detailed guidance for the safe and effective use of your Orion Motor Tech 9-Way Slide Hammer Puller Set. This versatile tool kit is designed for various automotive pulling applications, including the removal of flange-type rear axles, front-wheel drive hubs, bearings, gears, seals, and for dent pulling. Please read this manual thoroughly before operation and retain it for future reference.
Safety Information
Always prioritize safety when using automotive tools. Failure to follow these safety guidelines may result in personal injury or damage to the tool or vehicle.
- Wear appropriate personal protective equipment (PPE): Always wear safety glasses, gloves, and sturdy footwear.
- Ensure a stable work environment: Work on a level surface. Use jack stands to support the vehicle securely.
- Inspect tools before use: Check all components for damage, wear, or loose connections. Do not use damaged tools.
- Use the correct attachment for the job: Ensure the puller jaws and adapters are correctly sized and securely attached to the component being removed.
- Maintain a firm grip: Hold the slide hammer firmly with both hands during operation.
- Avoid excessive force: If a component is extremely stubborn, re-evaluate the setup or consider alternative methods. Excessive force can damage parts or cause the tool to slip.
- Keep bystanders clear: Ensure no one is in the immediate vicinity of the work area during operation.
- Clean and store tools properly: After use, clean all components and store them in the provided case to prevent damage and corrosion.
Package Contents
Verify that all components are present and undamaged upon opening the case.

Image: All components of the 9-Way Slide Hammer Puller Set, including the slide hammer, various puller jaws, adapters, and fasteners, neatly arranged with a corresponding package list.
| Quantity | Item |
|---|---|
| 1 | Center Screw |
| 1 | Lock Nut |
| 1 | Spindle |
| 1 | Puller Hook |
| 1 | Bolt Adapter (M12x1.75) |
| 1 | Rear Axle Puller |
| 1 | Dent Puller Adapter |
| 1 | 2-Jaw Puller Adapter |
| 1 | Slide Hammer |
| 1 | 3-Jaw Puller Adapter |
| 1 | Deep Axle Puller |
| 1 | Cross Bar |
| 3 | Jaws |
| 1 | Screw |
| 3 | Bolts and Nuts (M8x1.25) |
Setup
The slide hammer puller set is designed for easy assembly and interchangeability of components. Follow these general steps to set up the tool for your specific application.
- Identify the required attachment: Determine which puller head (e.g., 2-jaw, 3-jaw, rear axle, dent puller) is suitable for the task.
- Attach the puller head to the slide hammer shaft: Thread the chosen puller head or adapter onto the threaded end of the slide hammer shaft. Ensure it is securely tightened.
- Assemble jaws (if applicable): For 2-jaw or 3-jaw pullers, attach the appropriate number of jaws to the puller head using the provided bolts and nuts. Ensure the jaws are oriented correctly for internal or external pulling.
- Prepare the workpiece: Ensure the component to be pulled is accessible and any retaining fasteners have been removed. Clean the area if necessary.

Image: An assembly diagram demonstrating how to connect different puller attachments and jaws to the slide hammer for various applications.
Operating Instructions
The slide hammer operates by converting kinetic energy into a pulling force. Once the appropriate attachment is secured to the component, slide the hammer weight forcefully towards the handle to generate an impact that dislodges the part.
A. Flange-Type Rear Axle and Front-Wheel Drive Hub Pulling
- Select the appropriate adapter: Use the rear axle puller or the FWD hub puller adapter.
- Attach to the hub/axle: Securely bolt the adapter to the wheel studs or mounting holes of the hub or axle flange. Ensure all bolts are tightened evenly.
- Operate the slide hammer: With a firm grip on the slide hammer shaft, slide the hammer weight towards the handle with controlled, consistent force. Repeat until the hub or axle is dislodged.
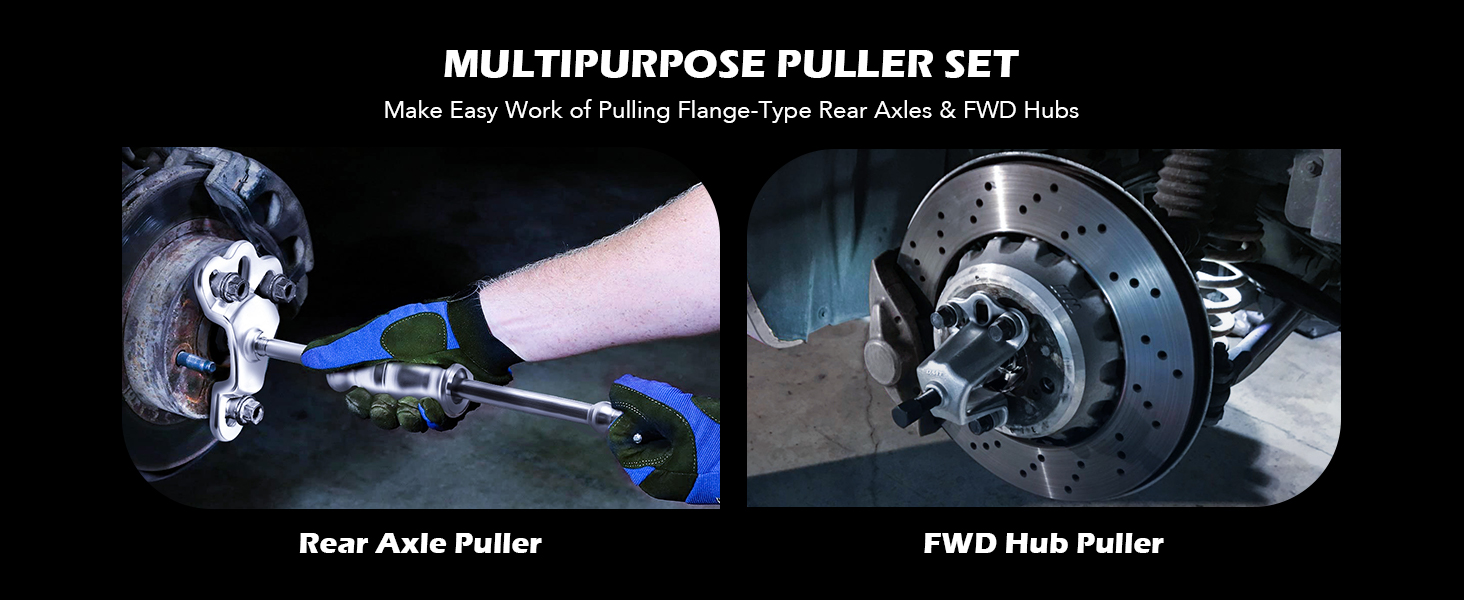
Image: Demonstrations of the slide hammer being used to remove a rear axle and a front-wheel drive hub.
B. Bearing, Gear, and Seal Extraction (Internal & External Jaws)
- Choose jaw configuration: Select either the 2-jaw or 3-jaw puller adapter. Configure the jaws for internal pulling (to grip from inside a bore) or external pulling (to grip from outside a component).
- Position the jaws: Carefully position the jaws to grip the bearing, gear, or seal securely. Ensure even pressure distribution.
- Tighten the center screw: Use the center screw to apply initial tension to the jaws, ensuring a firm grip.
- Operate the slide hammer: Slide the hammer weight towards the handle to extract the component.
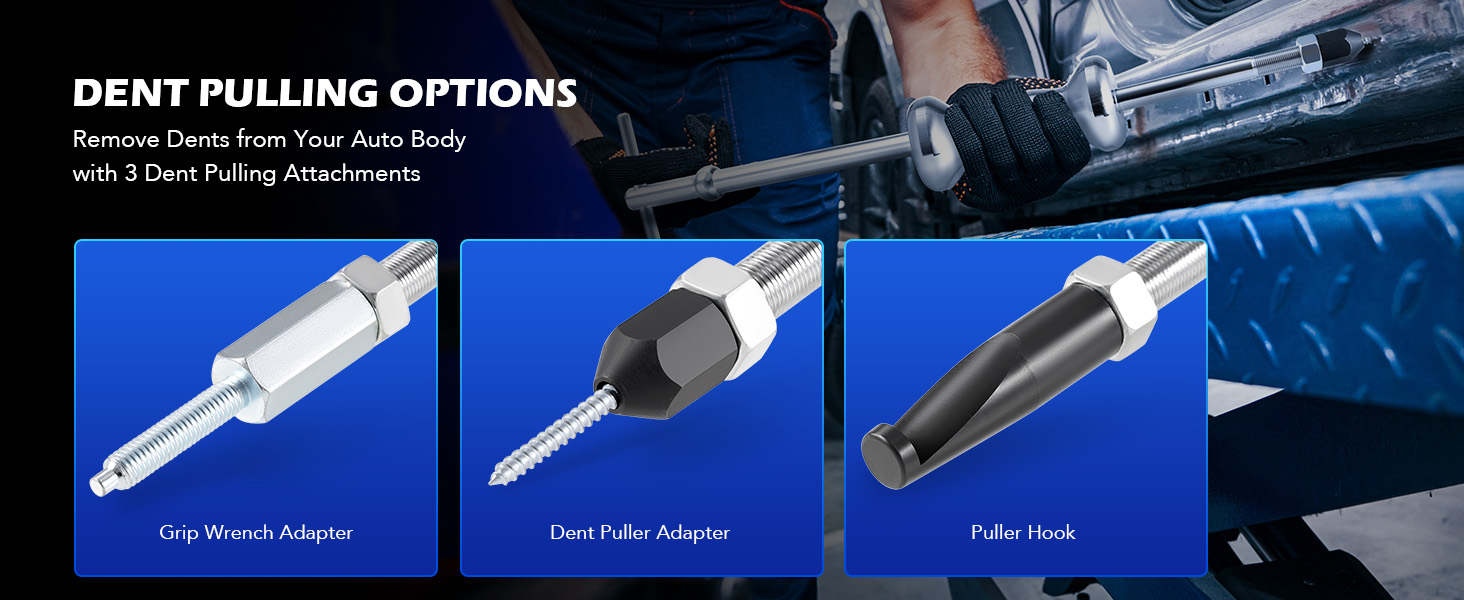
Image: Visual guide showing internal and external configurations for 2-jaw and 3-jaw pullers, suitable for extracting bearings, gears, and seals.
C. Dent Pulling
- Select dent pulling attachment: Choose the grip wrench adapter, dent puller adapter, or puller hook based on the dent type and access.
- Secure the attachment: For the dent puller adapter, thread it into a pre-drilled hole in the dent. For the grip wrench adapter or puller hook, ensure it has a secure purchase on the dented panel.
- Operate the slide hammer: Gently and repeatedly slide the hammer weight towards the handle to gradually pull out the dent. Use controlled impacts to avoid over-pulling or further damage.

Image: A visual guide to the dent pulling attachments and their application for auto body repair.
Maintenance
Proper maintenance ensures the longevity and reliable performance of your slide hammer puller set.
- Cleaning: After each use, wipe down all components with a clean cloth to remove dirt, grease, and debris.
- Lubrication: Periodically apply a light coat of machine oil to threaded parts and the slide hammer shaft to ensure smooth operation and prevent corrosion.
- Inspection: Regularly inspect all components for signs of wear, cracks, bends, or other damage. Pay close attention to the puller jaws, adapters, and the slide hammer shaft. Replace any damaged parts immediately.
- Storage: Store the entire set in its original blow-molded case in a dry, clean environment to protect it from moisture and physical damage.

Image: A close-up of the heavy-duty slide hammer, emphasizing its robust construction and features that contribute to its durability and ease of use.
Troubleshooting
If you encounter difficulties while using the slide hammer puller set, consider the following:
- Component not moving:
- Ensure the attachment is securely gripping the component.
- Verify all retaining fasteners (e.g., bolts, clips) have been removed.
- Apply penetrating oil to rusted or seized components and allow time for it to work.
- Increase the force of the slide hammer impacts, but always maintain control.
- Attachment slipping:
- Re-position the jaws or adapter for a better grip.
- Ensure the jaws are fully engaged and the center screw (if applicable) is tightened.
- Check for excessive wear on the jaws or the component being pulled.
- Difficulty assembling components:
- Ensure threads are clean and free of debris.
- Apply a small amount of lubricant to the threads.
- Verify you are using the correct components as per the package list.
Specifications
| Feature | Detail |
|---|---|
| Model Number | 0002BK |
| Product Dimensions | 60.96 x 22.86 x 12.7 cm |
| Item Weight | 7.37 kg |
| Material | Alloy Steel |
| Special Features | Blow Molded Case for Easy Storage, Heavy Duty Forged Steel, Multiple Sizes |
Warranty and Support
Orion Motor Tech products are manufactured to high-quality standards. For specific warranty information or technical support, please refer to the warranty card included with your product or contact Orion Motor Tech customer service directly. Keep your purchase receipt as proof of purchase.