
1. Introduction
This manual provides detailed instructions for the installation, configuration, and operation of your XENOCAM 4-Channel Power over Ethernet (PoE) Network Video Recorder (NVR). This device is designed to manage and record video streams from up to four 5MP, 4MP, 3MP, or 1080P IP cameras, offering advanced security features such as H.265 compression, motion detection, and remote access.
Please read this manual thoroughly before operating the NVR to ensure proper usage and to maximize its capabilities.
2. Product Overview
2.1 Key Features
- 4-Channel PoE NVR: Supports recording from up to four IP cameras at resolutions including 1080P, 3MP, 4MP, and 5MP.
- H.265 Compression: Advanced video compression technology for efficient storage and bandwidth usage without compromising video quality.
- Power over Ethernet (PoE): Provides power and data transmission to compatible IP cameras via a single Ethernet cable.
- ONVIF Support: Compatible with virtually any ONVIF-compliant IP camera.
- Motion Detection & Alerts: Configurable motion detection with email alerts and app notifications.
- Multiple Video Outputs: Features VGA and HDMI outputs for local display.
- Remote Access: Supports Android, iOS, Windows, and MAC systems for live viewing and playback via the XMEye app.
- USB Backup: Allows for easy backup of recorded footage to USB flash drives.
- Hard Drive Support: Accommodates one 3.5'' SATA hard drive (up to 6TB, not included).
2.2 Package Contents
Verify that all items listed below are included in your package:
- 1 x XENOCAM 4-Channel PoE NVR (Hard Drive Not Included)
- 1 x Power Adapter (48V 3A)
- 1 x USB Mouse
- 1 x User Manual
- 1 x Package of Screws (for HDD installation)
- 1 x Remote Control
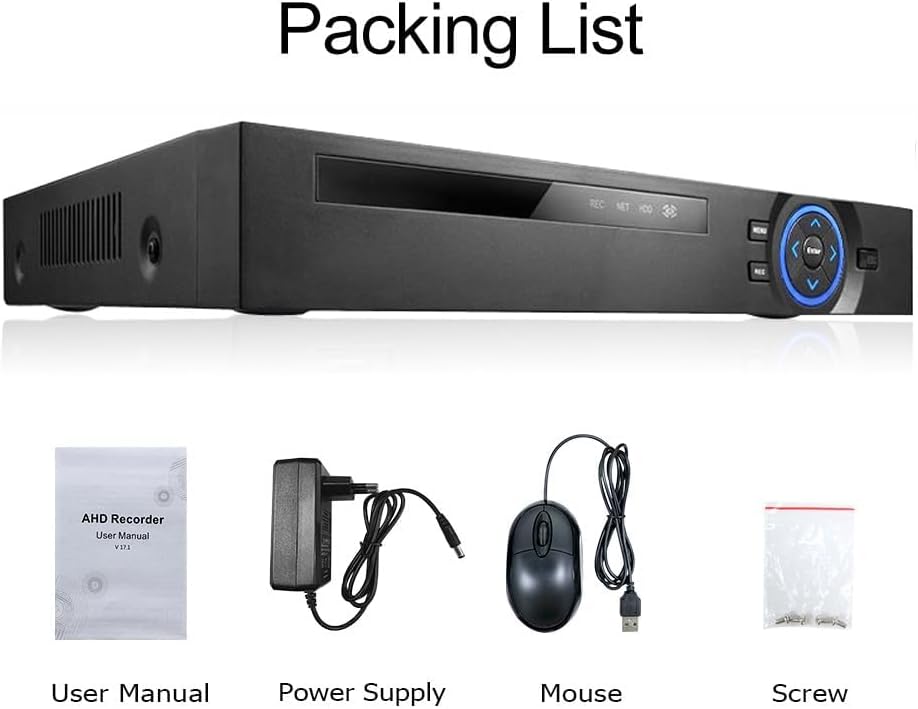
Image: Package contents of the XENOCAM NVR.
2.3 NVR Front and Rear Panels

Image: Front panel with indicators (Power, HDD, Alarm) and navigation buttons. Rear panel with DC IN, ON/OFF switch, PoE ports (POE1-POE4), UP LINK Ethernet port, AUDIO OUT, VGA, HDMI, and USB ports.
3. Setup
3.1 Hard Drive Installation (Optional)
The NVR does not include a pre-installed hard drive. To enable video recording, a 3.5-inch SATA hard drive (up to 6TB) must be installed.
- Unscrew and remove the top cover of the NVR.
- Connect the SATA data and power cables from the NVR to the hard drive.
- Secure the hard drive to the NVR chassis using the provided screws.
- Replace the top cover and secure it with screws.
3.2 Initial Connection
- Connect your IP cameras to the NVR's PoE ports (POE1-POE4) using Ethernet cables.
- Connect the NVR's UP LINK Ethernet port to your router or network switch.
- Connect a monitor to the NVR via the HDMI or VGA port.
- Connect the USB mouse to one of the NVR's USB ports.
- Connect the power adapter to the NVR's DC IN port and plug it into a power outlet.
- Turn on the NVR using the ON/OFF switch on the rear panel.

Image: Connection diagram for NVR, cameras, and router, followed by steps for remote access via the XMEye app.
3.3 Adding Cameras
The NVR is designed for plug-and-play operation with compatible IP cameras. Typically, the NVR will configure cameras automatically upon connection.
3.3.1 Quick Set (Automatic Configuration)
1. Connect the camera to the NVR box via an Ethernet cable. Ensure both the camera and NVR are powered on.
2. Right-click with the mouse on the NVR's display to access the main menu. Navigate to the 'Quick Set' option. The NVR will normally configure the camera automatically.

Image: NVR interface displaying the 'Quick Set' menu for camera configuration.
3.3.2 Manual Camera Addition
If a camera is not automatically connected, follow these steps to add it manually:
- From the IP Channel menu, click "Search". The NVR will search for cameras with the same IP segment.
- Select the new camera's IP address from the list.
- Select an empty channel for the new camera (e.g., #5 if channels 1-4 are occupied).
- Click "Add".
- After successful configuration, click "Apply" to save settings, then click "Exit".

Image: NVR interface for manual IP camera configuration, highlighting search and add functions.
4. Operating the NVR
4.1 Main Menu Navigation
Right-click on the live view screen to access the main menu. Use the USB mouse to navigate through the options.

Image: NVR system menu interface.
4.2 Remote Access (XMEye App)
To access your NVR remotely, download the XMEye app on your smartphone or tablet.
- Download the XMEye app from your device's app store:
XMEye for Android
XMEye for iOS - Register an account and log in.
- Add your NVR device by scanning the QR code displayed on the NVR's monitor (usually found in the 'System Info' or 'P2P' section) or by manually entering the device ID.
- Once added, you can view live feeds and recorded playback from your cameras.
4.3 Motion Detection and Smart Features
The NVR supports various detection features to enhance security monitoring.

Image: Visual examples of Human Detection, Intrusion Detection, and Line Crossing Detection capabilities.
- Human Detection: Identifies human shapes in the camera's field of view, reducing false alarms from other movements.
- Intrusion Detection: Triggers an alarm when an object enters a predefined virtual area.
- Line Crossing Detection: Activates an alarm when an object crosses a predefined virtual line in a specified direction.
These features can be configured in the NVR's menu under 'Alarm' or 'Advanced' settings. You can set up email alerts or app notifications for these events.
5. Maintenance
5.1 Hard Drive Management
Regularly check the status of your hard drive through the NVR's system settings. If the hard drive becomes full, the NVR will typically overwrite the oldest footage (loop recording). You can format the hard drive from the NVR's menu if needed.
5.2 Firmware Updates
Periodically check the manufacturer's website for firmware updates. Firmware updates can improve performance, add new features, or fix bugs. Follow the instructions provided with the firmware update package carefully to avoid damaging the device.
5.3 Cleaning
Ensure the NVR unit is kept clean and free from dust to prevent overheating. Use a soft, dry cloth for cleaning. Do not use liquid cleaners or aerosols.
6. Troubleshooting
- No Video Output: Check HDMI/VGA cable connections. Ensure the monitor is powered on and set to the correct input.
- Cameras Not Displaying: Verify that cameras are properly connected to PoE ports and receiving power. Check network cables. Ensure cameras are added correctly (refer to Section 3.3).
- No Recording: Confirm that a hard drive is installed and formatted. Check recording schedules in the NVR settings.
- Remote Access Issues: Ensure the NVR is connected to the internet. Verify network settings (DHCP/Static IP). Check XMEye app settings and device ID.
- NVR Not Powering On: Check the power adapter and power outlet. Ensure the ON/OFF switch on the rear panel is in the 'ON' position.
7. Specifications

Image: XENOCAM NVR with indicated dimensions.
| Feature | Specification |
|---|---|
| Model Number | N6704HE5-POE |
| Number of Channels | 4 |
| Video Compression | H.265 |
| Audio Compression | G711A |
| Video Resolution Support | 1080P, 3MP, 4MP, 5MP |
| Video Output | 1x VGA, 1x HDMI |
| Audio Output | Yes |
| Hard Drive Interface | 1x SATA (supports up to 6TB, 3.5'' HDD) |
| Network Interface | RJ45 10/100M (UP LINK), 4x PoE RJ45 |
| Network Protocol | PPPoE, FTP, SMTP |
| Supported Systems | Android, iOS, Windows, MAC |
| Alarm Action | Email Photo, Local Alarm, App Notification |
| E-Cloud (P2P) | Yes |
| Backup Type | USB Flash Drives |
| Power Supply | 48V 3A |
| Item Weight | 3.14 pounds |
| Dimensions (L x W x H) | 25.6 cm x 24 cm x 4.4 cm (approx. 10.08 x 9.45 x 1.73 inches) |
8. Warranty and Support
Specific warranty details for the XENOCAM 4CH PoE NVR are typically provided at the point of purchase or within separate warranty documentation. Please refer to your purchase receipt or contact your retailer for warranty information.
For technical support, please refer to the contact information provided by your seller or visit the official XENOCAM website for support resources.