1. Product Overview
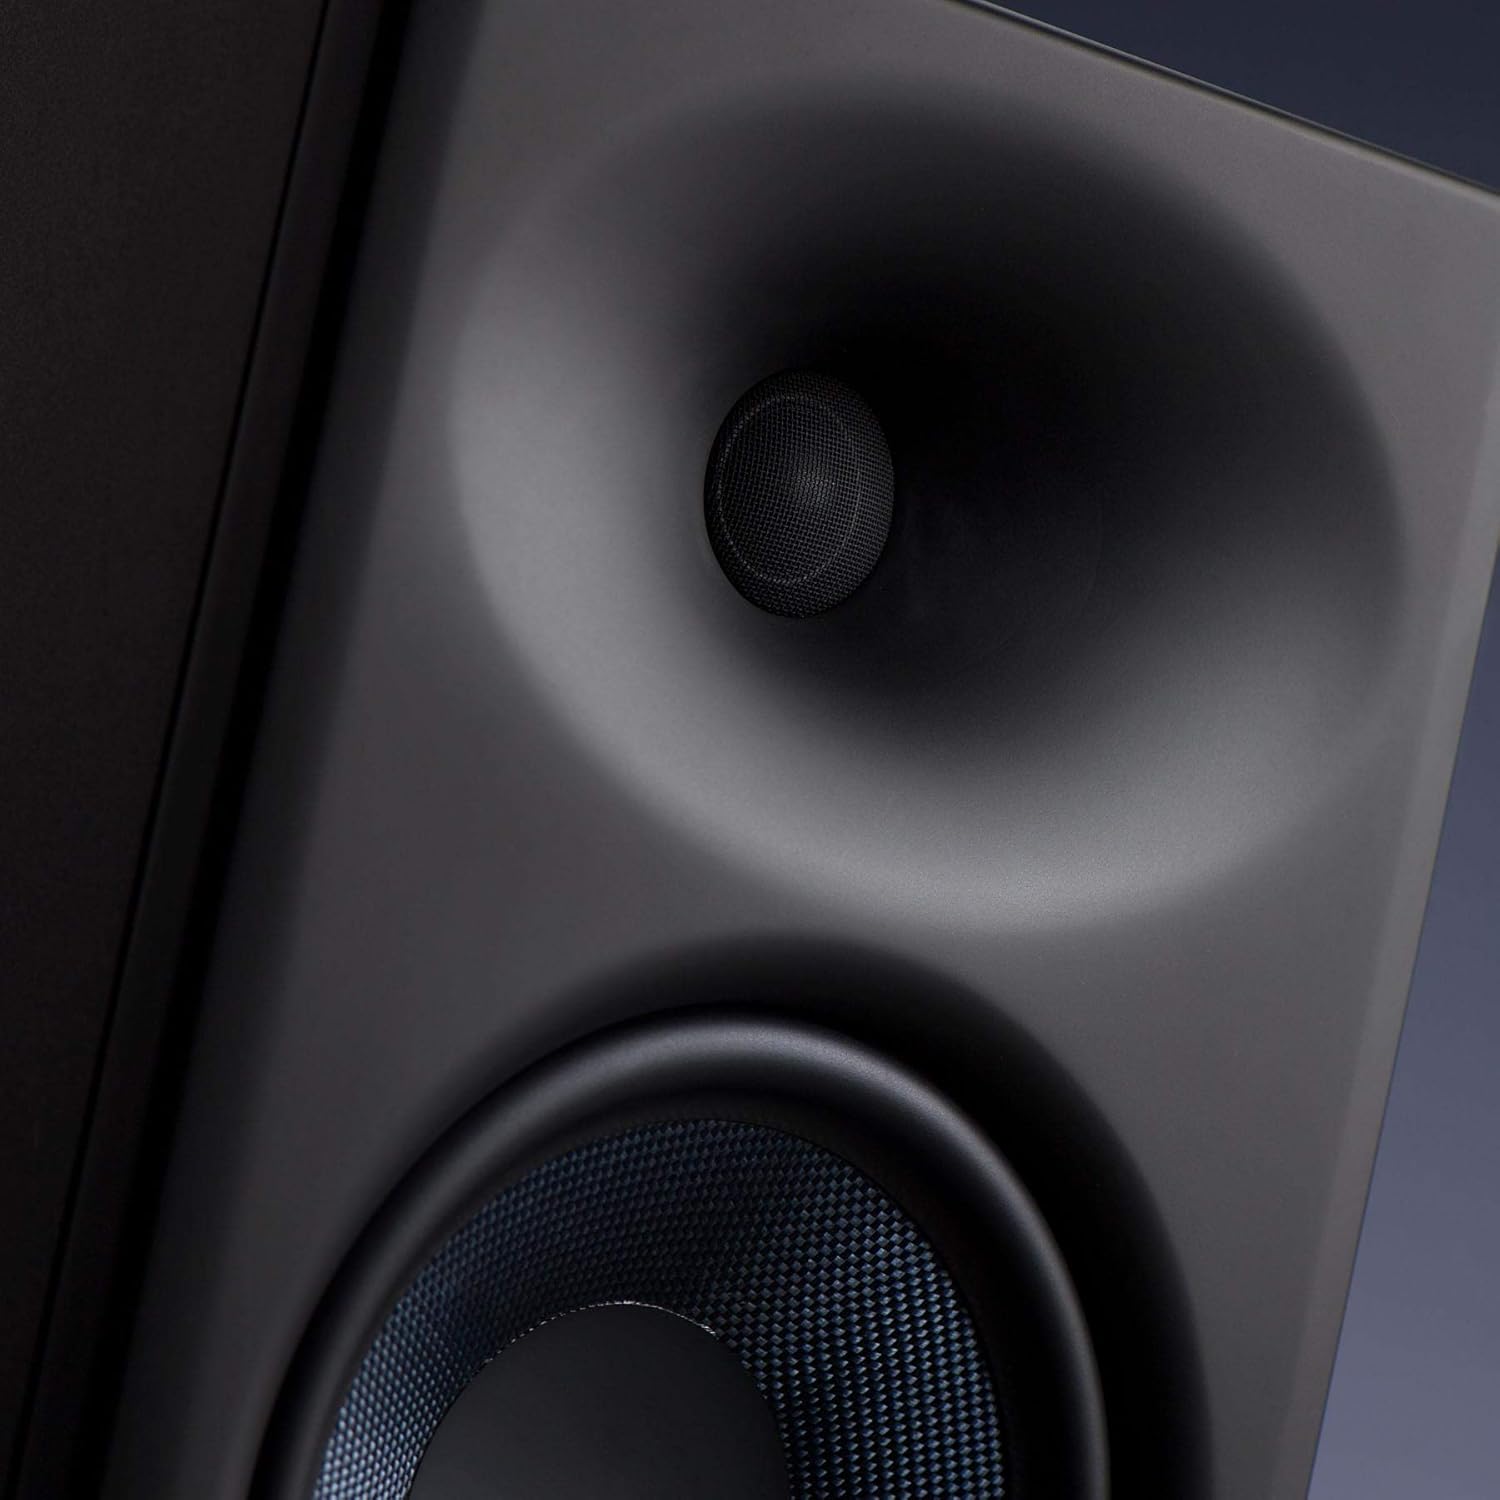
The PreSonus Eris E8 XT studio monitor is an advanced 2-way near field studio monitor designed for accurate audio reproduction in professional and home studio environments. It features a robust 8-inch woven composite low-frequency transducer for deep lows and a 1.25-inch silk-dome, high-frequency transducer for smooth highs. The monitor incorporates a Hugh Sarvis-designed EBM waveguide, which provides a wider and more controlled sweet spot, enhancing group listening and collaboration. Its larger, ported enclosure extends bass response without introducing muddiness. Acoustic tuning controls allow users to tailor the frequency response to their specific mix environment.
- 8-inch Woven Composite Low-Frequency Transducer: Delivers deep and clear bass frequencies.
- 1.25-inch Silk-Dome High-Frequency Transducer: Provides smooth and detailed high-frequency reproduction.
- EBM Waveguide: Innovative 100°(H)x60°(V) EBM waveguide horn ensures a wide sweet spot and minimized vertical reflections.
- Front-Ported Enclosure: State-of-the-art design for tight and extended bass response.
- Acoustic Tuning Controls: Includes Level, HPF (High-Pass Filter), LF Trim (Low-Frequency Trim), HF Trim (High-Frequency Trim), and Acoustic Space controls to optimize sound for any room.
- 140 Watt Class AB Bi-amplification: Delivers up to 105 dB SPL for powerful and clear sound.
- Versatile Connectivity: Balanced XLR, TRS (1/4-inch), and unbalanced RCA inputs for compatibility with various audio sources.
- Integrated Protection: Features protection against RF interference, extreme output current, over-temperature, external mains fuse, subsonic, and transient issues.
2. Safety Information
Please read and follow all safety instructions before operating your PreSonus Eris E8 XT studio monitor. Failure to do so may result in electric shock, fire, or other hazards. Keep this manual for future reference.
- Power Source: Connect the unit to a power supply of the type specified in the operating instructions or as marked on the appliance.
- Ventilation: Do not block any ventilation openings. Install in accordance with the manufacturer’s instructions.
- Water and Moisture: Do not use this apparatus near water or moisture.
- Heat: Do not install near any heat sources such as radiators, heat registers, stoves, or other apparatus (including amplifiers) that produce heat.
- Cleaning: Clean only with a dry cloth.
- Servicing: Refer all servicing to qualified service personnel. Servicing is required when the apparatus has been damaged in any way, such as power-supply cord or plug is damaged, liquid has been spilled or objects have fallen into the apparatus, the apparatus has been exposed to rain or moisture, does not operate normally, or has been dropped.
- Hearing Protection: This loudspeaker is capable of delivering sound pressure levels of more than 85 dB, which may cause permanent hearing damage. Use hearing protection when operating at high volumes.
3. Setup
3.1 Unboxing and Initial Inspection
Carefully remove the monitor from its packaging. Inspect the unit for any signs of damage that may have occurred during shipping. If any damage is found, contact your dealer immediately.
3.2 Placement
Proper placement of your studio monitors is crucial for accurate monitoring. Position the monitors to form an equilateral triangle with your listening position. The tweeters should be at ear level. Avoid placing monitors directly against walls or in corners, as this can exaggerate bass frequencies. Utilize the Acoustic Space controls on the rear panel to compensate for boundary effects.

3.3 Connections
The Eris E8 XT offers flexible input options. Ensure all audio connections are made before powering on the speakers.
- XLR Input: For balanced connections from professional audio interfaces or mixers.
- TRS (1/4-inch) Input: For balanced or unbalanced connections from audio interfaces, mixers, or other audio equipment.
- RCA Input: For unbalanced connections from consumer audio devices.

3.4 Power On/Off
After making all audio connections, plug the power cables into the power inputs on the back of the speakers. Then, flip the power switches to the 'On' position. The PreSonus logo on the front will illuminate.
4. Operating
4.1 Volume Adjustment
Adjust the overall output level of the monitor using the 'Level' knob on the rear panel. Start with a low volume and gradually increase it to your desired listening level.
4.2 Acoustic Tuning Controls
The Eris E8 XT features several acoustic tuning controls on the rear panel to help you optimize the monitor's response for your specific listening environment.
- High-Pass Filter (HPF): Cuts frequencies below a selected point (Flat, 80 Hz, or 100 Hz) to integrate with a subwoofer.
- Low-Frequency Trim (LF Trim): Adjusts frequencies below 1 kHz by -6 dB, -3 dB, or 0 dB to compensate for room acoustics.
- High-Frequency Trim (HF Trim): Adjusts frequencies above 10 kHz by -6 dB, -3 dB, or 0 dB to fine-tune the high-end response.
- Acoustic Space: Compensates for bass buildup that can occur when monitors are placed near walls or in corners. Options include 0 dB (flat), -2 dB (middle of room), and -4 dB (close to wall/corner).
5. Maintenance
To ensure the longevity and optimal performance of your PreSonus Eris E8 XT monitors, follow these maintenance guidelines:
- Cleaning: Use a soft, dry, lint-free cloth to clean the exterior of the monitors. Avoid using abrasive cleaners, waxes, or solvents.
- Dust: Regularly dust the speaker cones and ports to prevent accumulation that could affect sound quality.
- Environment: Keep the monitors in a clean, dry environment away from extreme temperatures, direct sunlight, and excessive humidity.
- Ventilation: Ensure adequate airflow around the rear panel to prevent overheating.
- Transportation: When moving the monitors, use original packaging or suitable protective materials to prevent damage.
6. Troubleshooting
If you encounter issues with your Eris E8 XT monitors, refer to the following common troubleshooting steps:
- No Sound:
- Check if the power cable is securely connected and the power switch is ON.
- Verify that the audio input cables are correctly connected to both the monitor and the audio source.
- Ensure the volume knob on the monitor and your audio source is turned up.
- Test with a different audio source or cable to rule out faulty equipment.
- Distorted Sound:
- Reduce the input level from your audio source or the monitor's volume knob to prevent clipping.
- Check for damaged audio cables.
- Ensure the acoustic tuning controls are not set to extreme values that might cause distortion in your room.
- Hum or Buzz:
- Ensure all audio cables are balanced (XLR or TRS) if possible, especially for longer runs.
- Try connecting the monitors to a different power outlet or a power conditioner.
- Move audio cables away from power cables or other electrical interference sources.
7. Specifications
| Feature | Value |
|---|---|
| Model Name | Eris E8 XT |
| Mounting Type | Floor Standing |
| Material | Composite, Plastic |
| Speaker Type | Multimedia |
| Recommended Uses For Product | Music |
| Compatible Devices | Desktop, Laptop |
| Woofer Diameter | 8 Inches |
| Tweeter Diameter | 1.25 Inches |
| Unit Count | 1.0 Count |
| Color | Black |
| Included Components | 1 Eris E8 XT Monitor |
| Product Dimensions | 11"D x 9"W x 8"H |
| Item Weight | 24.8 Pounds |
| Is Waterproof | FALSE |
| Number of Items | 1 |
| Control Method | Touch |
| Wireless Communication Technology | Radio Frequency |
| Speaker Maximum Output Power | 140 Watts |
| Frequency Response | 20 KHz (Note: This is likely the upper limit, actual range is wider) |
| Connectivity Technology | XLR, TRS, RCA |
| Audio Output Mode | Mono |
8. Warranty and Support
The PreSonus Eris E8 XT Studio Monitor comes with a Limited Warranty. For specific terms and conditions, please refer to the warranty card included with your product or visit the official PreSonus website.
For technical support, product registration, or service inquiries, please visit the PreSonus support page or contact their customer service directly. Keep your purchase receipt and serial number (located on the rear panel of the monitor) handy for any warranty claims.


