
IWISS IWD-20
IWISS IWD-20 Closed Barrel Crimper Instruction Manual
Model: IWD-20
1. Introduction
This manual provides detailed instructions for the safe and effective use of the IWISS IWD-20 Closed Barrel Crimper. This tool is specifically designed for crimping 20 and 22 gauge Deutsch solid contacts, as well as Amphenol closed barrel terminals. Please read this manual thoroughly before operating the tool to ensure proper function and to prevent injury or damage.

Image 1.1: The IWISS IWD-20 Closed Barrel Crimper, featuring orange and grey ergonomic handles and a black crimping head.
2. Safety Information
- Always wear appropriate personal protective equipment, such as safety glasses, when using this tool.
- Keep hands and fingers clear of the crimping jaws during operation.
- Do not use the tool for purposes other than its intended use (crimping specified electrical terminals).
- Inspect the tool for any damage before each use. Do not use if damaged.
- Keep the tool clean and dry to ensure optimal performance and longevity.
3. Product Features
- Crimper Type: 4-indent, 8-impression ratchet crimper.
- Adjustable Crimping Force: Allows for precise crimping based on terminal hardness and thickness.
- High Precision: Ensures consistent and equal force for each crimp, critical for reliable connections.
- Terminal Compatibility: Designed for 20 & 22 gauge closed barrel terminals from Deutsch and Amphenol.
- Ergonomic Grips: Made of TPR material to reduce hand fatigue during prolonged use.
- Built-in Locator: Adjustable for height to ensure proper alignment and consistent crimps.
- Durable Construction: Core shafts are made from high-quality material for enhanced durability, corrosion, and rust resistance.

Image 3.1: A detailed view of the IWISS IWD-20 crimper, highlighting the built-in locator for height adjustment, the high tenacity spring for durability, and the ergonomic grips designed for comfort.
4. Operating Instructions
4.1. Adjusting Crimping Force
The IWISS IWD-20 features a 7-mode adjustable gear to control the crimping force. This allows for adaptation to different hardness and thickness of pins, ensuring an optimal crimp.
- Locate the numbered dial on the side of the crimper head.
- Push the gear to select the desired crimping force setting (1-7). A higher number typically indicates a stronger crimp.
- Perform a test crimp on a scrap terminal and wire to verify the setting is appropriate for your application. Adjust as needed.
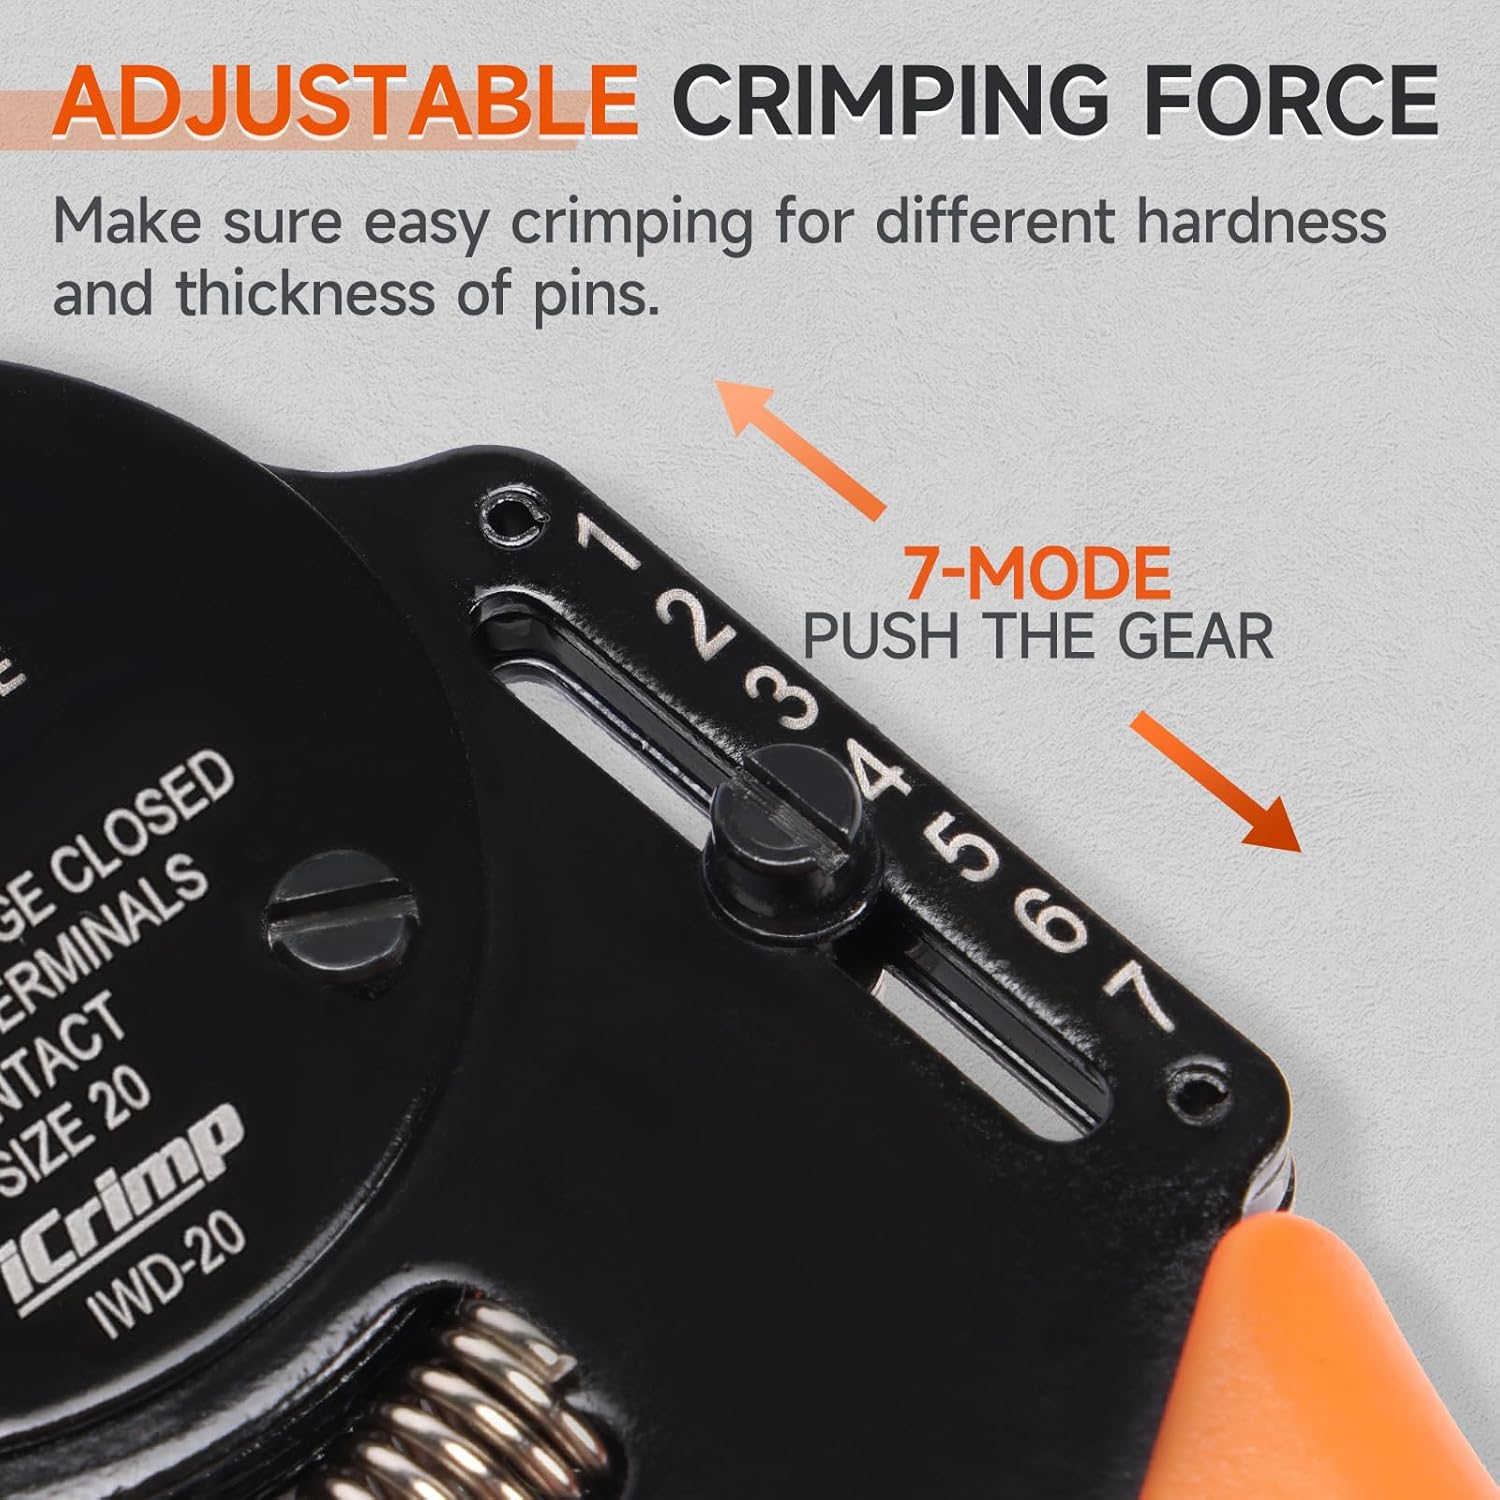
Image 4.1: Close-up of the 7-mode gear on the crimper, used to adjust the crimping force for various terminal types.
4.2. Crimping Process
Follow these steps for a secure and reliable crimp:
- Prepare the Crimper: Squeeze the handles together until the crimper automatically and fully opens.
- Insert Terminal: Insert the Deutsch or Amphenol closed barrel terminal into the appropriate cavity of the crimper. Ensure the barrel end of the terminal is facing out.
- Prepare Wire: Strip the insulation from the wire to the proper length, exposing the conductor. The stripped length should match the barrel length of the terminal.
- Insert Wire: Insert the stripped wire into the barrel end of the terminal.
- Complete Crimp: Squeeze the handles together firmly until the crimper automatically opens again. This indicates a complete crimp cycle.
- Inspect Crimp: Remove the crimped terminal and inspect it for proper formation and wire retention. The wire should be securely held, and the crimp should appear uniform.

Image 4.2: A four-panel illustration demonstrating the crimping process: 1. Squeeze handles to open. 2. Insert terminal. 3. Insert stripped wire. 4. Squeeze handles until crimper automatically opens.
5. Maintenance
- After each use, wipe the crimper jaws and body with a clean, dry cloth to remove any debris or residue.
- Periodically apply a light coat of machine oil to the pivot points and moving parts to ensure smooth operation and prevent rust.
- Store the crimper in a dry environment to prevent corrosion.
- Do not attempt to disassemble the tool beyond routine cleaning and lubrication.
6. Troubleshooting
- Poor Crimp Quality: If crimps are loose or deformed, verify that the correct terminal size (20 or 22 gauge) is being used. Adjust the crimping force setting (refer to Section 4.1) to a higher number if the crimp is too loose, or a lower number if the terminal is being crushed. Ensure the wire is stripped to the correct length and fully inserted into the terminal barrel.
- Wire Slipping Out: This often indicates an insufficient crimping force or incorrect wire stripping. Re-evaluate the crimping force setting and ensure the wire is fully inserted before crimping.
- Crimper Jaws Sticking: Clean the jaws thoroughly and apply a small amount of lubricant to the pivot points. Ensure no debris is lodged within the mechanism.
- Difficulty Inserting Terminals: Ensure the crimper is fully open before attempting to insert a terminal. Check for any obstructions in the crimping cavity.
7. Specifications
| Specification | Detail |
|---|---|
| Model Number | IWD-20 |
| Crimper Type | 4-indent, 8-impression ratchet crimper |
| Compatible Wire Gauge | 20 & 22 AWG |
| Compatible Terminals | Deutsch and Amphenol closed barrel terminals |
| Material | Carbon Steel (tool body), TPR (grips) |
| Item Weight | 10.2 ounces (0.64 lb) |
| Package Dimensions | 6.69 x 2.99 x 1.22 inches |
8. Applications
The IWISS IWD-20 Closed Barrel Crimper is suitable for creating reliable electrical connections in various demanding environments. Its precision and durability make it ideal for:
- Motorcycles
- Trucks
- Construction Equipment
- Race Cars
- Agricultural Equipment
- Heavy-Duty Vehicles
- Other equipment subject to excessive vibration

Image 8.1: A collage showing various applications for the crimper, including automotive, industrial, and marine settings, emphasizing its versatility.
Ask a question about this manual
Ask about setup, troubleshooting, compatibility, parts, safety, or missing instructions. Manuals+ will review the question and use this page’s manual context to help answer it.