
1. Introduction
The Phanteks Eclipse P400A Digital ATX Mid-Tower is designed to provide optimal cooling performance and aesthetic appeal for your PC build. It features a full metal mesh front panel for superior airflow and a tempered glass side panel to showcase your internal components. This manual provides essential information for setting up, operating, maintaining, and troubleshooting your Phanteks Eclipse P400A chassis.
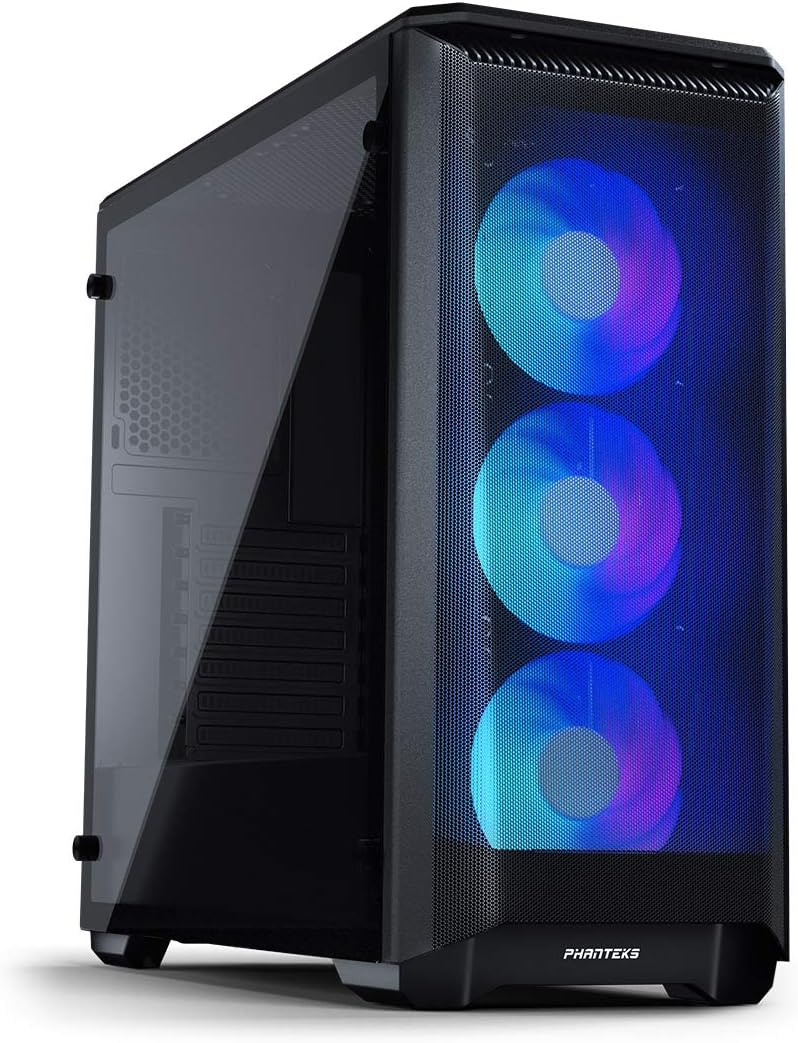
Image: The Phanteks Eclipse P400A Digital ATX Mid-Tower showcasing its illuminated Digital-RGB fans through the mesh front panel and the tempered glass side panel.
2. Key Features
- Optimal Cooling Performance: Features an Ultra-fine Performance Mesh front panel for maximum airflow.
- Tempered Glass Side Panel: Provides a clear view of your internal PC components.
- Integrated Digital-RGB Controller: Includes 3x pre-installed Digital-RGB fans with customizable lighting effects, controllable via a dedicated button or compatible motherboard software.
- Spacious Interior: Supports ATX, micro-ATX, mini-ITX, and E-ATX motherboards (up to 272mm wide).
- Extensive Storage Options: Accommodates up to 6x HDDs (2 trays included) and 8x SSDs (2 dedicated brackets included).
- Flexible Radiator Support: Front (up to 360mm/280mm), Top (up to 240mm), Rear (120mm).
- Convenient I/O: Features 2x USB 3.0 ports, Mic, Headphone jacks, Power button, Reset button, and D-RGB control.
3. Setup Guide
3.1. Unpacking and Initial Inspection
Carefully remove the chassis from its packaging. Inspect the case for any signs of damage during transit. Ensure all accessories, including screws, zip ties, and the user manual, are present. The tempered glass side panel is secured with thumbscrews; handle it with care.

Image: An exploded view of the Phanteks Eclipse P400A Digital ATX Mid-Tower, illustrating the removable front mesh panel, top magnetic dust filter, tempered glass side panel, and internal structure.
3.2. Component Installation
Before installing components, lay the chassis on its side on a stable, non-abrasive surface. Remove the tempered glass side panel by unscrewing the four thumbscrews.
- Motherboard: Install the I/O shield into the rear opening. Align your ATX, micro-ATX, mini-ITX, or E-ATX motherboard with the standoffs and secure it with screws.
- Power Supply (PSU): The PSU mounts at the bottom rear of the case. Slide your PSU into the dedicated compartment and secure it with screws from the rear.
- Storage Drives: Utilize the included HDD trays for 3.5-inch drives and dedicated SSD brackets for 2.5-inch drives. Mount them in their respective locations within the chassis.
- Graphics Card (GPU): Install your graphics card into the appropriate PCIe slot on your motherboard. The case supports GPUs up to 420mm in length.
- CPU Cooler: Ensure your CPU cooler height does not exceed 160mm.

Image: The spacious interior of the Phanteks Eclipse P400A Digital ATX Mid-Tower, highlighting the motherboard tray, pre-installed front fans, and ample space for component installation.
3.3. Cable Management
The P400A offers 25mm of cable management space behind the motherboard tray. Utilize the integrated Velcro straps and tie-down points to route and secure cables neatly. This improves airflow and maintains a clean aesthetic visible through the tempered glass panel.
3.4. Connecting Peripherals
Connect your monitor, keyboard, mouse, and other peripherals to the appropriate ports on your motherboard's I/O shield and the case's front I/O panel.

Image: A close-up view of the top-front I/O panel of the Phanteks Eclipse P400A Digital ATX Mid-Tower, featuring USB 3.0 ports, audio jacks, power button, and RGB control buttons.
4. Operating Instructions
4.1. Power On/Off
Press the power button located on the top-front I/O panel to turn your system on or off. A short press will typically power on, while a longer press (usually 4-5 seconds) will force a shutdown.
4.2. Digital-RGB Control
The Phanteks Eclipse P400A Digital comes with an integrated Digital-RGB controller. Use the dedicated buttons on the top I/O panel to cycle through various lighting modes and colors for the pre-installed fans. For advanced customization and synchronization with other D-RGB products or your motherboard, connect the D-RGB cable to a compatible 3-pin 5V addressable RGB header on your motherboard and use the motherboard's software (e.g., ASUS Aura Sync, MSI Mystic Light Sync, Gigabyte RGB Fusion).
5. Maintenance
5.1. Cleaning
Regular cleaning helps maintain optimal airflow and extends the lifespan of your components. Use a soft, dry cloth to wipe down exterior surfaces. For the tempered glass panel, a glass cleaner can be used, applied to the cloth first, not directly to the glass.
5.2. Dust Filters
The P400A features removable dust filters on the front mesh panel, top, and bottom (for the PSU intake). Periodically remove and clean these filters by rinsing them with water and allowing them to dry completely before reinstallation. This prevents dust buildup inside the chassis.
6. Troubleshooting
- System Not Powering On:
- Ensure the PSU is properly connected to the wall outlet and the power switch on the PSU is in the 'On' position.
- Verify that the front panel power switch cable is correctly connected to the motherboard's F_PANEL header.
- Check all internal power connections (24-pin ATX, 8-pin CPU, PCIe for GPU).
- Fans Not Spinning/RGB Not Lighting Up:
- Confirm that the fan power cables are securely connected to the motherboard fan headers or a fan controller.
- Ensure the Digital-RGB cables are properly connected to the integrated controller or the motherboard's 3-pin 5V D-RGB header.
- If using motherboard software for RGB, ensure the software is installed and configured correctly.
- Poor Airflow/High Temperatures:
- Clean all dust filters and ensure they are not obstructed.
- Verify that all case fans are spinning in the correct direction (intake/exhaust).
- Improve cable management to reduce airflow obstruction.
7. Technical Specifications
| Feature | Detail |
|---|---|
| Model Name | Eclipse P400A Digital |
| Model Number | PH-EC400ATG_DBK01 |
| Case Type | Mid-Tower |
| Dimensions (L x W x H) | 46.99 x 21.08 x 46.48 cm (18.5 x 8.3 x 18.3 inches) |
| Weight | 8.48 kg (18.7 lbs) |
| Motherboard Support | ATX, Micro-ATX, Mini-ITX, E-ATX (up to 272mm wide) |
| GPU Clearance | 420 mm (16.7 inches) |
| CPU Cooler Height | 160 mm (6.3 inches) |
| PSU Clearance | 270 mm (10.7 inches) |
| Cable Management Space | 25 mm (1.0 inch) |
| Storage Bays | 6x 3.5" HDD (2 included), 8x 2.5" SSD (2 included) |
| Pre-installed Fans | 3x 120mm Digital-RGB Fans (Front) |
| Radiator Support (Front) | Up to 360mm / 280mm |
| Radiator Support (Top) | Up to 240mm |
| Radiator Support (Rear) | 120mm |
| Front I/O Ports | 2x USB 3.0, Mic, Headphone, Power Button, Reset Button, D-RGB Control |
| Material | Steel Chassis, Tempered Glass Side Panel, Mesh Front Panel |

Image: Diagram illustrating the key dimensions of the Phanteks Eclipse P400A Digital ATX Mid-Tower chassis.
8. Warranty and Support
Information regarding the product warranty and specific support contacts is not available in the provided data. Please refer to the official Phanteks website or the documentation included with your purchase for detailed warranty terms and customer support options.


