1. Introduction
Thank you for choosing the CORBERO CCVEST11NOXGN Water Heater. This manual provides essential information for the safe and efficient installation, operation, and maintenance of your new appliance. Please read this manual thoroughly before installation and use, and retain it for future reference. Proper installation and adherence to these instructions will ensure optimal performance and longevity of the product.
2. Safety Information
Important Safety Instructions: Always follow basic safety precautions when using electrical appliances to reduce the risk of fire, electric shock, and personal injury.
- Read all instructions before using this water heater.
- Installation must be performed by a qualified technician in accordance with local codes and regulations.
- Do not operate the water heater if it has a damaged cord or plug, if it is not working properly, or if it has been dropped or damaged.
- Ensure the power supply matches the voltage specified on the appliance's rating label.
- Do not block any ventilation openings.
- Turn off the power supply to the unit before performing any maintenance or cleaning.
- Keep flammable materials away from the water heater.
- This appliance is not intended for use by persons (including children) with reduced physical, sensory, or mental capabilities, or lack of experience and knowledge, unless they have been given supervision or instruction concerning use of the appliance by a person responsible for their safety.
3. Product Overview
The CORBERO CCVEST11NOXGN is a compact and efficient water heater designed for reliable hot water supply. It features a modern design with an intuitive digital display for easy temperature control and monitoring.
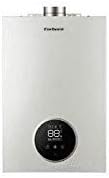
Figure 1: Front view of the CORBERO CCVEST11NOXGN Water Heater. This image shows the appliance's sleek white casing and the circular digital display located at the bottom center, which typically indicates the water temperature.
Key Components:
- Digital Display: Shows current temperature and operational status.
- Control Buttons: For adjusting settings (usually located near the display).
- Water Inlet/Outlet: Connections for cold water input and hot water output.
- Flue Gas Outlet: For venting combustion byproducts (if applicable to gas models).
- Mounting Brackets: For secure wall installation.
4. Setup and Installation
Professional Installation Required: Installation of this water heater must be carried out by a certified professional to ensure safety and compliance with all local regulations.
Installation Steps (for qualified technicians):
- Site Selection: Choose a suitable location that is well-ventilated, protected from freezing temperatures, and has adequate space for maintenance. Ensure the wall can support the weight of the unit when full.
- Mounting: Securely mount the water heater to the wall using the provided brackets and appropriate fasteners. Ensure the unit is level.
- Water Connections: Connect the cold water inlet and hot water outlet pipes. Use appropriate sealing materials to prevent leaks. Install a pressure relief valve if required by local codes.
- Gas Connection (if applicable): Connect the gas supply line to the unit. Perform a leak test on all gas connections.
- Flue System (if applicable): Install the flue pipe according to manufacturer instructions and local codes to ensure proper ventilation of combustion gases.
- Electrical Connection: Connect the unit to a dedicated electrical circuit as specified in the technical data. Ensure proper grounding.
- Filling the System: Slowly open the cold water supply valve to fill the water heater. Open a hot water tap in the house to allow air to escape until water flows steadily. Check for leaks.
- Initial Startup: Once filled and all connections are secure, turn on the gas and electrical supply. Follow the initial startup procedure outlined in the operating instructions.
5. Operating Instructions
Once the CORBERO CCVEST11NOXGN Water Heater is professionally installed and filled with water, follow these steps for operation:
- Power On: Ensure the main power switch to the water heater is in the 'ON' position. The digital display should illuminate.
- Set Temperature: Use the '+' and '-' buttons (or similar controls) near the digital display to set your desired hot water temperature. The display will show the set temperature.
- Heating Cycle: The water heater will automatically begin heating the water to the set temperature. The display may show the current water temperature or an indicator that it is heating.
- Hot Water Delivery: Once the desired temperature is reached, the unit will maintain it. Hot water will be available at your taps.
- Shutting Down: To turn off the water heater, switch the main power switch to the 'OFF' position. For extended periods of non-use, it is recommended to also turn off the water and gas supply.
- Error Codes: If an error code appears on the display, refer to the Troubleshooting section of this manual.
6. Maintenance
Regular maintenance ensures the efficient and safe operation of your CORBERO CCVEST11NOXGN Water Heater. It is recommended to have the unit inspected annually by a qualified technician.
User Maintenance Tasks:
- Exterior Cleaning: Wipe the exterior casing with a soft, damp cloth. Do not use abrasive cleaners or solvents. Ensure the unit is powered off before cleaning.
- Ventilation Check: Periodically check that the ventilation openings are not obstructed.
- Leak Inspection: Regularly inspect all water and gas connections for any signs of leaks. Address any leaks immediately.
Professional Maintenance (Annual):
- Flue System Inspection: Check for blockages or damage in the flue system.
- Burner Cleaning (if applicable): Clean the burner and combustion chamber to ensure efficient operation.
- Water Quality Check: Inspect for scale buildup and flush the system if necessary.
- Safety Device Check: Test the pressure relief valve and other safety devices.
7. Troubleshooting
This section provides solutions to common issues you might encounter with your CORBERO CCVEST11NOXGN Water Heater. For problems not listed here or if issues persist, contact a qualified service technician.
| Problem | Possible Cause | Solution |
|---|---|---|
| No hot water | No power supply; Gas supply off; Thermostat set too low; Pilot light out (if applicable) | Check power/gas supply; Adjust thermostat; Relight pilot light (refer to specific instructions for your model). |
| Water not hot enough | Thermostat set too low; Excessive hot water demand; Scale buildup | Increase thermostat setting; Reduce hot water usage; Contact technician for descaling. |
| Water leaks | Loose connections; Faulty pressure relief valve; Tank corrosion | Tighten connections; Replace pressure relief valve; Contact technician for tank inspection. |
| Strange noises | Sediment buildup; Loose components | Flush the tank (professional recommended); Contact technician to inspect components. |
| Error code on display | Specific internal fault | Consult the specific error code list (if provided with the unit) or contact a qualified technician, providing the error code. |
8. Specifications
The following table outlines the technical specifications for the CORBERO CCVEST11NOXGN Water Heater. These details are subject to change without notice.
| Feature | Detail |
|---|---|
| Brand | Corbero |
| Model | CCVEST11NOXGN |
| Product Dimensions | 20 x 20 x 20 cm (approximate package dimensions) |
| Product Weight | 1 kg (approximate package weight) |
| Manufacturer | CORBERO |
| Power Source | Not specified (typically gas or electric, refer to product label) |
| Capacity | Not specified (refer to product label) |
| Energy Efficiency | Not specified (refer to product label) |
9. Warranty and Support
Your CORBERO CCVEST11NOXGN Water Heater comes with a manufacturer's warranty. Please refer to the warranty card included with your product for specific terms, conditions, and duration. Keep your proof of purchase for warranty claims.
Customer Support:
For technical assistance, service requests, or to inquire about replacement parts, please contact CORBERO customer support. Contact details can typically be found on the manufacturer's official website or on the product packaging.
- Online Support: Visit the official Corbero website for FAQs and support resources.
- Service Center: Locate an authorized service center in your area for professional repairs.


