
1. Introduction
This manual provides essential information for the safe and effective operation, maintenance, and troubleshooting of your Skil AG2902-10 20V 4-1/2 Inch Angle Grinder. Please read all instructions carefully before using the tool to ensure proper function and to prevent injury.
The Skil AG2902-10 is a cordless angle grinder designed for various tasks including cutting, grinding, sanding, polishing, and sharpening. It features a 20V PWRCore 20 Lithium Battery system for portable operation.
2. Safety Information
Always follow basic safety precautions to reduce the risk of fire, electric shock, and personal injury. Keep this manual for future reference.
General Safety Rules:
- Work Area Safety: Keep the work area clean and well-lit. Cluttered or dark areas invite accidents. Do not operate power tools in explosive atmospheres, such as in the presence of flammable liquids, gases, or dust.
- Electrical Safety: Avoid body contact with earthed or grounded surfaces. Do not expose power tools to rain or wet conditions.
- Personal Safety: Always wear eye protection, hearing protection, and a dust mask when operating the grinder. Dress properly; avoid loose clothing or jewelry. Secure long hair.
- Tool Use and Care: Do not force the power tool. Use the correct power tool for your application. Disconnect the battery pack from the power tool before making any adjustments, changing accessories, or storing power tools.
- Battery Tool Use and Care: Recharge only with the charger specified by the manufacturer. Use power tools only with specifically designated battery packs.
- Service: Have your power tool serviced by a qualified repair person using only identical replacement parts.
Specific Angle Grinder Safety Warnings:
- This power tool is intended to function as a grinder, sander, wire brush, or cut-off tool. Read all safety warnings, instructions, illustrations, and specifications provided with this power tool.
- Do not use accessories that are not specifically designed and recommended by the tool manufacturer.
- Always ensure the guard is properly attached and adjusted for maximum safety during operation.
- Hold the tool firmly with both hands. A loss of control can result in personal injury.
- Keep hands clear of rotating accessories.
3. Package Contents
Verify that all items listed below are included in your package. If any parts are missing or damaged, contact Skil customer service.
- Skil 20V 4-1/2 Inch Angle Grinder
- 2.0Ah PWRCore 20 Lithium Battery
- 20V Charger
- Grinding Disc
- Grinding Guard
- Wrench
- Wrench Storage Handle

Image 1: Skil 20V Angle Grinder, Battery, and Charger.
4. Product Features
The Skil AG2902-10 Angle Grinder is equipped with several features designed for performance and user convenience:
- Powerful Motor: Delivers speeds of up to 8500 RPM for efficient material removal.
- Cordless Design: Powered by a 20V PWRCore 20 Lithium Battery for portability.
- Dual Function Lock-On Switch: Prevents accidental startup and allows for continuous operation without holding the trigger.
- Soft Start: Provides a gradual increase in speed upon startup for enhanced control.
- Spindle Lock: Facilitates quick and easy wheel changes.
- 3-Position Side Handle: Offers versatility and control for various applications.
- Tool-Free Guard Adjustment: Allows for quick and easy adjustment of the grinding guard.
- Onboard Wrench Storage: The wrench is conveniently stored within the side handle.
- Metal Gear Box: Provides durability and extended tool life.
- PWRCore 20 Lithium Battery: Features patented temperature management for longer run time and battery life.

Image 2: Side view of the Skil Angle Grinder.

Image 3: Close-up of the grinder head, showing the guard and spindle lock button.
5. Setup
5.1 Charging the Battery
- Connect the 20V Charger to a standard power outlet.
- Slide the 2.0Ah PWRCore 20 Lithium Battery onto the charger until it clicks into place.
- The charge status indicator light on the charger will indicate the charging process. A 2.0Ah battery typically charges in approximately 50 minutes.
- Once fully charged, remove the battery from the charger.
5.2 Attaching the Side Handle
The side handle can be attached in three different positions for optimal control and comfort.
- Identify the threaded holes on the grinder's gear housing.
- Screw the side handle into the desired position until it is securely tightened.

Image 4: Angle Grinder with side handle attached.

Image 5: Angle Grinder with side handle in an alternative position.
5.3 Adjusting the Guard
The grinding guard can be adjusted without tools to suit the application and provide maximum protection.
- Locate the guard adjustment lever or button.
- Press the lever/button to release the guard.
- Rotate the guard to the desired position.
- Release the lever/button to lock the guard in place. Ensure it is securely fastened before operation.
5.4 Installing/Changing Grinding Wheels
Always ensure the battery is removed from the grinder before changing accessories.
- Press and hold the spindle lock button located on the gear housing.
- Using the provided wrench (stored in the side handle), loosen and remove the outer flange nut by turning it counter-clockwise.
- Remove the old grinding wheel (if applicable).
- Place the new grinding wheel onto the inner flange, ensuring it is centered.
- Re-attach the outer flange nut and tighten it clockwise with the wrench while holding the spindle lock button. Do not overtighten.
- Release the spindle lock button.

Image 6: Wrench stored within the side handle.
6. Operating Instructions
6.1 Inserting the Battery
Slide the charged battery pack into the base of the grinder until it clicks securely into place.
6.2 Starting and Stopping the Grinder
- To Start: Push the lock-on switch forward to the "ON" position. The grinder will begin with a soft start, gradually reaching full speed.
- To Stop: Push the lock-on switch backward to the "OFF" position.
6.3 General Operation Guidelines
- Always hold the grinder firmly with both hands during operation.
- Allow the wheel to reach full speed before contacting the workpiece.
- Apply moderate pressure. Excessive pressure can reduce speed, cause overheating, and shorten tool life.
- Maintain a stable stance and keep bystanders clear of the work area.
- Be aware of sparks and debris generated during grinding or cutting.
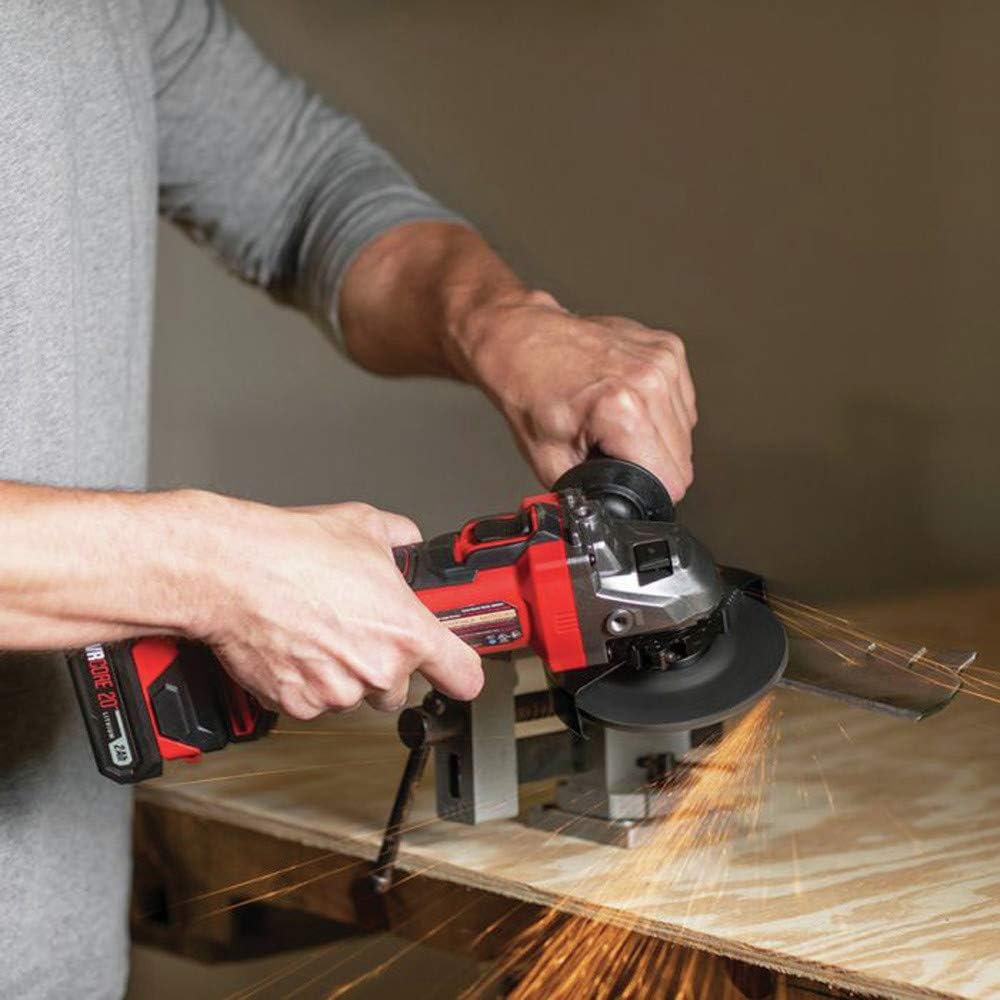
Image 7: User operating the angle grinder to cut metal.
7. Maintenance
7.1 Cleaning
- Regularly clean the ventilation openings on the grinder to prevent overheating. Use compressed air if available.
- Wipe the tool with a clean, damp cloth. Do not use harsh chemicals or abrasive cleaners.
- Keep the battery contacts clean.
7.2 Storage
- Store the grinder, battery, and charger in a cool, dry place, away from direct sunlight and moisture.
- Ensure the battery is partially charged (not fully depleted or fully charged for long-term storage) before storing.
- Keep out of reach of children.
8. Troubleshooting
| Problem | Possible Cause | Solution |
|---|---|---|
| Grinder does not start. | Battery not inserted correctly or discharged. | Ensure battery is fully seated. Charge the battery. |
| Grinder stops during operation. | Overload protection activated or battery depleted. | Reduce pressure on the tool. Replace with a charged battery. Allow tool to cool if overheated. |
| Reduced power or performance. | Battery low or accessory worn. | Charge or replace battery. Replace grinding wheel/accessory. |
| Excessive vibration. | Improperly installed wheel or damaged accessory. | Re-install wheel correctly. Replace damaged accessory. |
9. Specifications
| Feature | Detail |
|---|---|
| Model Number | AG2902-10 |
| Brand | Skil |
| Voltage | 20 Volts |
| Maximum Rotational Speed | 8500 RPM |
| Wheel Diameter | 4-1/2 Inches |
| Power Source | Battery Powered (Lithium Ion) |
| Product Dimensions | 11.18 x 3.03 x 3.94 inches |
| Item Weight | Approximately 0.01 ounces (tool only, without battery/accessories) |
| Included Components | Angle Grinder, Grinding Disc, Grinding Guard, Wrench, Wrench Storage Handle |
10. Warranty and Support
Warranty Information:
The Skil AG2902-10 Angle Grinder comes with a 5-year limited warranty. This warranty covers defects in material and workmanship under normal use. Please retain your proof of purchase for warranty claims.
For detailed warranty terms and conditions, please refer to the warranty card included with your product or visit the official Skil website.
Customer Support:
If you have any questions, require technical assistance, or need to make a warranty claim, please contact Skil customer support. Contact information can typically be found on the Skil website or on the product packaging.
For more information, you may visit the Skil Store on Amazon.


